Decor

DIY Kitchen Remodel Cost

A little over two years ago, Steve and I remodeled our kitchen. I am often asked to share our DIY kitchen remodel cost, so today I’m breaking it all down.

DIY Kitchen Remodel Cost

We hated the kitchen layout from the day we moved in. The space was closed in, you couldn’t see the living room from the kitchen, and the appliances were outdated and poorly placed.

Knowing how expensive and time consuming a kitchen remodel would be, I painted the cabinets and changed out the hardware which bought us several years of being okay with the space. You can see why I painted the cabinets TWICE here.

I have attended Haven Conference for several years, and in 2017 I won a competition with The Home Depot. I had the amazing opportunity to partner with them on the remodel. Although I priced them out for you, we did not have to pay for the appliances or the countertops thanks to The Home Depot.

In complete transparency, I also partnered with Custom Service Hardware on the Cabinets, Hickory Hardware on the hardware, Delta Faucet on the faucet and pot filler, and Blanco on the sink. Keep in mind this blog is my full time job which is why I am able to partner with companies. So for us, the cost of the kitchen included all the things that snowball after a remodel – we had to hire a drywaller for our shortened wall and to patch the ceilings where the wall once extended. We also had to paint the ceilings throughout the entire first floor. Because we changed the layout of the kitchen, we had to patch the floors and ended up refinishing/staining the entire first floor as well.

DIY Kitchen Remodel Cost

Cost of Labor: $0

Cost of Supplies: $11,465

  • Quartz Countertops: $4685
  • RTA Cabinets: $4560
  • Farmhouse Sink: $720
  • Kitchen Faucet: $375
  • Pot Filler: $450
  • Cabinet Hardware: $425
  • Miscellaneous Plumbing and Electric Supplies: $250
  • TOTAL: $11,215

Cost of Appliances: $5,200

  • Oven: $2200
  • Refrigerator: $2000
  • Dishwasher: $800
  • Microwave: $200
  • TOTAL: $5,200

Total Cost of Kitchen Remodel: $16,465

Now, as I mentioned before, we had a snowball effect. Because of our remodel we had to patch and paint the ceilings throughout the entire first floor. We also had to patch parts of the kitchen flooring and as a result refinish all the wood floors on the first floor. Keep in mind that with any remodel, additional costs like these will come up.

Cost of Flooring: $4,200

Since we changed the layout of the kitchen, we had some areas that needed patched, and while we were at it wanted to refinish the floors and have them stained a different color. This cost actually included our kitchen, kitchen nook, family room and dining room.

Drywall and ceilings: $3,900

We opened up a wall in our kitchen and took out a little coat closet. As a result, we needed some drywall work and the ceilings needed patched as well. We ended up repainting the ceilings in the kitchen, kitchen nook, living room, library and dining room.

Total Cost of Kitchen Remodel (including our unique additional costs): $24,515

I was curious what the average kitchen remodel costs, and I obviously found there is a huge range of costs. However, I feel pretty good about our kitchen knowing that the average upscale kitchen remodel (although I would consider ours in the mid-level range) is over $80,000!

DIY Kitchen Remodel Cost

Obviously the fact that we did most of the work ourselves helped save a lot of money. We recruited friends for the demo and throughout the kitchen remodel.

As I mentioned earlier, we brought in professionals for the projects that were beyond our expertise.

For nine weeks, we spent every spare moment and lost lots of sleep working on the kitchen. However, two years later, we still love our kitchen and feel and extra since of pride knowing we created so much of it!

DIY Kitchen Remodel Cost

Want to get my kitchen look? GO HERE!

Are you new to my blog? Go HERE to see my home tour and HERE to shop for items I use in our home.

Find me on Facebook | Instagram | Twitter Pinterest

DIY

Best DIY Projects

I often wonder why I didn’t become a food or fashion blogger because the amount of time one DIY post takes is SO long (however, I’ll be the first to admit you don’t want any of my recipes or fashion advice)!  I am in the middle of two fairly large DIY projects, and it will be awhile before I can post anything about either.  So in the mean time, I thought it would be fun to share what I consider my best (and more recent) DIY projects!  

  • DIY PANELED WALL TREATMENT

Best DIY Project - Elegant wall treatment

This project was a result of wanting to give my family room an entirely new look. The DIY paneled wall treatment makes such an elegant statement. I do not claim to be a woodworker, but I am pleased with the result and spent around $300. Go HERE for the full tutorial!  

  • DIY BOARD AND BATTEN TUTORIAL

DIY Project - Board & Batten

My boys’ room recently had a major makeover, and you can see all the furniture details by going here.  I wanted to add a statement wall in the space, so I created this board and batten wall.  It was built solo one afternoon, and (since I had everything other than the MDF board) this project cost me less than $100!  The full tutorial is here.  

  • DIY KITCHEN REMODEL

Best DIY Project - kitchen remodel

My husband and I tore out our old kitchen and completely remodeled the space in 9 weeks.  Read all about that DIY journey here!  It was definitely my craziest and biggest DIY to date.  I am so proud of what we accomplished, but I don’t think we will attempt a project of this size and scale anytime soon…  

  • DIY PAINTED TILE FLOOR

Best DIY Project - Painted Tile Floor

Our laundry room also serves as my crafting/DIY room, so it sees a lot of wear and tear (and lots and lots of paint).  There was already paint everywhere, so adding a little more paint wouldn’t be a big deal.  Here is the full tutorial on painting tile floors.  

  • DIY: INSTALLING A FARMHOUSE SINK

Best DIY Project - Installing a farmhouse sink

Installing a farmhouse sink proved to be one of our harder DIYs.  I really was clueless how much goes into installing on – including building a base for the sink.  All the details of this DIY can be seen here.

And stay tuned – I promise there are more great DIY project tutorials coming your way.  

Good things come to those who wait! 🙂

Go create something!

Are you new to my blog? Go HERE to see my home tour and HERE to shop for items I use in our home.  

DIY

RTA Cabinets

DIY KITCHEN REMODEL AND RTA CABINETS

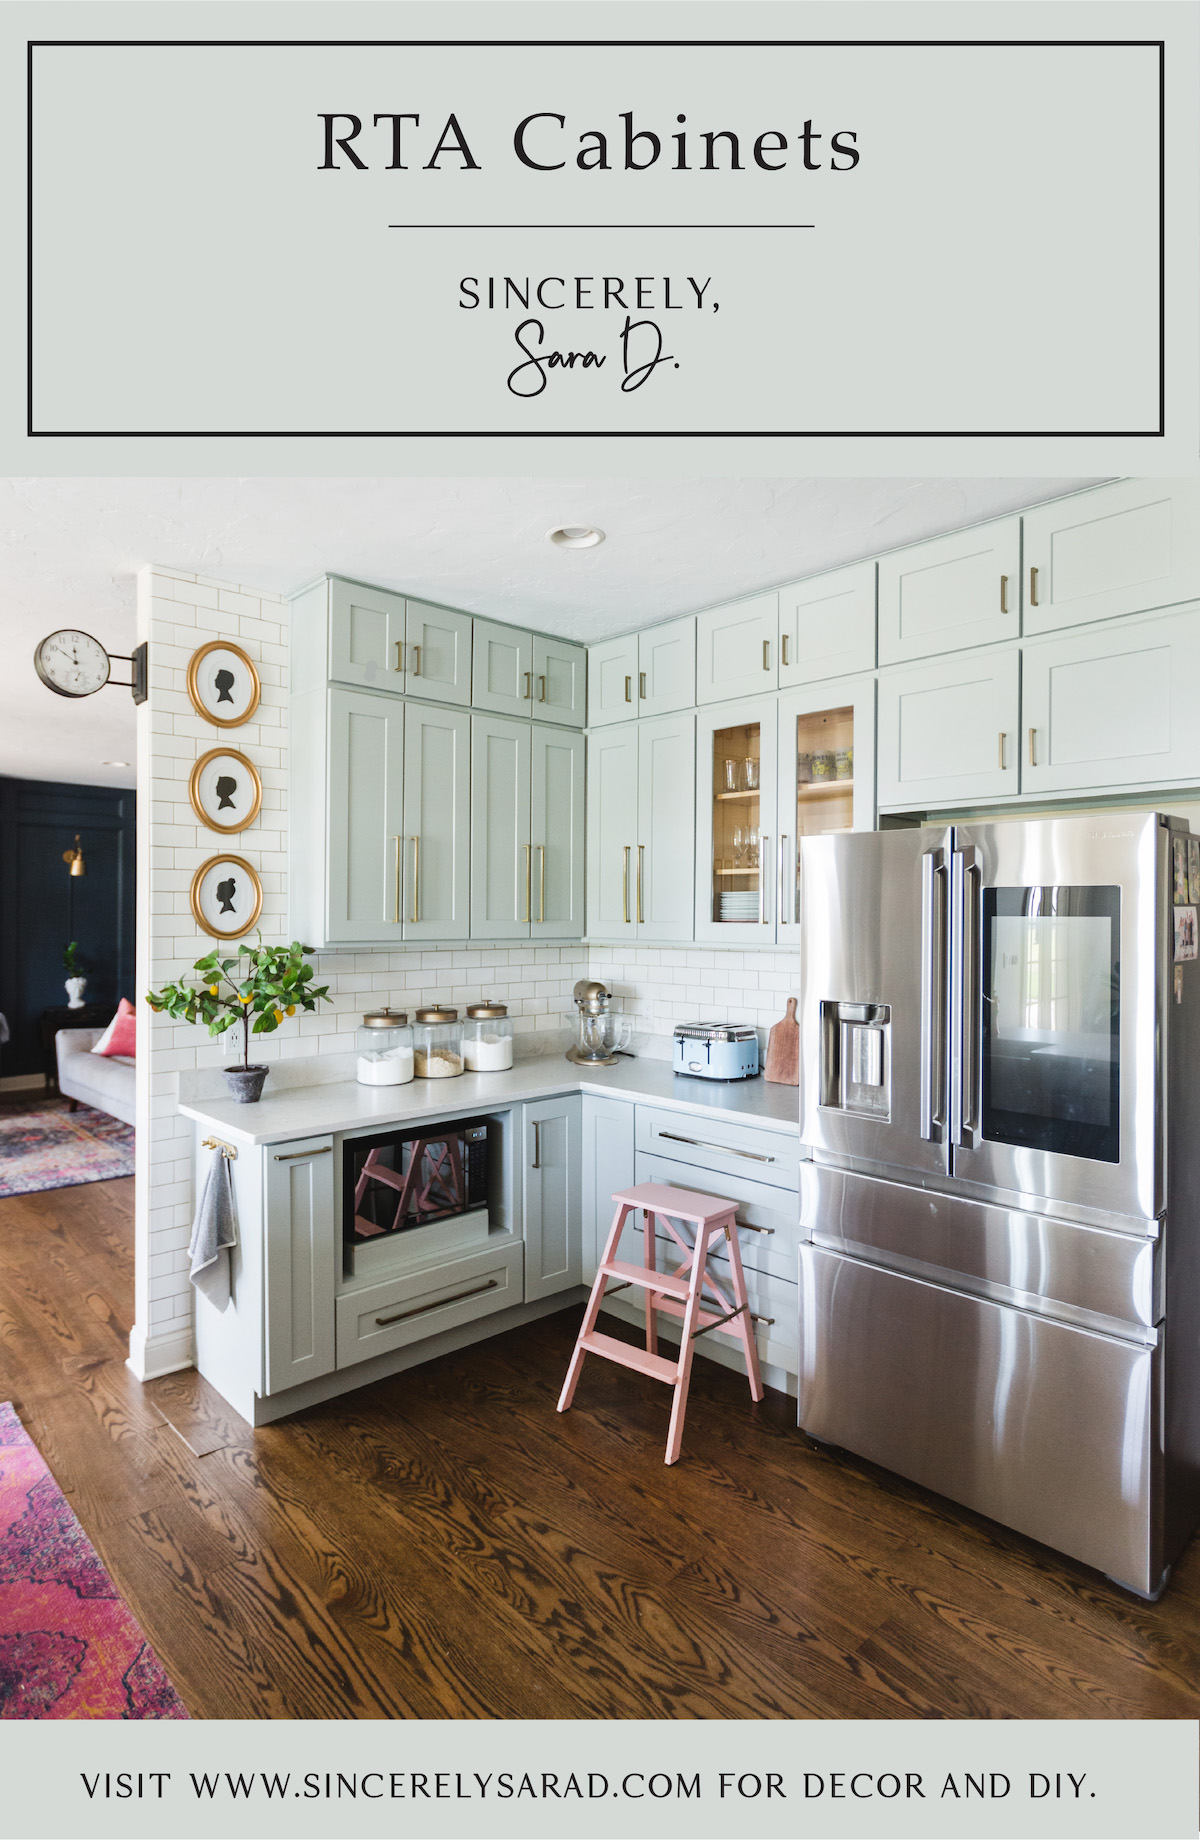
We used RTA (ready-to-assemble) cabinets in our DIY kitchen remodel.  RTA cabinets can provide a 50% savings from big-box store cabinets and turnaround is fairly quick – usually within two weeks!

DIY Kitchen Remodel and RTA Cabinets

Oh my goodness.  We are DONE with our DIY kitchen remodel and could not be more thankful.  To see more on the reveal I shared last week (and a funny behind-the-scenes video), go HERE.

Our newly designed kitchen functions much better than our old design, and we are in LOVE with how gorgeous the new space is – mainly thanks to our new cabinets from Custom Service Hardware. Our old kitchen was dark, and we hated the layout (not to mention our really old appliances).

I did the best I could updating the space using paint…

However, we love to host big groups in our home and the layout was so frustrating.  The kitchen was closed off from the living room, and there was only one way in and one way out (resulting it lots of traffic issues). When we remodeled the kitchen, we tore down part of the wall between the kitchen and the family room.  Unfortunately we couldn’t remove as much of the wall as we intended due to some water lines we didn’t know were there.  Due to timing and our budget, we kept the wall a little longer than we had originally planned.  I had already ordered my cabinets from Custom Service Hardware, so we just added another base cabinet to fill the space and make it look more intentional.  My plan for the upper space was to add open shelving, but my husband and I panicked at the last minute about drilling into the tile AND possibly hitting the water lines that we now know are there.  I actually like the relief in the extra space, and it provides a little decorating space…

Our lower cabinets in the original kitchen design connected to the sink area in an “L” design.

We opted for an island this time around and moved the dishwasher next to the sink.

The range and stove were separate in the old design.

We added a new stove/range combo using the same hood from before (only painted to look like wood).

We are in love with the new space, but the entire space was DIYed, so it was a process to get to where we are.

I partnered with Custom Service Hardware on the kitchen cabinets and I cannot say enough good things about this company and their people.  I have worked with them in the past and had such an amazing experience with their rolling library ladder.

RTA (READY-TO-ASSEMBLE) CABINET PROCESS

  • Sizes are limited to what is in stock, but the large variety allows for a great layout.
  • The cabinets are delivered via a truck shipment.
  • There are no instructions in the box, but there are plenty of online video tutorials.
  • Assembly takes time, and the first one is always the hardest.  We figured out an assembly groove pretty quickly.
  • Use lots of glue and add a few screws for the best solid cabinet assembly.

I was surprised how quickly my cabinets arrived – I had them within a week of ordering them. Once they arrived, I was asked to check for damage with the delivery driver, and we didn’t find any damage.

After the delivery man left, I freaked out a bit looking at all those (very flat) boxes.

However, my husband and I set up a staging area in the garage and spent our evenings working on the cabinets (thanks to Steve’s parents for helping us assemble some).

The first cabinet really is the hardest, and you will create a system that works for you that makes the process go faster.  We spent just under an hour per cabinet on average – which would have been faster if Steve didn’t spend so much time organizing the screws…

Here’s a video showing the assembly process on one of the upper cabinets:

My parents came to help with the actual hanging of the cabinets.  It’s amazing how not level your home is.  It took some time, but the cabinets were hung over a long weekend.  You can see the process in this video:

RTA (READY-TO-ASSEMBLE) CABINET PRODUCT

  • The color availability is limited, but you can see the product before you buy by ordering sample doors.
  • The finish is very nice, and there are touch-up kits available for any scuffs or dents.
  • The quality is amazing!  We were pleasantly surprised with all the features and sturdiness of the cabinets.
  •  

We did find that hardware was necessary for the cabinets in securing the faceplates of the drawers.  However, we prefer the added touch the hardware provides the cabinets. We went with two separate cabinet series for our kitchen (although they are both shaker in style).  The gray cabinets are the NORWICH SERIES and the white cabinets (the island) are the ESSEX SERIES.

The RTA cabinets offer several fun features such as a hidden trash can.

We love the out-of-site microwave shelf.

And pull-out spice rack.

All the hours spent assembling and hanging the cabinets were time well spent because the finished result is absolutely gorgeous!

Custom Service Hardware also provides matching trim and molding pieces with their various cabinets series.

We are in love with our new kitchen and grateful to Custom Service Hardware on their partnership with this DIY kitchen remodel. Custom Service Hardware provides amazing service, and everyone I spoke with was pleasant and helpful.  However, I have to give a special shout-out to James who walked me through every step of this RTA cabinet process.

Go create something!

Are you new to my blog? Go HERE to see my home tour and HERE to shop for items I use in our home.

Want to follow the kitchen remodel journey? Start here: Week 1 – Demo

*This post is a sponsored post by Custom Service Hardware.  I take pride in reviewing only products that fit my brand and will be beneficial to my readers. And while this post is sponsored, all the opinions are my own.  

Decor

DIY Kitchen Remodel Reveal

I am SO excited – it is time for our DIY kitchen remodel reveal!

DIY kitchen remodel reveal with the home depot

We are SO happy with our new kitchen and incredibly grateful to The Home Depot for the partnership.  This absolutely would never have happened without them!

Back in July, I entered a design competition at a Haven – a DIY home decor blogger conference.  The competition was sponsored by The Home Depot, and they selected our kitchen remodel!

Our kitchen was cramped, and there was only one way in and one way out.  Our appliances were original to the house (20 years old), and didn’t work well.  Our oven burned everything and the fridge was small and opened up to the counter.  It was hard to stand and the sink with the dishwasher open, and we needed to reconfigure the appliance layout. After winning the partnership with The Home Depot, Steve and I got busy planning the remodel.  We had NEVER done a DIY project to this extreme, but we were excited (and extremely naive).

We demolished the kitchen on a Saturday in late September, and I remember walking through the house that afternoon and completely freaking out.  What were we doing?! However, we took the project day by day.

And spent lots of late night and weekends working on the kitchen and forever grateful to friends who helped us along the way!

Everything was done by us except for the floors (we had them refinished), the drywall, and the countertops (they were installed by The Home Depot). Want to see some behind the scene thoughts on this DIY kitchen remodel?

GO HERE to see the DIY Kitchen Remodel Reveal on The Home Depot’s Blog!

  A special thanks to The Home Depot for the partnership on this kitchen.  It would not have happened without you!

Go create something!

Are you new to my blog? Go HERE to see my home tour and HERE to shop for items I use in our home.

Want to follow the kitchen remodel journey?

Week 1 – Demo Week 2 – Dry Wall and Cabinets Week 3 – Floors and Cabinets Week 4 – Painting and Trim Week 5 – Appliances and Farmhouse Sink Prep Week 6, 7 & 8 – Countertops Week 9 – Finishing Touches Find me on Facebook | Instagram | Twitter | Pinterest *This post is a sponsored post by The Home Depot.  I take pride in reviewing only products that fit my brand and will be beneficial to my readers. And while this post is sponsored, all the opinions are my own.      

Decor

Kitchen Remodel

Kitchen Remodel | Week 9

We can see the finish line on this kitchen remodel!  When we began this project 9 weeks ago, I wasn’t sure we every would finish…

Kitchen Remodel | Week 9

The final touches are happening this week.  I worked on the backsplash over Thanksgiving break, and I am also adding a few open shelves at the end of the top cabinets.

This week I am working on the cabinet hardware from Hickory Hardware.  Obsessive measuring is happening before drilling the holes!

I have made all the design decisions and dealt with the easy DIY projects.  My husband (on the other hand) has had to deal with all the harder, behind-the-scenes projects.  He has learned more about electrical and plumbing projects than he probably ever wanted to know.  We are so grateful to a friend who has helped countless hours along the way.   I know he doesn’t want to be named (both because he is humble, but also because we live in a small town and doesn’t want the constant requests)!

I will be sharing some of the details of the kitchen, but this is the last weekly update!  I remember how I felt that afternoon after demo wondering what in the heck we had just done.  It has been a quite a journey, and we are excited to see the end! A special thanks to The Home Depot for the partnership on this kitchen.  It would not have happened without you! Go create something!

Are you new to my blog? Go HERE to see my home tour and HERE to shop for items I use in our home.

Find me on Facebook | Instagram | Twitter Pinterest

Want to follow the kitchen remodel journey?  Go here to begin: Week 1 – Demo