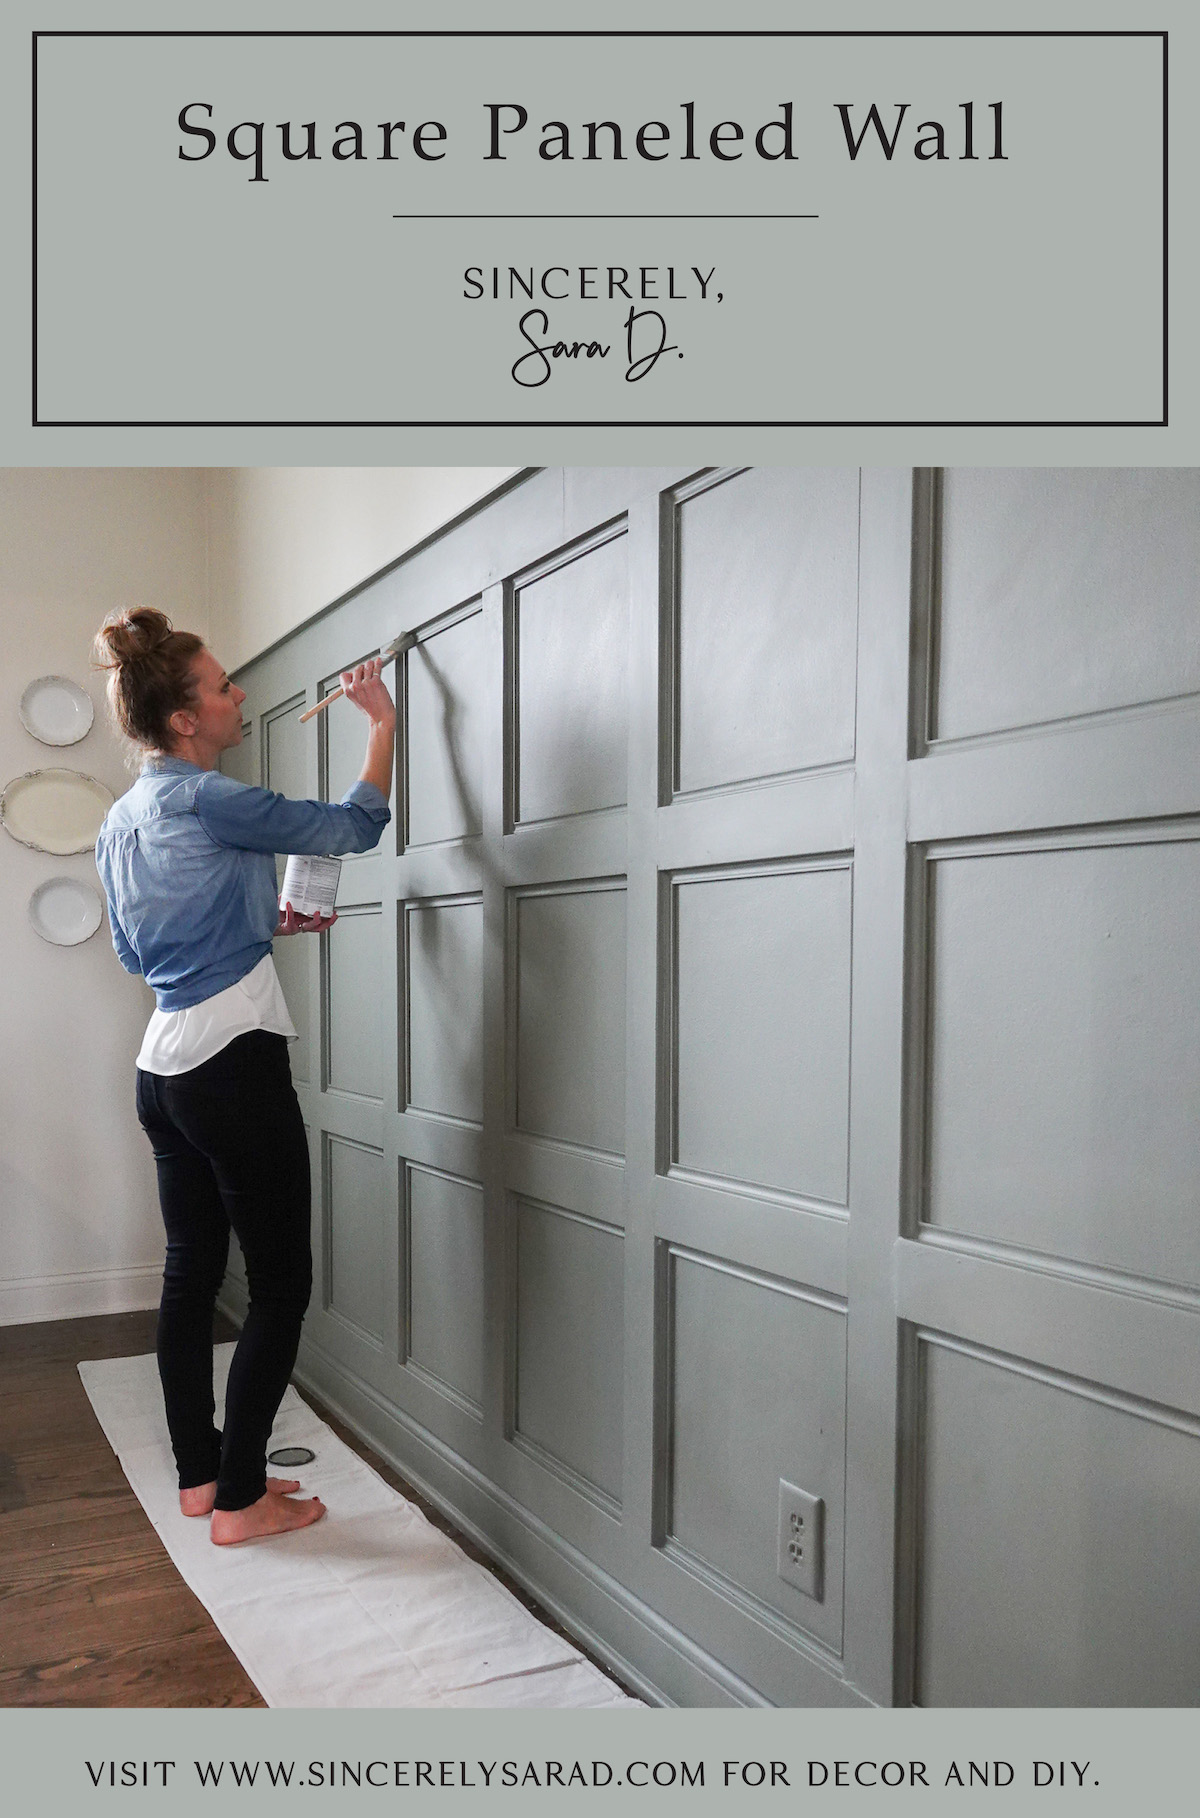
About five years ago, we added a square paneled wall treatment to our dining room, and you can see that tutorial HERE. It was the first of many wall treatments we have done over the years, and we have really loved it.
It was a medium gray for the first few years of its life.

And then (just like I always do), I decided to switch it up and wanted a change. I painted the square paneled wall treatment off-white (the same color as the trim in the room) to brighten up the dining room.


I have always liked the wall treatment but felt like something was missing – like it wasn’t quite elegant enough for the space. It needed a little more detail, so I decided to fix that and added some additional smaller molding to the inside of each square. It’s all in the details, right?

This wasn’t a hard addition, but it was time-consuming cutting that 45-degree angle on each of those interior pieces of molding. Although we tried, those square are not equal sizes. Even being off an eighth of an inch made a difference on this project and meant I couldn’t cut mitered corners in batches and became a little bit of a jigsaw puzzle.
On a project like this, I prefer brad nails over wood glue and/or construction adhesive, and wood filler and caulk will be your best friends to hide the gaps and nail holes.
Again, if you are looking for the original tutorial for this panel wainscoting, you can go HERE to see how we originally created this accent wall (pre-additional wall molding). We used MDF instead of real wood since we were painting it.

Once I had the small molding installed, I painted the entire wall treatment including the baseboard in a greenish-gray (I know – back to the darker colored wall again). I wanted a different color, and it is Benjamin Moore in Storm Cloud Gray. It is even more beautiful in person.


Want even more feature wall ideas? They add texture and a beautiful focal point to any wall space.

I have created several accent walls in our home (everything from wainscoting to board and batten to shiplap to plank walls), and you can see all the details on those HERE. No contractor is required for these DIY wall treatments which add so much visual interest!
*UPDATE* You guys will think I’m crazy, but we replaced this wall treatment (after almost 6 years) with a thin paneled wall treatment that goes to the ceiling and all around the room. You can see all the details HERE. We tried to figure out a way to keep the square paneled wall, but we couldn’t make it work in the rest of the room since it was solely planned as an accent wall.
Tag me on Instagram or Facebook or email me pictures of your wall treatments! I always love seeing what you’re up to.
Go create something!

Are you new to my blog? Go HERE to see my home tour and HERE to shop for items I use in our home.
Find me on Facebook | Instagram | Twitter | Pinterest
