Paint

Adding Stripes to a Wall

Adding stripes to a wall is a fun way to add interest to a space.

I am really close to revealing my living room and my boys’ room.  But before I do, I am going to show you a little striped sneak peek! Horizontal stripes are fun and can work in many different spaces. From my formally casual (does that even make sense?!) living room:

Adding stripes to a wall

To my playful boys’ room:

paintstripes

Stripes are much easier than they appear.  The setup is the most time-consuming part, and it does require a little math to make your striped pattern work out correctly.  I ended up doing 10-inch stripes.  I used a ruler and started from the ceiling.  I just marked off 10 inches as I ran the length of the wall.

stripes.4

Then, I connected the marks (using a level) to make a straight line.

stripes.5

Next, I taped over my line. *Important tip: Use Frog tape.  It’s so worth the extra money!  It helps keep your lines much crisper without the paint seepage.

stripes.6

Finally, paint the lines.  I marked the sections I wanted to paint with a large “x”.  It can get confusing!

stripes.8   stripes.7

Now for a much better tutorial, check out Angela’s stripe painting tutorial at Unexpected Elegance.  I wish I had read her tutorial before I did my stripes.  The laser-level idea is genius. How-to-Add-Horizonal-Stripes-to-Any-Room-e1376961344330

The great thing with painted stripes is that it is just paint.  When you grow tired of them, you can just repaint the wall.  Keep in mind you may have to sand some before you repaint, but it is much easier than removing wallpaper! To see more on the boys’ room, click HERE.

Go create something!

Are you new to my blog? Go HERE to see my home tour and HERE to shop for items I use in our home.

Find me on Facebook | Instagram | Twitter Pinterest

DIY

Make a Headboard into a Bench

See how to make a headboard into a bench!

Last summer, I got a little addicted to the local Facebook marketplace.  I especially loved the furniture category, and this was one of my purchases:

Turn a Headboard into a Bench

I thought the headboard detail was so pretty, and I bought it not knowing exactly what I would do with it.  After some time, I decided it would make the cutest little bench for our home.

bedbench3

It was a really easy project (mainly because my dad did it for me). He took the bed rails and cut them down to the width I wanted the bench. Then, he used the extra bed rail wood to make the seat of the bench. We were short a little wood, so we added one more piece to keep the bench sturdy.

benbench.2

(See my cute assistant walking around in the background? She’s also known as “mom”.) I painted the bench with chalk paint.

bedbench4

We added a thin board across the top of the bench.  I bought the thickest foam I could find (from Hobby Lobby), and we cut it down to make the padded seat. My mom helped me cover the foam with fabric, and we used staples to secure the fabric.

bench  

And that was it!  We now have a unique bench that fits perfectly with those small awkward spaces you don’t know what to do with.

bench.2

Are you going to try to make a headboard into a bench?

bench.3

Go create something!

Are you new to my blog? Go HERE to see my home tour and HERE to shop for items I use in our home.

Find me on Facebook | Instagram | Twitter Pinterest

Paint

Painting Cabinets with Chalk Paint

Last year, I painted my bathroom cabinets, and it was a REALLY long process.  See how I cut out a lot of time by painting my cabinets with chalk paint.

slider-cabinets

I did it the “traditional” way, and you can take a look at that post HERE. However, considering my kitchen has (what feels like) a thousand more doors, I knew that process may not be the best solution for my kitchen.  Or my sanity. kitchenBEFORE

So, I decided to give the chalk paint method a try.  Chalk paint doesn’t require prep work or sanding.  (Although I did clean my doors considering there are 15 years of kitchen grease layered on them.)

Here’s my (I don’t claim to be a chalk paint pro) 9 step chalk paint cabinet tutorial:

1) Remove the cabinet doors and all the hardware.

This is my second to the least favorite part of the process.  My least favorite part is putting the hardware back on.  There is always a cabinet door that ends up hanging funny.


 cabinets.before.11  

2) Clean the wood with a cleaner to remove any dirt/grime.

cabinets.before.5  

3) Tape off any areas where you don’t want to get paint.

cabinets.before.14  

3) Start Painting!   Forget about sanding and pull out the paint.  I used Annie Sloan’s “Old Ochre.”  I did two coats of paint on everything.

cabinets.before.12

cabinets.before.13 copy  

4) Wax. Once the two coats of paint are dry, you can begin to wax.  Since I was doing kitchen cabinets, I applied three coats of Annie Sloan’s clear wax on everything.  It’s much quicker than it sounds.

**March 2015 UPDATE**  

Although my wax has held up well, it isn’t the easiest to clean.  If you scrub too hard, the wax can be removed.  If I were to do this over again, I would use a polycrylic for a finish instead of the wax.  The reason I didn’t do this the first time around was because I was afraid of yellowing the paint.  However, the more I research, the more I find that there is polycrylic that really is clear and doesn’t yellow!

cabinets.before.17 cabinets.before.18

 5) Buff the wax. Use a lint free cloth to rub in the wax and remove any clumps. (I use old t-shirts for this.)  

6) Sand. If you want to distress the cabinets some, use sandpaper after you’re done waxing.  I lightly sanded the edges of the cabinets and doors.

cabinets.before.19  

7) (optional) Buff. 24 hours after the final wax, you can go back and buff the wood if you want more of a sheen.  

8) Put back the hardware and cabinet doors.  

9) Enjoy your “new” cabinets!

kitchen

Would you try painting cabinets with chalk paint?

I did my kitchen in stages to preserve my sanity.  I did a few groupings a week until I have what you see above.  

*Also, I’m keeping the lower cabinets wood – for now. 😉

*UPDATE (2/21/14): The unpainted lower cabinets didn’t last long.  They have been painted.  Check out how they look HERE.  

Also, if you still want to see more about painting cabinets, this tutorial was featured in the DIY section of About.com.

*UPDATE (7/24/16): I ended up repainted my cabinets because I did not love the wax as a sealer.  To see why click HERE.

Go create something!

Are you new to my blog? Go HERE to see my home tour and HERE to shop for items I use in our home.

Find me on Facebook | Instagram | Twitter Pinterest

DIY

Remove Cabinet Doors

Remove cabinet doors for an instant kitchen update!  Removing cabinet doors adds interest to your kitchen and is a great option for people who rent.

Remove Cabinet Doors - Instant Kitchen update


I am the middle of three girls, and I get a lot of great ideas from my creative sisters. On a recent trip to my sister’s house, I noticed she had removed some of her cabinet doors. cabinet

It made a HUGE difference. Heather is currently renting this house, so it is a great option for all you renters out there. She simply removed the doors (It is important to save the doors and all the hardware to keep your landlord happy!), and she added black paper on the back of the cabinets. It really makes her dishes pop.

cabinet3 cabinet2

As my friend Anne (of Green Gables) always says, “imitation is the sincerest form of flattery.” So, I went home and removed some of mine! Here’s the before:

cabinet7

And after!

cabinet6

My cabinet update also included paint (and I’ll talk more about that later this week), but I’m loving the open cabinet concept. I removed the cabinet doors right above the dishwasher, so putting dishes away is easier now! I saved my doors and hardware (just in case I want to cover them up again).  But I did fill the holes where the screws once were.

cabinet8

I used Durham’s Water Putty to fill in the holes.  It comes in a powder form, and you add just add water to make the putty.

cabinet9

I’m glad I took them off!

cabinet5

If you want to know more about painting your cabinets, click HERE to see my post on how I did it! If you’re stuck inside for the next couple of days with this snowstorm, why not remove some cabinet doors?  It’s an easy and quick update. 

Go create something!

Are you new to my blog? Go HERE to see my home tour and HERE to shop for items I use in our home.

Find me on Facebook | Instagram | Twitter Pinterest

DIY

Easy DIY Silhouettes

If you love silhouettes and want an easy tutorial for creating your own, then this is the DIY tutorial for you!  See how to make these easy DIY silhouettes:

Easy DIY Silhouettes

  1. Take a profile photo of the person you want to be featured in your silhouette. {I used my iPhone for these profiles since you really just need an outline  Quality is not important.}
  2. Email the photo(s) to yourself.
  3. Enlarge the photo(s) to the size you want.  I created these silhouettes using Microsoft Word, and I enlarged my photos to fit an 8.5 x 11 sheet of paper.
  4. Print out the photo(s) – I printed my photos in black and white.  You do NOT need a high-quality printout.  You will eventually throw the printout away.
  5. Tape the photo printout to a piece of black paper.
  6. Cut around the printout following the profile of the person pictured.
  7. Remove the printout, and you will be left with a black paper profile.
  8. Glue the silhouettes to fun scrapbook paper for additional interest.
  9. Frame the silhouette(s) and enjoy!

silhouttes

Be as creative as you wish with the color of the silhouette paper and the pattern of the background paper.  Mix and match them to fit the decor style of your home.  You can create the perfect DIY silhouettes for your family (and these also make great gifts)! Unfortunately, I was new to blogging when I created this post.  I did not realize that you have to take progress photos as your DIY projects.  However, here is a more recent silhouette project I have done with lots of step by steps photos and a full tutorial.  It is a different approach, but I love it!  It is the perfect art for my daughter’s bedroom!

Go create something!

Are you new to my blog? Go HERE to see my home tour and HERE to shop for items I use in our home.

Find me on Facebook | Instagram | Twitter Pinterest


Paint

Chalkboard Fridge

If you have an ugly old fridge that you want to make more fun, try chalkboard paint to create a chalkboard fridge.

We are not big fans of the fridge that came with our house.  It’s old, glossy black, and just hard to maneuver.  It opens towards the cabinets, and not only are you squashed, but you have to be on your knees to rummage through the fridge.  However, my husband and I are too practical to replace it right now.

fridge.2

I decided the only way to make this thing work in the space was to paint it.  Luckily my husband was okay with this idea – especially since it will eventually become the garage fridge. First, you need to clean your fridge with a cleaner.  You want a clean surface for the paint to adhere to

fridge.3

After you have a clean surface, the fun can begin!  I taped off the edges (I wanted crisp lines – even if I was painting black over black).  And, I used a small roller for this project. fridge.4

I gave the fridge *two coats of chalkboard paint.  While the first coat dried, I covered the roller and pan with foil so it didn’t dry out.

*I would suggest using a primer before the chalkboard paint – especially on a glossy surface like my fridge.

fridge.6

I gave the fridge the second coat with the roller and left it alone for 24 hours.

fridge.5

The next day, I treated the chalkboard paint with chalk.  You cover the entire “board” with chalk and rub it in with a rag.

fridge.7

Now, my fridge was ready! I wanted the top to be our family schedule, so I printed out the days of the week along with a cute little design to go on the side.

week.1 week.2 week.3

***You can download the PDFs here:

week.1

week.2

week.3


Then, I covered the back of my printout with chalk.

fridge.8

Next, I taped the printouts onto the fridge.

fridge.9

And I traced over the printout with a pen.

fridge.10

You’ll get a faint chalk line of your lettering or design.

fridge.12

I used a chalk pen on my design and days of the week. (See more about the chalk pen in this post.)  This way, it’s a lot harder to wipe it away (you actually have to use water to remove it).  On my weekly schedule, on the other hand, I just write in with chalk and can easily wipe it away every week.

fridge.2

I followed the same technique with frames for the lower door:

fridge.3

Here’s the result!

fridge

More to come on the rest of my kitchen!

Go create something!

Are you new to my blog? Go HERE to see my home tour and HERE to shop for items I use in our home.

Find me on Facebook | Instagram | Twitter Pinterest

Paint

Spray Painting Furniture

Spray painting furniture is an easy way to update tired, worn pieces.

When we first moved into our current home, we needed a new dining room set.  Unfortunately, dining room sets are expensive, so I began looking at second-hand shops for used dining room sets.  While visiting my parents, I fell in love with our dining room set in a little antique shop.

Furniture Makeover with Spray Paint

Unfortunately, it was 250 miles away. My amazing parents loaded up a trailer (and their two vehicles – a truck and an SUV) and brought the set to us. The chairs have some amazing detail, but they were very worn and beat up.

chair

DSC_0028

Luckily I had one last 60 degrees in late fall before all this crazy weather (snowpocalypse and polar vortex) hit the midwest.  Do not try to spray paint in cold temps.  Just do not try it.  I have done it before, and the results are not pretty. With the warmer temperatures, I was able to spray paint the dining room chairs.  With a little spray paint (and some new fabric), these chairs look refreshed and updated: chair.3

chair.4

I used Valspar’s Color Radiance spray paint in black matte.  The coverage was great, and I love the finish. I also lightly sanded the corners to add a {slightly} distressed look.  This way my kids can use the chairs without me worrying about nicks and scratches. It just took a few hours of my time to update the chairs.  Spray paint is great for pieces where you’re looking for a flat finish.  The makeover was easy and inexpensive! If you want more details on when to use spray paint on furniture (and tips for applying it), check on this post on painting furniture with spray paint:  

I also love using spray paint to update old dishes!  They make great decor pieces – just don’t use them for food…  

Are you new to my blog?

Go HERE to see my home tour and HERE to shop for items I use in our home.

Find me on Facebook | Instagram | Twitter Pinterest

DIY

Chalkboard Lettering

This DIY technique allows anyone to create perfect chalkboard lettering!

I love chalkboard art, but free handing lettering drives me crazy.  I am an impatient perfectionist, and I have discovered a way to quickly create pretty chalkboard lettering every time…

Perfect Chalkboard Lettering

I will walk you through the steps of creating perfect chalkboard lettering, and it really is easy!  I also have a video tutorial where I share the same technique, and I share that towards the end of this post.

  • Begin with a chalkboard. I made a mirror into a chalkboard, but I wouldn’t always recommend this. Instead, I would suggest cutting a hardboard or some thin wood to put in the frame. Make sure the board is smooth so you can create a nice, smooth chalkboard finish.

mirror.2

mirror.3

  • Print out lettering for your chalkboard.

I combined two fonts to make this type art for my dining room, and you can download the (2 page, letter-sized) PDFs here:

Print

giveus

giveus(2)

diningquote

  • Cover the back of your paper with chalk.

mirror.4

  • Tape your printed type just as you would read it (chalk covered side down) to the chalkboard. Using a pen or pencil, firmly trace the type with a pen or pencil.
  • Remove the paper, and you will see a fine chalk outline.  Using chalk (or a chalk pen), trace and color in the lettering.

mirror.5

mirror.6


These chalk pens are great for chalkboards you want something a little more permanent.  However, I recently began using china markers instead of the chalk pens because they look more like chalk and are permanent!

mirror.7

I also created this video using the same technique for transferring an image: 


Since I shared this tutorial over 5 years ago, I had a friend create this gorgeous custom piece. 

The chalkboard mirror lives on!

Go create something!

Are you new to my blog? Go HERE to see my home tour and HERE to shop for items I use in our home.

Decor

Dining Room Reveal

This dining room has changed a lot since I first posted this years ago, but it is fun to look back and see how far this space has come!  Decorating is definitely a journey.

Are you ready for it?  My dining room reveal! Here is the before…

diningroomWALL1

And the after…

diningroomAFTER.3

Since we eat most of our meals as a family in our kitchen, the dining room is reserved for our guests.  I wanted it to be special, elegant, and pretty – especially since it is one of the first rooms you see when you walk into our home.  It is pretty frilly (and maybe I’ve been watching a little too much Downton Abbey), but I did throw in some straight lines (the clock and the hutch) as well as more modern prints (window treatments and rug) to offset the ornate antique dining table set.

diningroom.6

I will break down all the individual projects in future posts – my dining room table, (painted) chairs and buffet, wall art as well as post a tutorial for the wall treatment. Speaking of the wall, it is my “faux wallpaper” treatment (I used vinyl decals as stencils for the flowers).  I LOVE wallpaper, but I can’t commit.  Wallpaper is expensive, and I am afraid I will grow tired in a few years.  Paint is much easier to change and less expensive.

Are you new to my blog? Go HERE to see my home tour and HERE to shop for items I use in our home.

Find me on Facebook | Instagram | Twitter Pinterest

{The paint color for this room is Valspar’s Woodlawn Colonial Gray} *I ended up toning down the wall a few months later (because I can’t ever stop according to my husband).  Although it was fun, I grew tired of the boldness of the wall. And if you follow my blog, you’ll see that it continue to change!

DRwallupdate

Paint

Painted Piano

A painted piano adds so much character to any home.

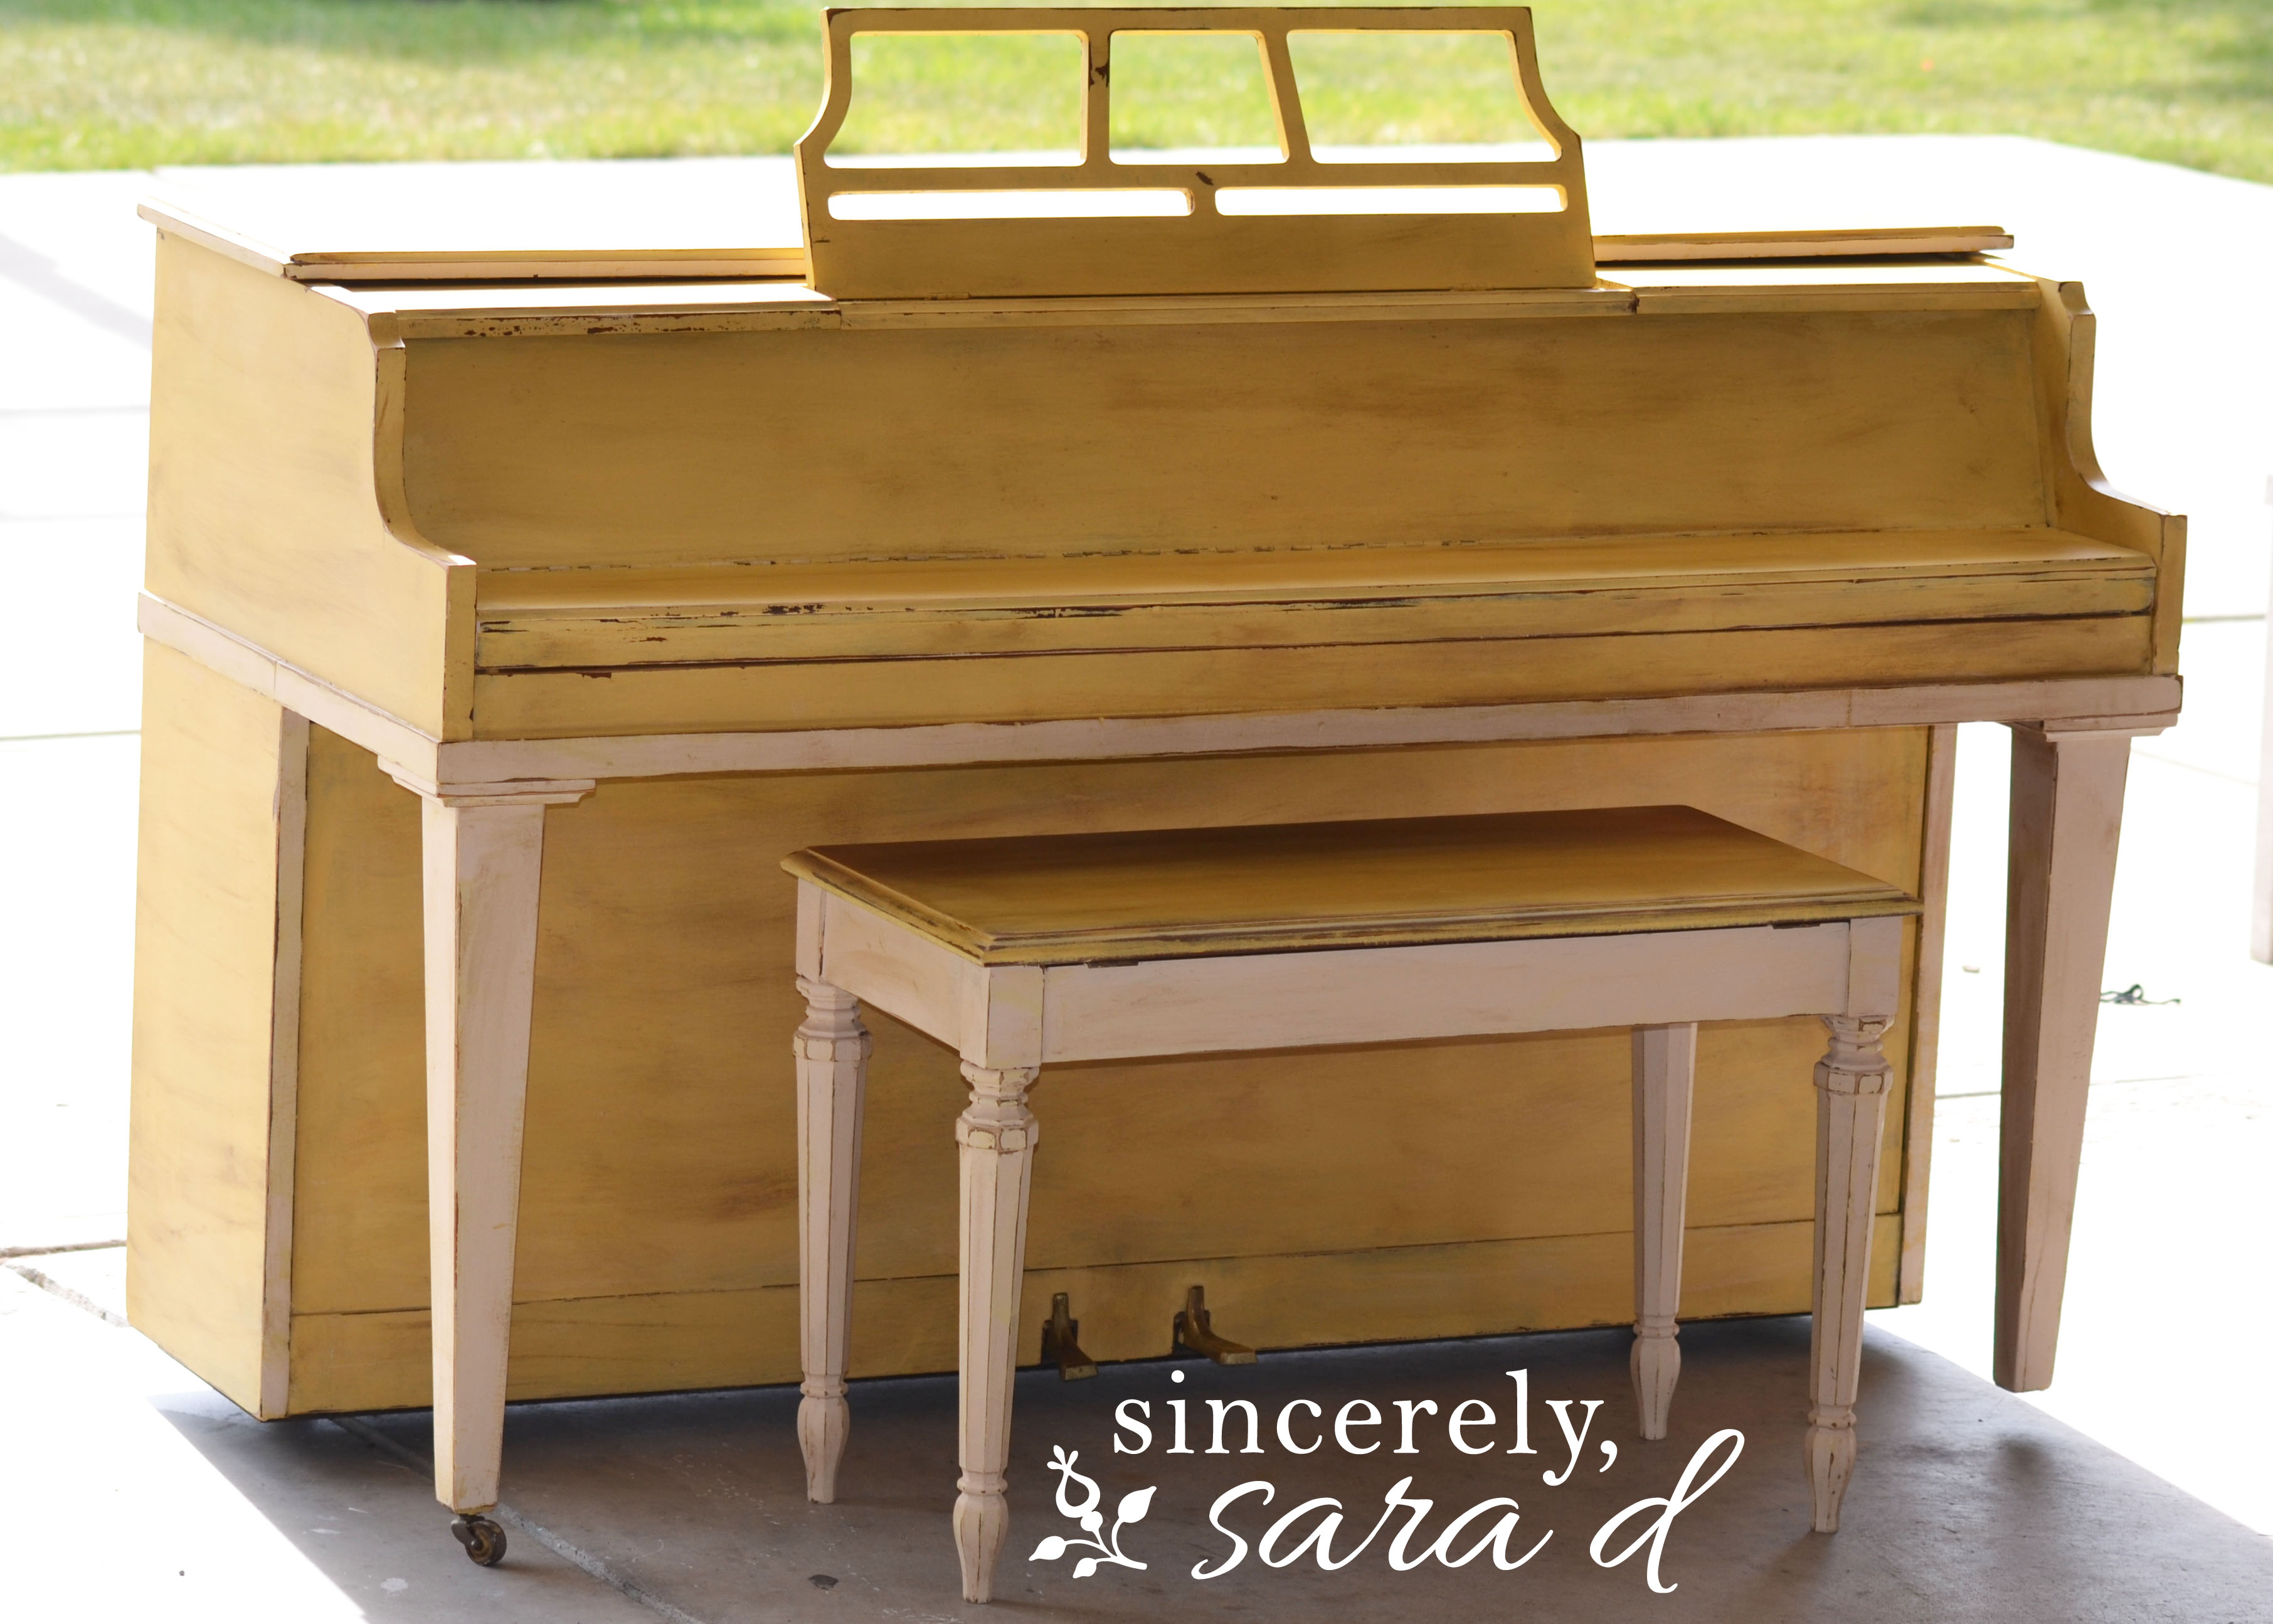
I painted a piano this week.

Painting a Piano

We’ve been talking about getting a piano for a little while since our oldest son is going to start lessons this fall. While on Facebook a couple of weeks ago, I ran across someone selling an upright for $50. I was excited because it obviously needed help. My husband would definitely be okay with me painting it, and it was so inexpensive that I couldn’t mess it up. Plus, how cool would a painted piano be?!

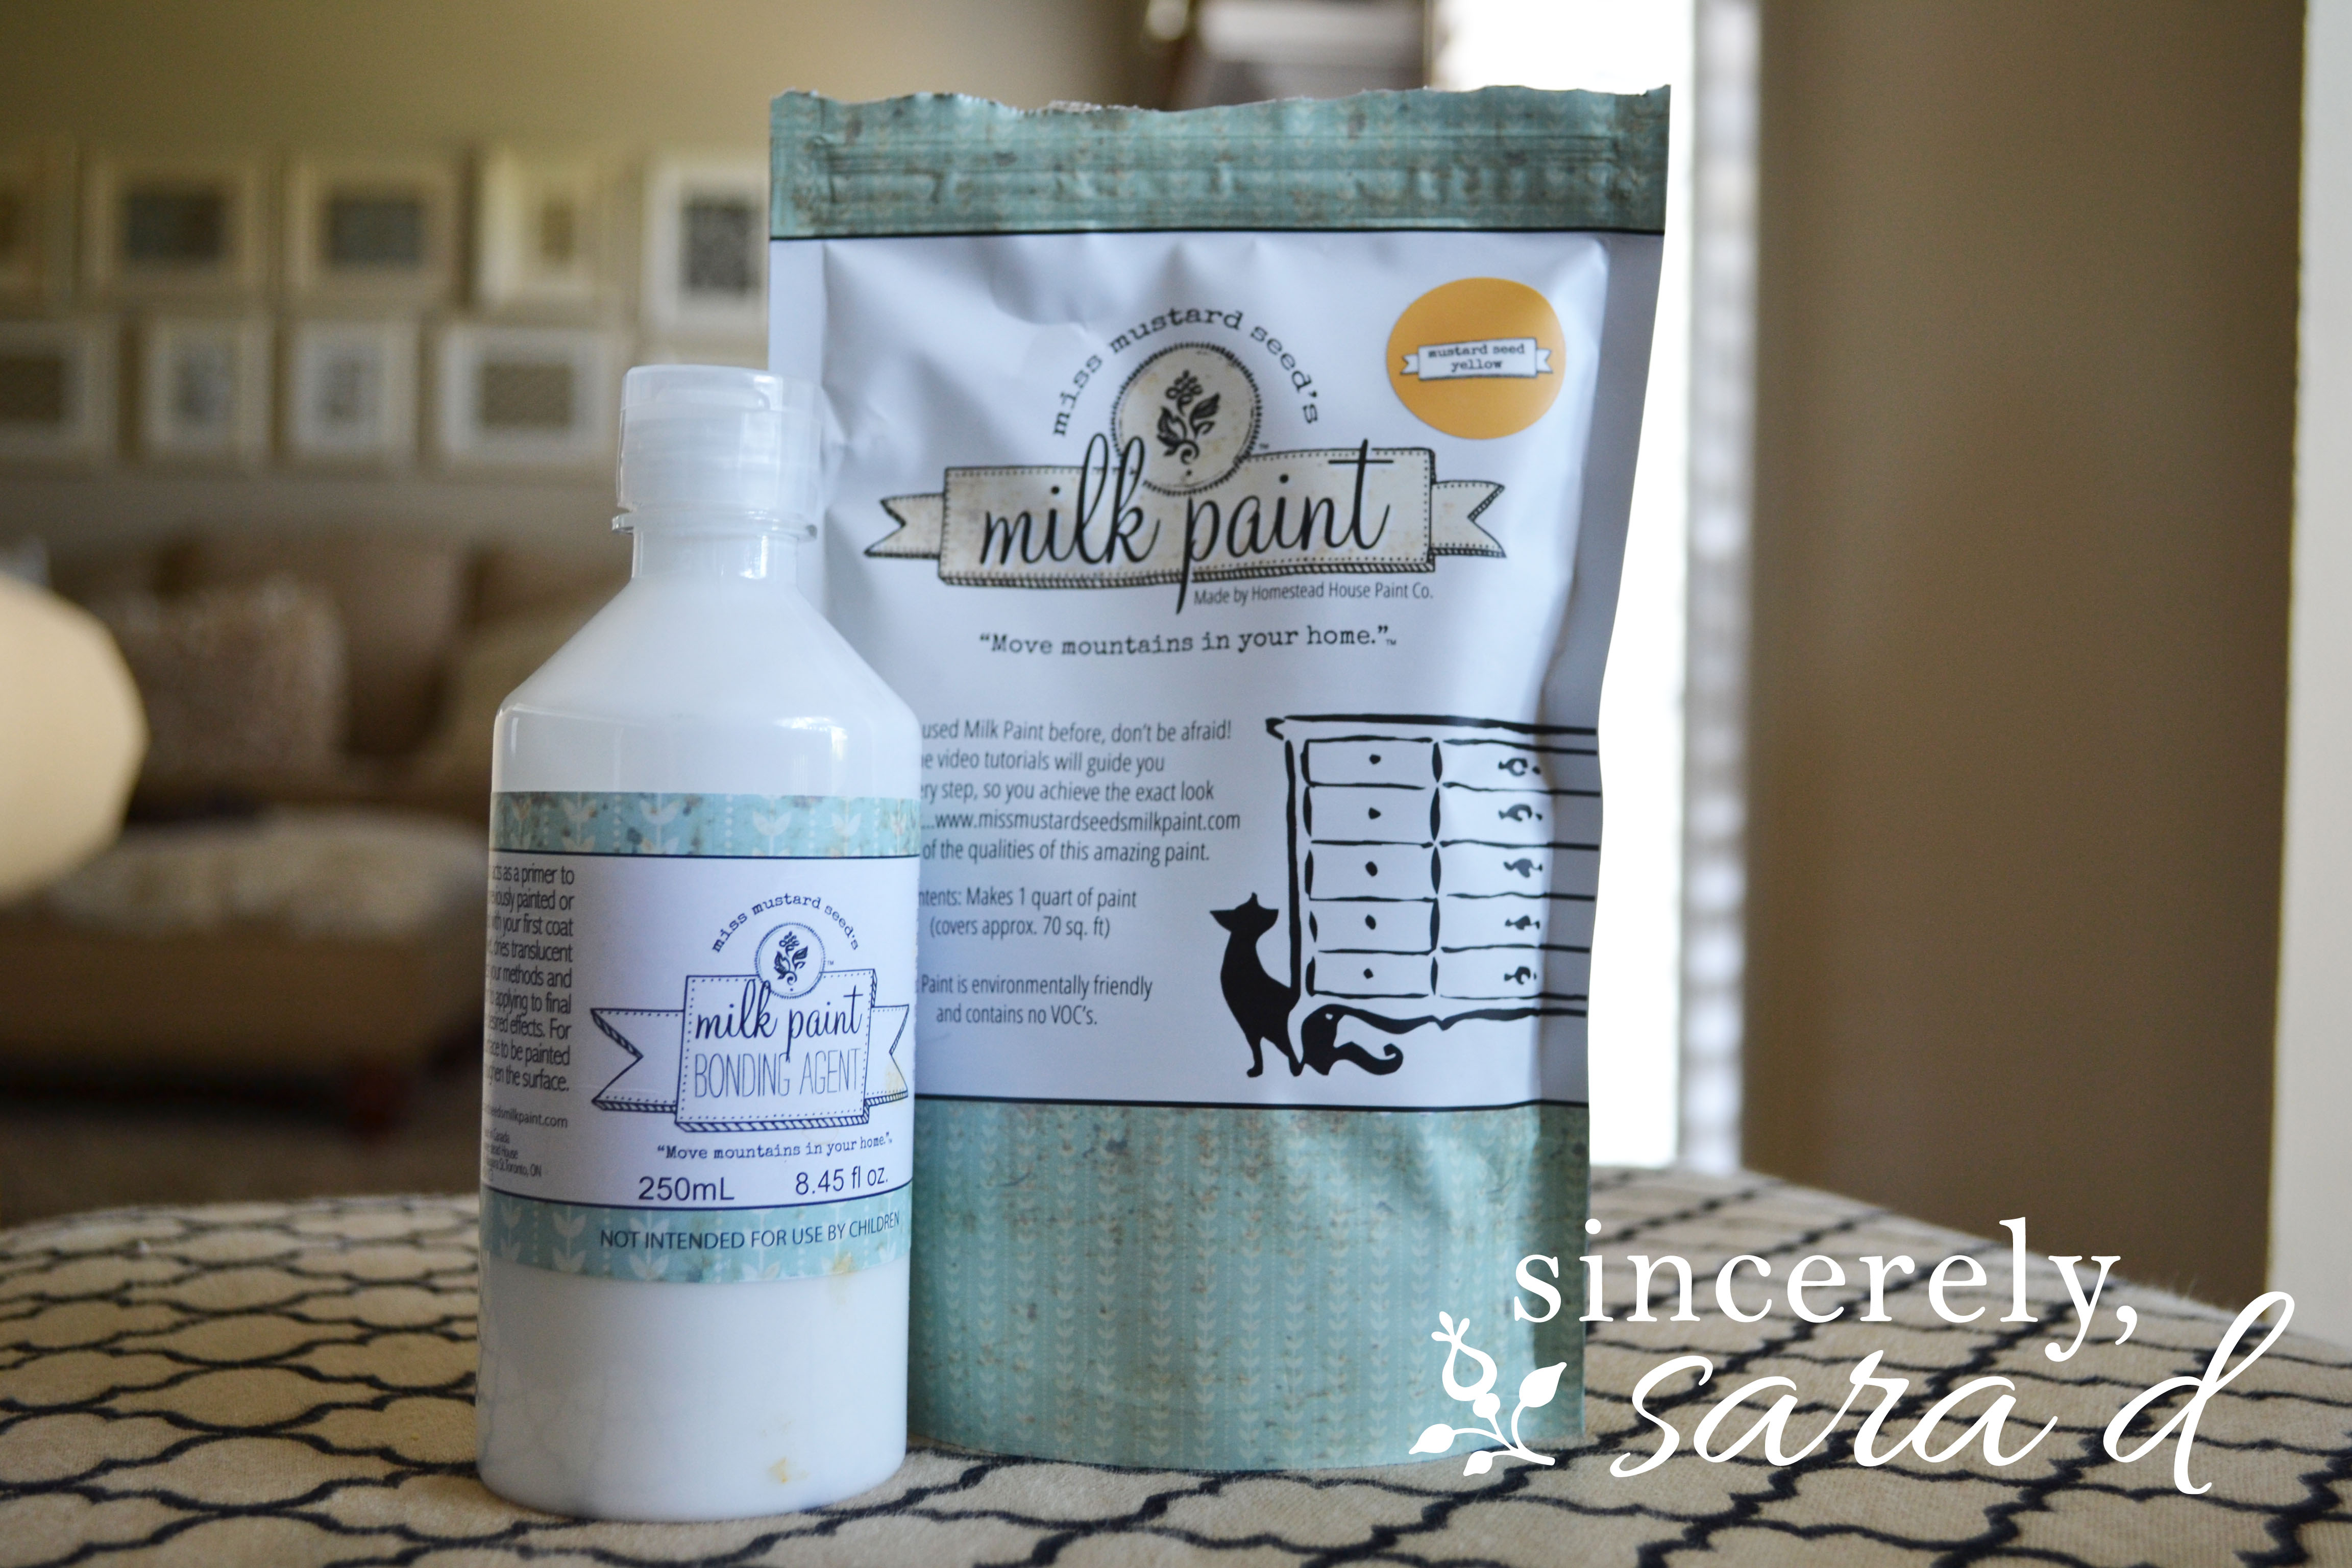
piano Now, I decided to use milk paint for the first time ever. Note to self: Don’t try a paint you’ve never used next time you paint a piano. I’ve heard a lot about milk paint because I follow Miss Mustard seed, and she has her own line of (Miss Mustard Seed) Milk Paint. Her stuff always looks so amazing.

piano3 What I didn’t think about was how unpredictable it can be. For someone like me, this isn’t really a good thing. I like plans and predictability. I like to be the one to distress where I want to distress. I’m not saying this is a good thing, but it’s how I work. So you can imagine my frustration when this started to happen: piano8 The charm of milk paint is that it does have a tendency to chip. However, to avoid this, you can mix a bonding agent with the first paint layer. I did – but I ran out of paint for the first batch and got a little lazy with my second batch and didn’t add the bonding agent. The areas I painted without the bonding agent (obviously) are where the major chipping occurred. Another thing about milk paint is that it comes in powder form. I didn’t love having to mix my own paint. I’m a pretty impatient person and mixing just added another layer in the process of painting. It’s not a huge deal to mix, but there’s something great about just popping a can of paint open… All that being said, milk paint does have its charm. If you like the (very) distressed look, this paint is for you. It comes in a bunch of BEAUTIFUL colors and it does have a unique look. It’s also a great paint for color washing pieces – you can easily water the paint down to achieve the washed look. So, after I painted the piano, I used (cream) chalk paint to accent some of the parts – and I also used the chalk paint on the areas that I hadn’t used the bonding agent in my first layer of paint. I wasn’t loving the extreme chipping happening in these areas and luckily my cream “accents” look intentional. piano11 After everything was painted, I took a sander to the entire piano. All the tutorials I watch show the people sanding by hand. Again, I don’t have patience for this. So, I used this big guy: piano7 At the end, I did wax the entire piece with both clear wax and a small amount of dark wax. I used Annie Sloan wax because I had it on hand. Overall, it’s a little more distressed than I had originally planned. However, I think I’m starting to like the piano more and more. It may be because we have a family pass to Conner Prairie and have been spending too much time there, but I think it will work well in my house. And, my son has a piano to practice on! piano14 piano13 piano10 piano9

Are you new to my blog? Go HERE to see my home tour and HERE to shop for items I use in our home. Find me on Facebook | Instagram | Twitter Pinterest

Paint

Chalk Paint Tutorial

Chalk Painting Tutorial | Painting a Mirror I’ve done a chalk paint tutorial in the past, but I thought it may be helpful to do a more detailed one. I love to garage sale shop, and I found this mirror at a sale recently for $30. (?!!) It’s hard to tell in the pictures, but it’s HUGE! Mirror BEFORE When painting a mirror, always tape off the mirror itself. If possible shove paper between the frame and mirror. Then, tape the paper in place. Mirror BEFORE* Next, prepare your supplies. For this mirror, I used Annie Sloan products: chalk paint (I actually mixed 1:1 Paris Grey and Florence) and wax (clear and dark). Cahalk Paint Supplies The great thing about chalk paint is that there is no sanding or other prep work (well, minus taping off the mirror). Just go for it! Chalk Painting Chalk paint dries pretty fast. Once it’s dry (20-30 mins for this project), you can add the wax. Chalk Paint on Mirror Chalk Paint on Mirror* Chalk paint dries pretty fast. Once it’s dry (20-30 mins for this project), you can add the wax. I recommend the wax brush. It’s expensive, but it makes the waxing a much easier process. I brush on the wax and then go back through with a lint-free cloth (aka: my husbands old t-shirts) and rub away the extra. Chalk Paint - Waxing waxing chalk paint For the dark wax, you just repeat the same process as before: brush on the (dark) wax and rub it away. Chalk Paint Dark Wax Adding Dark Wax Chalk Paint - Dark Wax **If you are going to use the dark (antiquing) wax, it is a MUST to use the clear wax first. The clear wax provides a coating between the dark wax and the paint. If you don’t use the clear wax first, your dark wax will stick to everything, and you won’t be able to wipe it away very easily. I like to distress my projects, so I sand. You sand AFTER the wax. I know it’s strange, but that’s what you do. You don’t have to wait for the wax to dry, but it can quickly cake up your sand paper. I went through a lot of sand paper for this project… Chalk Paint - Sanding And I had several helpers: Little Sanding Helper My little helpers I found that wax residue got stuck in the beautiful details. I used a Q-tip to remove as much of this “residue” as possible. Cleaning Wax You can add another clear wax layer after sanding if you want, but I find that I can just rub over the entire project and spread out the wax I added before. Also, if you want a more buffed project, wait 24 hours and use your lint-free cloth to buff the entire project. It will give it a nice sheen. FINAL mirror Mirror - AFTER Mirror AFTER Good luck!
Are you new to my blog? Go HERE to see my home tour and HERE to shop for items I use in our home. Find me on Facebook | Instagram | Twitter Pinterest   Click HERE or on the photo below to see more chalk paint tips and download FREE chalk paint tips printable! ChalkPaintTipsPic
Home

Big Girl Room Makeover

Big Girl Room Makeover The nursery is gone. But I’ve had so much fun decorating Lena’s new room, that I’ve forgotten I was once mourning its loss. Here’s Lena’s new room: Room

Unfortunately, the furniture placement (the bed against the wall) is not exactly how I’d like it due to the fear of Lena rolling out of bed. However, it works for now. Also, if you’d like to see how I did the bed rail cover, you can check out my recent blog post here: https://sincerelysarad.com/2013/06/10/the-almost-no-sew-bed-rail-cover/ We found this bedroom set on Craigslist:

Bed DSC_0046

And although the white wood was pretty, my vision for it was even better. So, I painted it!

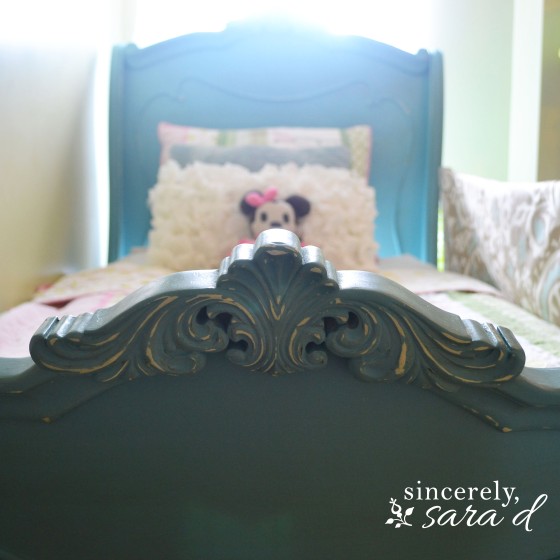
You can see how I painted it in this blog post: https://sincerelysarad.com/2013/04/11/saying-goodbye-to-the-nursery/ I used Annie Sloan’s “Provence” chalk paint for the bed:

Bed

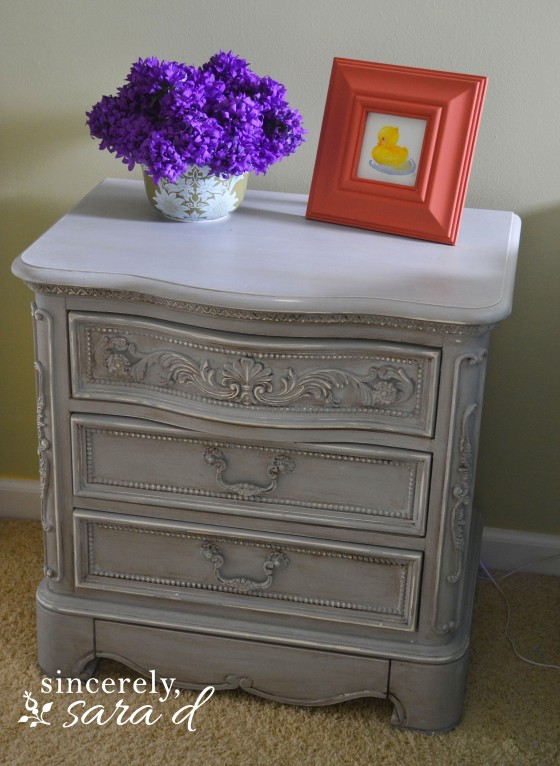
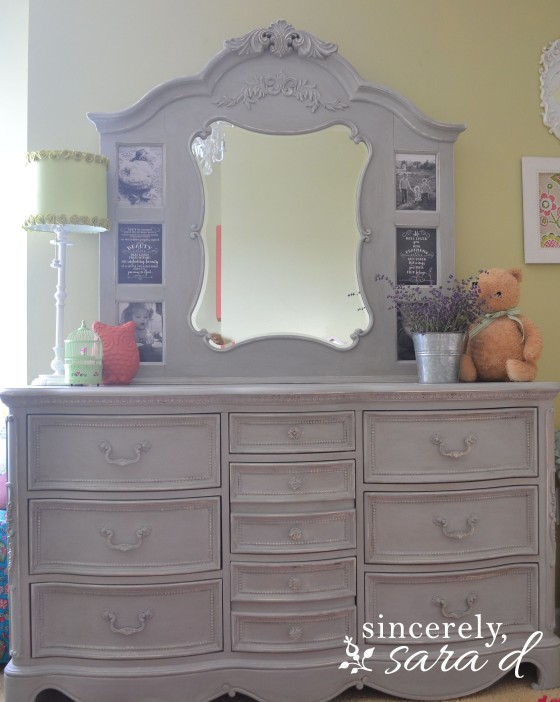
And Annie Sloan’s “Paris Grey” for the nightstand and dresser:

Detail

nightstand

Dresser closeup

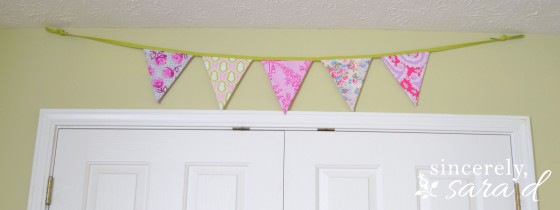
The mirror above the dresser has cute frames for pictures. I also added a few great verses. You can find the prints at my shop on Etsy: https://www.etsy.com/listing/125066323/1-peter-33-4-bible-verse-print-digital https://www.etsy.com/listing/126410195/psalm-914-bible-verse-print-digital?ref=shop_home_active I used this bunting at her birthday party and found a cute spot for it above her closet: bunting

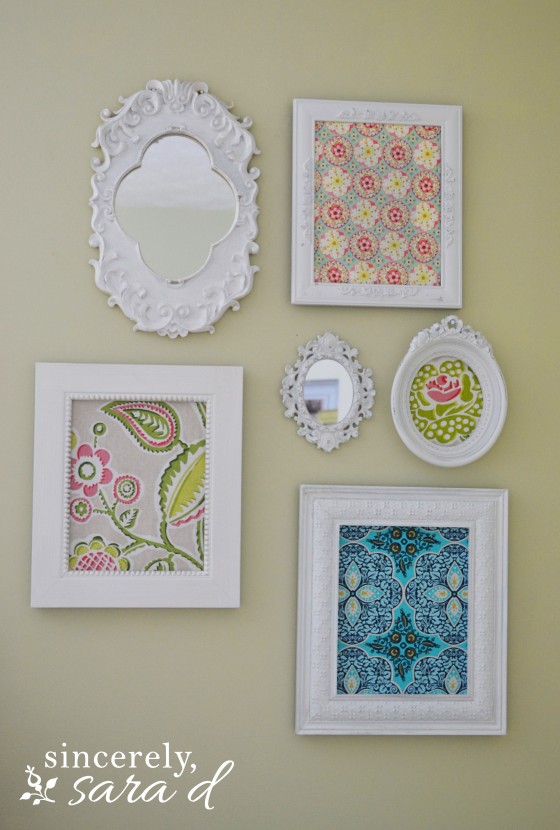
The frames from her nursery made a reappearance. I just updated a few of the fabric pieces with some remnants I bought off Etsy:

Frames

I’ve had this old paper doll set (from the ’60s?) since I was pretty young. I bought it at the local annual book fair in my hometown, and I’ve somehow managed to hang on to it through the years. I placed the dolls on a piece of oilcloth to keep with the retro vibe:

Frame

I’ll keep you updated with new additions and changes!

Are you new to my blog? Go HERE to see my home tour and HERE to shop for items I use in our home.

Find me on Facebook | Instagram | Twitter Pinterest