I am excited to share this FREE customizable Pumpkin Patch Print, and I’m also sharing how to transfer and image to wood!
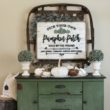
I have been slightly obsessed with large wooden signs and wanted to create one specifically for fall. I decided a “vintage” pumpkin patch sign would be perfect.

Last time I made a large wooden sign, I used my silhouette machine. Although time consuming, it worked well. However, I really wanted to try a different transfer method where you transfer a printed paper onto wood. I found this video on YouTube from DecoArt, and decided to give it a try! I created a printable pumpkin patch sign (the download is available toward the end of this post). This printable is sized to 8.5 x 11, and there is an editable version to add your own town and state. The pumpkin patch printable could also be mounted to a board with spray adhesive or simply framed. However, if you have a little more time and are up for a fun DIY project, join me in this fun paper transfer method.

For this project you will need:
- Decor Art Media Medium Matte
- Printed Design (mirrored/reversed)
- Brush
- Sponge (in place of the rag I used)
- Spray Bottle
- Sandpaper
- Varnish
- Cut-to-size Piece of Plywood
- Furring Strips (for frame)

First, cut to size a plywood board to the size of the printed (reversed) image. I blew up my pumpkin patch print (I enlarged mine to around 20 x 24) and REVERSED the image so it would print backward. I had it printed at a local office store. Reverse the image because the printed piece will be placed face-down. Stay with me, it will make sense!

Cover the entire board with a thin coat of the medium and allow it to dry.

Tear the edges of the paper (according to the video this helps hide the edges).

Add a thin coat of the medium to the printed page and allow it to dry.

After both the board and the print are dry, add a thick coat of the medium to the board and glue down the printed art – face-down.

Allow everything to completely dry overnight.

The idea behind this process is to remove most of the paper so only a thin layer is left allowing the ink to be visible. To do this, wet down the paper.

The paper is scrubbed away. Since I didn’t have a sponge, I used a cloth (but the video recommends a sponge).

This process is time-consuming – especially on a large piece like mine.

The cloth wasn’t doing a great job removing all the paper, so I pulled out my dish scrubber.

Be careful with using something abrasive because I actually scrubbed through the paper down to the board in a few spots:

Once satisfied with the amount of paper removed, allow the sign to dry.

If the distressed look is desired, lightly sand the sign.

When it dries, the image does begin to fade.
You can add a varnish to help brighten the image color.

I used a weathered gray to continue with my antique, distressed look.
You can see the right side where I added the varnish.
The varnish helps bring out the color.

Once the entire sign is varnished, allow it to dry and frame it using furring strips (you can see more detail about that process HERE).

Below is the JPG file for this pumpkin patch sign. Just click and save:

I am also sharing two PDF files. The first file has an editable city and state and the second is like the one in my photos.
EDITABLE Pumpkin Patch
Pumpkin Patch Print
The printables are sized at 8×10 (printable on regular letter-sized paper), but you can blow them up to fit your need. If you want a large (20″ x 24″) already REVERSED pdf like the one I printed, then click on the file below:
large-pumpkin-patch-reversed


I would love to know how you incorporate this pumpkin patch sign into your fall decor! Email me or tag me on social media!
*All Sincerely Sara D. printables are for personal, non-commercial use only. Use it, gift it, but don’t alter it, sell it or otherwise distribute the print or the file.
Go create something!

Are you new to my blog? Go HERE to see my home tour and HERE to shop for items I use in our home.
Find me on Facebook | Instagram | Twitter | Pinterest I have several other free printables on the blog:


 I’ve joined forces with 5 of my blog friends, and we’re sharing fall decor ideas (see their links at the end of this post).
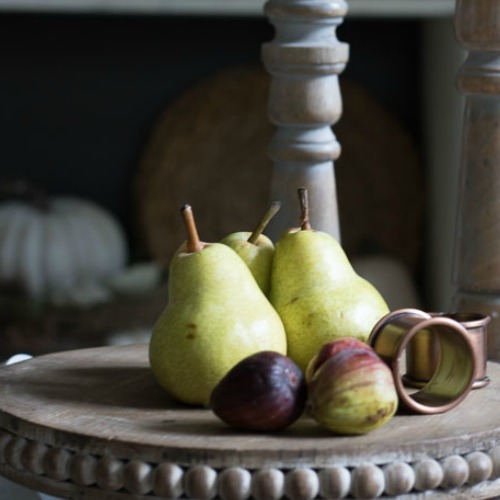
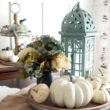
 I keep my fall decor fairly simple – mainly because it just isn’t my favorite season. Maybe it’s the warmer colors, but I just don’t go too crazy with my fall decor.
 Today I’m sharing my simple fall decor ideas using these
  And the second is this sweet little pumpkin watercolor:
 Katie is only offering these fall printables for free through October 15th, so
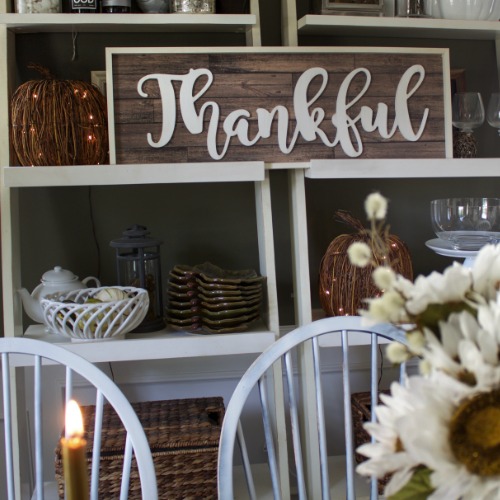
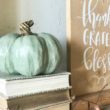
  I added a lot of mini pumpkins (I think they’re actually goards) to the shelves which you can find at almost any grocery store and their fairly inexpensive.
 I also added some faux leaves that I picked up at a craft store and coated with a light coat of cream spray paint to tone down the colors a bit.
 Want to see more fall decor ideas? Visit these blogs for even more inspiration!


