Home

Easy to Install Camera

We have wanted to add a security camera to our backyard for a while, and we found the perfect solution with Logitech Circle 2 – an easy-to-install security camera.

Thank you Logitech for sponsoring this post. Get whole home security with the Circle 2 security camera!

Having a security camera watching our backyard gives me added peace of mind. It is nice to know I can always see what is happening back there – whether I am home or away.

Circle 2 is the the only indoor and outdoor, weatherproof, Wired or 100% Wire-Free, 1080p HD home security camera with up to 180° field-of-view that records when motion is detected, has night vision, goes just about anywhere, and sets up in minutes.

Circle 2 also has powerful integrations and will work with your smart home. You can tell Alexa to turn on Circle 2 before you leave home, use Apple HomeKit to control your place while you’re away, or ask Google Assistant to pull up your camera’s live stream on your phone or Chromecast device.

We chose to go Wire-Free, which gave us the freedom to position the Logitech Circle 2 camera wherever we wanted (which happened to be in our backyard).

The Wire-Free camera charges quickly and easily using the included charger. Once the light changes from amber to green, it’s go time!

Set up for the Circle 2 is very simple and once you connect it with the Logi Circle app, you are walked through the entire set up process.

We mounted our Circle 2 under our back porch overhang. We used the provided mount and adjusted the camera to where we wanted it to see. Its view is pretty impressive – both from scope and quality!

There are many mounts available for Circle 2. We used the provided mount, but there are also window mounts, plug mounts, and even magnetic mounts.

Every Circle 2 camera comes with 24-hours of free, secure bank-level encrypted cloud storage; and if you want more storage options, there are two Circle Safe™ plans available.

I love looking through the days activities. It gives you a fast version of everything it saw throughout the day.

If you see something suspicious, you can take action directly from the Circle app – take a snapshot, download footage, or use talk and listen to deter them.

No matter where you place it, Circle 2 provides a crafted home security experience that will continue to evolve with your needs.

One of my favorite features of the camera is the Smart Location feature. It automatically detects when you leave the house or come home, and you can receive alerts when you’re away (and pause alerts when you are back).

I love keeping an eye on our backyard with Logitech Circle 2, an easy to install security camera!

Go create something!

Are you new to my blog? Go HERE to see my home tour and HERE to shop for items I use in our home.

Find me on Facebook | Instagram | Twitter Pinterest

Decor

Find the Perfect Bedding

How to Find the Perfect Bedding | Sponsored by Joss & Main I partnered with Joss & Main to share how to find the perfect bedding.

How to Find the Perfect Bedding:

Before you even think about creating a pretty bed from the outside, it is important to build the bed up with quality pieces from the inside:

  • Sheets: Find a set that offers both comfort and longevity. To do this, consider both thread count and material.  Thread count is often used as the barometer of a sheet’s smoothness and durability and is the number of threads woven into a square inch of fabric. In regards to fabric, there are lots of options, but the most common is cotton. The best is 100 percent Egyptian cotton followed by 100 percent pima cotton.
  • Duvet or Comforter: A duvet requires both a duvet (insert) and a duvet cover. The duvet can be filled with either down, wool, feathers, or a synthetic alternative. Duvets cannot be used without a duvet cover. A comforter, on the other hand, can be used without any cover. Comforters typically are thick and fluffy (making them especially great in colder weather), are covered in a durable fabric, and filled with down or synthetic fibers. I selected a duvet for our bed, so I share more details on that duvet below.

Sheets

We have a really deep mattress, and up until now have had sheets that constantly pop off.  Not only is it uncomfortable, but I would spend every morning remaking our bed – until now.  I discovered the most perfect sheets from Joss & Main.  They feel like luxury hotel sheets, are pima cotton, 800 thread count, they have the deep pockets our mattress requires, AND they’re affordable!

Duvet

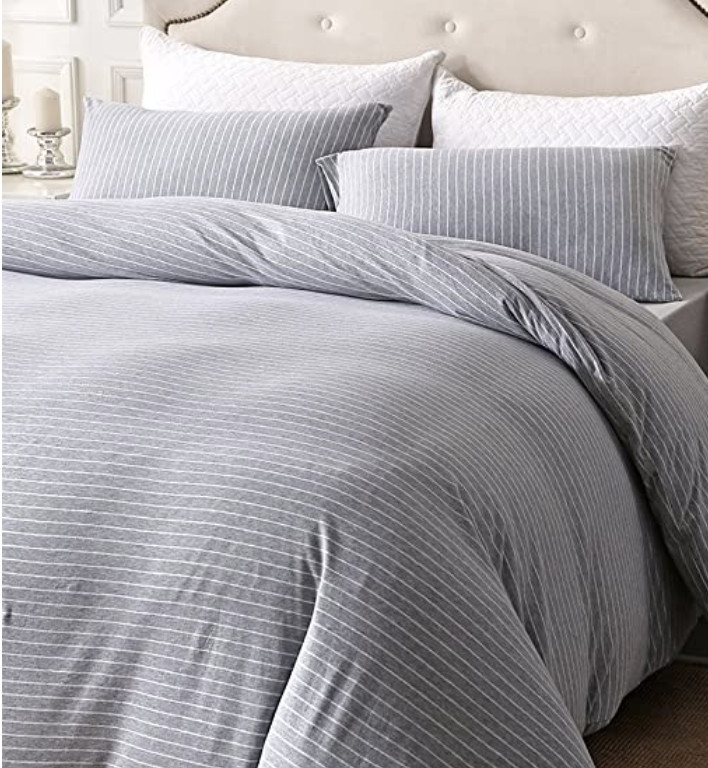
My previous duvet cover yellowed, so I replaced it with this super soft and sophisticated Duvet Set. It has the same embroidered stitching some of the higher end stores offer but at a fraction of the price.

Duvet Insert

It is important to stay warm at night while not getting hot.  This midweight down alternative comforter is perfect and cozy. Once you have the foundation bedding pieces (sheets, duvet cover, and comforter), it’s time to have fun.  I prefer to stay neutral with my foundational pieces and add color with the bedding accessories:

  • Throw blanket
  • Throw pillows

Throw Blanket

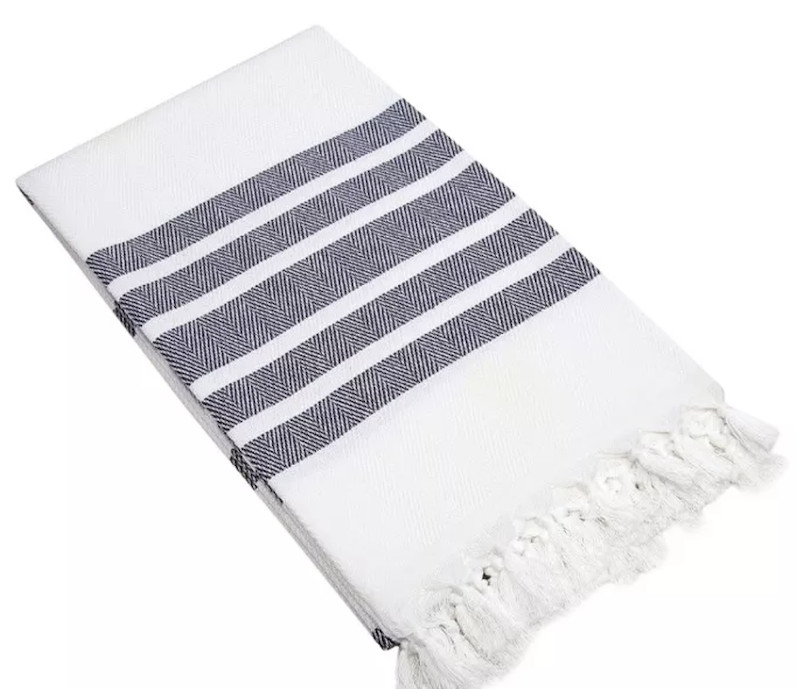
I selected this casual cotton throw in navy to tie in the navy in my velvet pillows and my navy nightstands. You can casually drape the throw over the bed, or neatly fold it at the end of the bed.  It is a fun way to add texture and bedding to your space.

Throw Pillows

I love throw pillows and they can instantly change up a space without breaking the bank.  Throw pillows can be changed out as the seasons change, and they also add color add texture to bedding like these boucle embroidered pillows.\

If you grow tired of your accent colors, changing out the pillows and throws are the best way to updated the space!

I tested out my new pillows in my living room as well, and they look just as pretty on my sofa as they do on the bed.

Don’t forgot to check out Joss & Main for their incredible home decor pieces and express yourself in this new year!

Go create something!

Are you new to my blog? Go HERE to see my home tour and HERE to shop for items I use in our home.

Find me on Facebook | Instagram | Twitter Pinterest

Shop the Post
Seasonal Decor

Landscaping Tips

Today I’m sharing some Landscaping Tips.

We have been busy prepping our home and landscaping for the holiday weekend. Toro’s all new PowerPlex™ 40V Max* Lithium Ion Products made the project a little easier.

Landscaping Tips for the 4th

Our home is twenty years old, and our landscaping is starting to show its age.  Although we will eventually need to replace much of it, we are trying to work with what we have for now which involves lots of trimming. I began by trimming the hedges and bushes with Toro’s Power Plex hedge trimmer.  I have always used an electric trimmer and dealt with a cord that was always too short and would miss spots.  However, Toro’s Power Plex Hedge Trimmer is battery-powered, and it reached wherever I needed to go!

The 24-inch trimmer is sturdy and has a 90° rotating handle.  It also has reduced vibrations because of a dual-action cutting system, and the battery allows up to 60 minutes of run time.  I was able to trim all of the bushes and hedges in my front yard using one battery!

We mulched this past spring, and the last thing I wanted was a bunch of clippings messing up our pretty mulch.  My husband suggested I lay down some old sheets to catch the trimmings, and it worked amazingly well.

There was no raking (and loss of mulch).  I just rolled up the sheets with the clippings and dumped them.  It was so easy!

After I had all the bushes and hedges trimmed, we began working on our overgrown trees.

We have several smaller ornamental trees around the house that needed trimming as well as a larger cluster of trees off the side of our home that had fairly low hanging limbs.

I put my husband to work with the Toro Power Plex Chainsaw, and I think he had a little too much fun cutting down branches.

The chainsaw (like the hedge trimmer) is battery-powered, and it is amazingly powerful!

The Toro chainsaw has a no-pull easy start – it runs on just the push of a button.  It ran only using one battery the entire time my husband was trimming trees, and it has tool-free chain tensioning (adjust by turning knobs with fingers).  It also has reduced kickback – chain, bar tip indicator, chain brake, and metal bucking teeth.

We had a pretty massive pile of limbs and branches by the time our tree trimming was complete.

Our town picks up landscaping clippings for free – we just have to set them out on the road.

Besides having well-groomed landscaping, we also ended up with a nice little pile of logs for our firepit.

The next evening we had the most gorgeous rainbow appear over our newly manicured landscaping:

We are ready for the holiday weekend thanks to Toro!

What are your favorite Landscaping Tips?

Go create something!

Are you new to my blog? Go HERE to see my home tour and HERE to shop for items I use in our home.

Find me on Facebook | Instagram | Twitter Pinterest

*This post is a sponsored post by Toro. I take pride in reviewing only products that fit my brand and will be beneficial to my readers. And while this post is sponsored, all the opinions are my own.

Home

LEVITON Smart Lighting

There is a fun new way to wake up your kids in the morning, and it involves just the touch of a button thanks to LEVITON Smart Lighting.

A few years ago, I participated in Leviton’s Renu Challenge – a competition between several bloggers.  We were asked to design a space using Leviton’s colorful light switches and outlets. After using their switches and outlets in the boys’ bathroom makeover (see all the details HERE), I ordered more for our master bathroom remodel. When Leviton recently reached out to see if I was interested in partnering and testing out their new Decora Smart line with wi-fi technology, I was excited since I was already a fan of their products.

The Decora Smart light switches are simple and classy and come in either white or light almond.  You can turn on the lights using the switch or by using the “My Leviton” app.

I have the app on my phone (it is right above my mail app in the photo above), and it works so well!

I replaced all our bedroom light switches with the Decora Smart switches.  Our man cave (which is actually our family hang-out space) is also a smart light switch.

Everyone in our family sleeps with fans, and all of our fans are now hooked up to the plug-in outlets which also have the wi-fi technology the switches have.

Leviton’s plug-in outlets are amazing.  They are easy to install (just plug them in), and almost anything can be turned on or off with just the touch of a button on the app.  If we drank coffee, I would have my coffee maker plugged into the smart outlet.  The plug-in outlets can be programmed to turn on (or off) at the same time every day!

This is where my life just got a little easier.  Although we are on our summer schedule right now (which means the kids can sleep in longer), I will be ready for the early school mornings thanks to Leviton.  I will have a school schedule on my app which will turn off their fans and turn on their lights at the same time every morning!

My dad replaced all my old switches with the new Leviton switches.

Once the switches (and plug-ins) are installed, go to the app.

The app walks you through programming, and it is really easy!

Now I can wake up my kids without even running upstairs.  I set the schedule on the app to turn on their lights (and turn off their fans) every morning.

The lights can be turned off with a touch of a button for family movie night. I made a little video to show just how easy the My Leviton app is to turn on and off the lights.  

Watch it here: 


There are so many options for the Decora Smart wi-fi light switches and plug-ins.  How would you use them in your home?

Go create something!

Are you new to my blog?

Go HERE to see my home tour and HERE to shop for items I use in our home.

Find me on Facebook | Instagram | Twitter Pinterest *This post is a sponsored post by LEVITON. I take pride in reviewing only products that fit my brand and will be beneficial to my readers. And while this post is sponsored, all the opinions are my own.  

Home

VELUX Skylights

This is a sponsored post written by me on behalf of VELUX Skylights. All opinions are 100% mine.

We are in awe of the difference the VELUX No Leak Solar Powered “Fresh Air” Skylights have made in our Man Cave.  We knew more lighting would be great for the space, but we had no idea how great of an impact natural light would make in the room.

Here is the before:

The room was dark and always felt very closed in with the low slanted ceilings.  Our only natural light source was a small window on one end of the long room.

Here is another before photo:

And here is the (amazing) after:

We removed the popcorn ceiling and painted the slanted ceiling the same color as the walls.  Once the skylights were added, the slanted ceiling (which once made the room feel closed in) now acts as a fifth wall and open up the room.  The room appears to have grown!

Randy and the crew at Circle City Skylights (serving the Indianapolis area) did a gorgeous job on the skylight installation and made use of extra space by cutting into the crawl space.

For one set of skylights, a built-in bench was added into the wall.  We now have a pretty window seat right next to the pool table.  It is perfect for taking a break while playing pool or reading a book!

Under the other pair of skylights bookshelves were built.  We now have extra storage for books and other miscellaneous items.  I also can now have live plants in the room – something that was never possible with the previous low lighting.

Our VELUX skylights are solar powered, which means we can open and shut the windows (and skylight blinds) with just the touch of a button.  We use a remote to open them.  We have our windows and blinds programed to open and shut together.  There is also a timer option which is perfect for skylights in a bedroom.  I would love to wake up to the sun as my blinds slowly opened!

There are also rain sensors outside the skylights.  We have the peace of mind knowing the skylights will shut if it rains and love VELUX’s No Leak warranty.

We selected dark charcoal black-out blinds which add a fun (and unexpected) pop of color when they are shut.  The blinds are perfect for shutting out light when we want to watch TV.

Here is one more look at the room before (notice how that ceiling once closed in the space):

And the after – notice the fifth wall (find more fifth wall inspiration at www.whyskylights.com):

We are completely thrilled with our brighter space and would recommend VELUX skylights to all our friends and family (whyskylights.com)!

I used to shy away from entertaining in the Man Cave since it was dark and not very welcoming.  We now are excited to share our space with guests!  My husband’s man cave may actually now become the family room…

Go create something!

Are you new to my blog? Go HERE to see my home tour and HERE to shop for items I use in our home.

Find me on Facebook | Instagram | Twitter Pinterest


Printables

Chore Chart for Kids

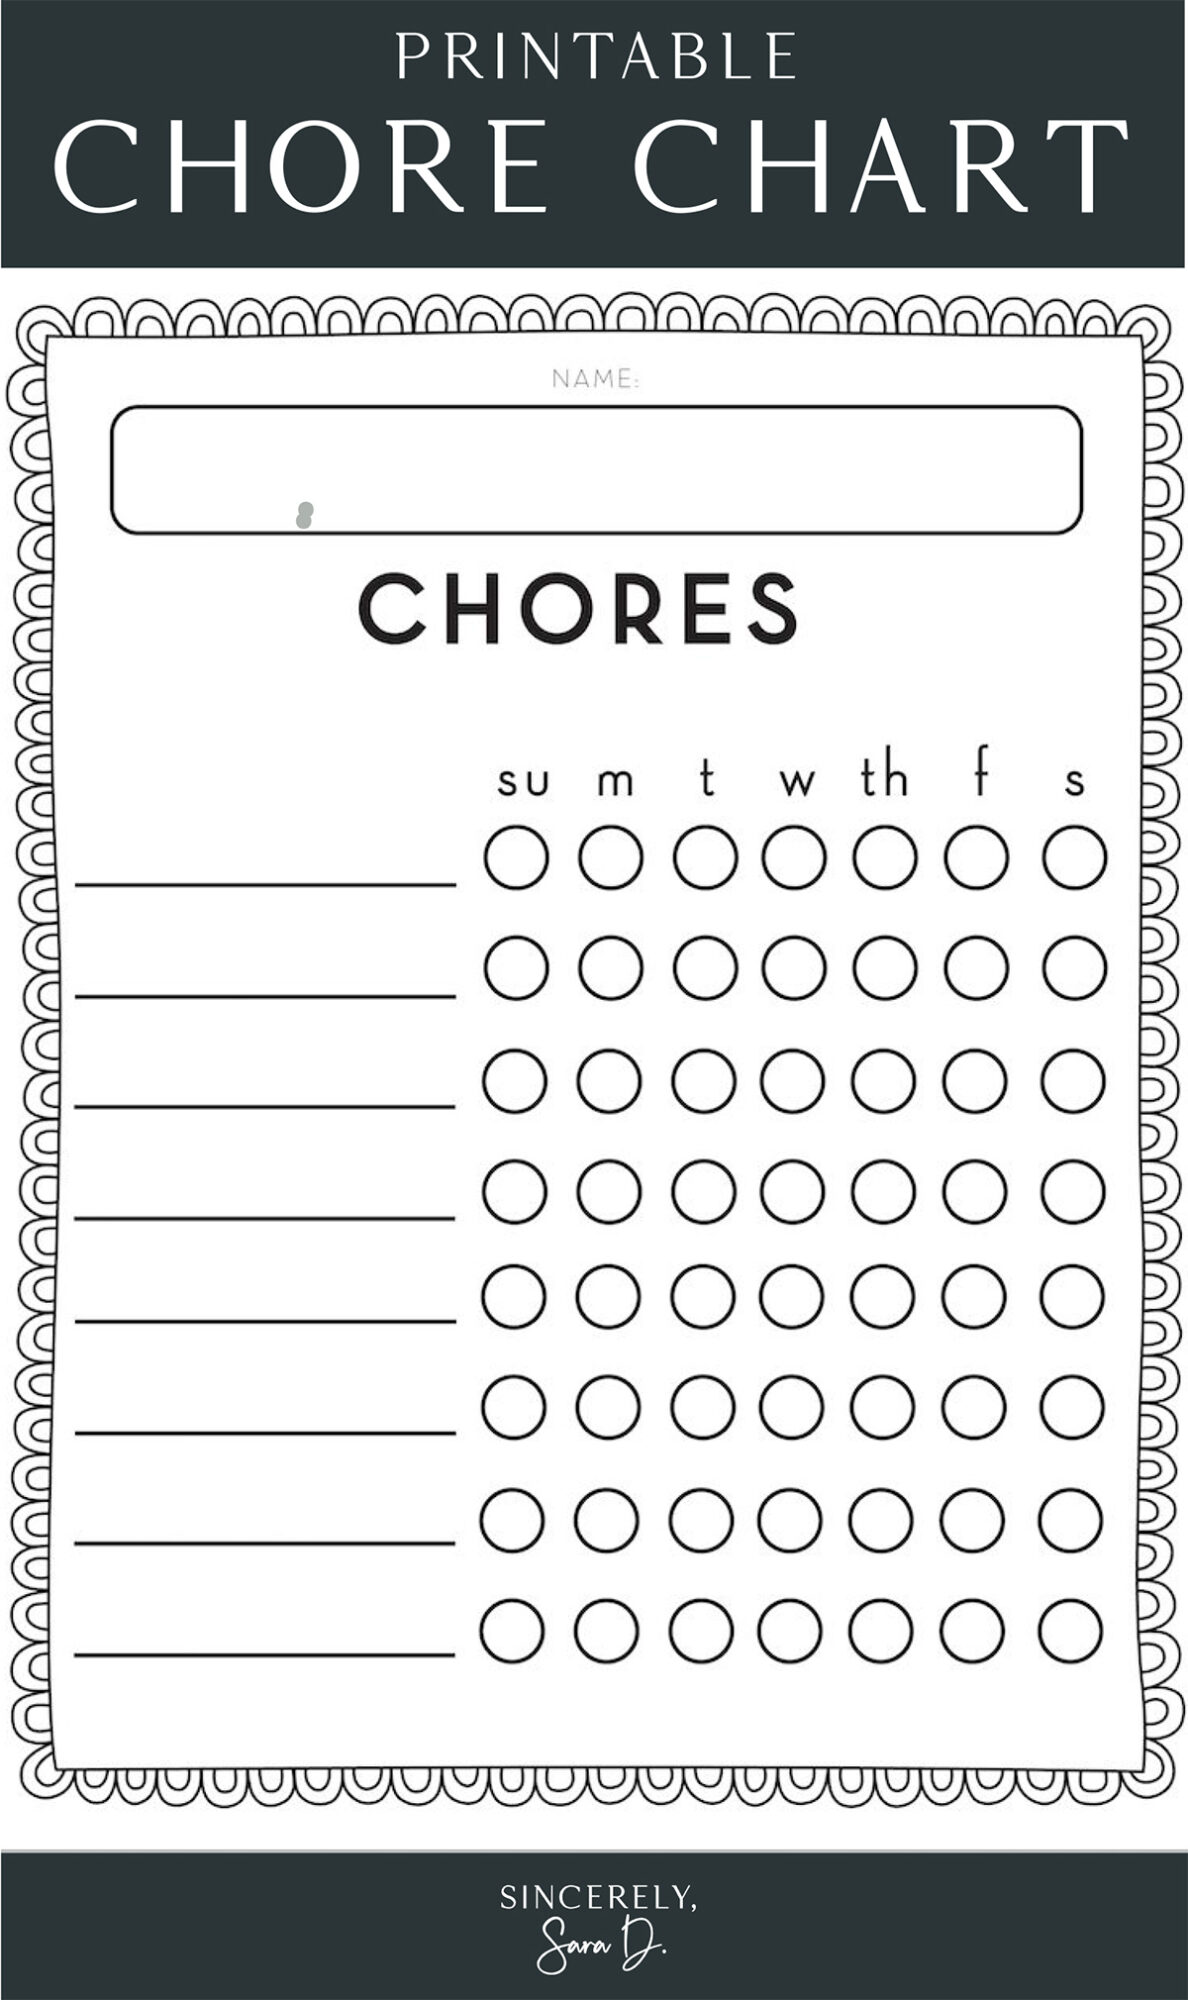
Now that my kids are getting older, one of my resolutions is to have my kids help out around the house more.  I have tried various chore charts through the years, but I always manage to not follow through with their chore routine.  It takes effort to make chores (and chore charts) happen, and I am determined to make it work this time! So, I created a printable chore chart for kids, and I’m excited to share it with you today.

Free Printable Chore Chart

In the past, I’ve made the process too complicated, so I am simplifying it as much as possible.  Each of my kids will have certain chores they are expected to complete every day.  I also decided to put their chore charts in the bathroom so there is no avoiding them.  They will see them several times during the day and hopefully we can maintain these chore charts!

I created a simple chore cart for my kids, and I am sharing the free printable with you:

(To download the JPG file, simply click and save the image below.)

You can save the PDF file of the chore chart here: 

CHORE CHART

I found frames from the dollar store and spray-painted them to match their bathroom (Lena has a fancy gold frame in her bathroom).  I wrote their daily chores on their charts and framed them. The kids mark off their chores using a dry erase marker on the glass which doesn’t require a new printout until the chores change.

My boys are 9 and 11 and share their own bathroom.  One of their daily chores is to make sure their bathroom is clean.

I’m teaching the boys to clean up any bathroom “misses.”  Say goodbye to the pee-smelling toilet area.

Is this chore chart not quite what you’re looking for?  Check out this other FREE printable chore chart.

Go create something!

I also have

Are you new to my blog? Go HERE to see my home tour and HERE to shop for items I use in our home.


Shop the Post
Home

Tivoli Audio

Tivoli Audio

This is a sponsored post written by me on behalf of Tivoli Audio. All opinions are 100% mine.

Working from Home with Tivoli Audio

Last month marked three years in our home, and next month I will be celebrating my three-year blog anniversary.  As a mom of three, I love being able to work from home while doing what I love – creating.  Blogging really is my dream job, and I could not be more thankful.

tivoli-art-speaker

My only complaint with blogging (and working from home) is solitude.  Now that my youngest is at school, I am left alone in a completely silent home (which is definitely a change after having at least one kid by my side for over the past decade).

When I was approached about partnering with Tivoli Audio, I was excited because I am constantly playing music to keep the silence away.  I fell in love with their ART Speaker.  It is a unique product that can hang on your wall like a painting or be placed on its stand as a work of art (not something you need to hide).

tivoli-art-speaker-6

Set up was fairly easy and just required downloading the ART – Tivioli Audio Wireless app which walked me through the entire setup process.

tivoli-art-speaker-7

Neatly hidden on the bottom of the speaker you can find all the buttons and other technical stuff.  I use an electrical outlet to power my speaker, but I love that there is an optional rechargeable battery to hang it without wires.

tivoli-art-speaker-8

I pick my playlist for the day, hit play from my phone, and take away the silence through music (which is so funny to me because when my kids were home all I wanted was silence)!

You can start with a single speaker and slowly build your full home system.

tivoli-art-speaker-4

Besides enjoying music while I work, I love that Tivoli Audio’s ART speaker also works for background dining music.

tivoli-art-speaker-5

The office is right across from our formal dining room.  I love to play music while entertaining (especially during the holidays), and this speaker serves both the office and our dining room perfectly.

tivoli-art-speaker-9

Tivoli Audio products are available around the world through a large dealer network as well as direct from their website: tivoliaudio.com.

tivoli-art-speaker-2

I am a huge fan of the ART speaker because of its unique mix of style and sound.  I love a product that functions well, but I really love a product that functions well AND fits into my decor seamlessly.  Tivoli Audio’s speakers makes a great gift for music, radio, and podcast lover or for yourself.

Also, don’t forget to check out Tivoli Audio’s Cube Speaker. It is a simple box that can be placed anywhere and used as a single speaker or paired with other speakers (such as the ART speaker) as part of your home’s system.  It doesn’t take up much space and can be easily moved from room to room with the optional battery back and no wires.

Do you play music in your home?  I would love to know where you would put your Tivoli Audio ART (or cube!) speaker.  Don’t forget to sign up for Tivoli Audio’s emails and receive 10% off your purchase!

Go create something!

Are you new to my blog? Go HERE to see my home tour and HERE to shop for items I use in our home.

Find me on Facebook | Instagram | Twitter Pinterest


Decor

Entry Makeover

It’s amazing what a little paint did for our Entry Makeover!

This is a sponsored post written by me on behalf of FrogTape®. All opinions are 100% mine.

Entry Makeover with Frog Tape

The entry is the first impression guests have of your home.  My entry was fine, but I knew it could be better.

Here is a before shot of the entry:

Using Frog Tape on Trim (1 of 1)

I have never loved the front door, but I do try to make the best of it.  It was a burgundy color when we bought the home, but I painted it gray and more recently the black you see above.

It still was not the statement it wanted to be.  I love the black trim I am seeing everywhere.  Although most of my home doesn’t lend itself to black trim, I really felt it would work well in our entry.

I began with FrogTape®.

Using Frog Tape to Paint (1 of 1)

I used the green multi-surface FrogTape® to protect the drywall next to the trim.

Using Frog Tape to Paint trim (1 of 1)

And the yellow delicate surface FrogTape® was used to protect my recently painted front door.

Using Frog Tape on Delicate Surfaces (1 of 1)

When painting trim, you also want to fix any pieces that may require attention.

Fix Trim around Door (1 of 1)

I had a piece of trim above my door that had popped out, so I nailed it back in place.

Tips for painting Trim (1 of 1)

Before painting trim, you also need to wipe down any dust and grime.

Wipe down trim before painting (1 of 1)

Once the trim is all prepped (taped, repaired, and cleaned), you are ready to begin painting.

I always like to test previously painted surfaces to see if it has been painted with an oil-based or latex paint.

Testing for Oil-based Paint (1 of 1)

Using nail polish remover, I wiped some of the painted trim,  If it comes off, you will know it is water-based paint.  If it is clean, it is oil-based.  I had paint on my cloth, so I knew my paint was water-based (latex).

I prefer to use water-based paint whenever possible, and I found this latex in black.

Painting Black Trim around Door (1 of 1)

Using a small angled brush, I painted all the trim.

Painting Black Trim (1 of 1)

I started on one side and painted across the doorway.

Using Frog Tape for Painting Project (1 of 1)

I also painted the inside trim inside the door.

I let the first coat dry according to the manufacturer’s instructions and painted a second coat.  Once the second coat was dry, I began removing the tape.

FrogTape® brand painter’s tape is the only painting tape treated with patented PaintBlock® Technology.  PaintBlock® reacts with the water in latex paint and instantly gels to form a barrier against paint bleed giving you the sharpest paint lines possible

Removing Frog Tape (1 of 1)

FrogTape® removes easily and quickly.

Using Frog Tape on Painted Surface (1 of 1)

I am so happy with the end result!

DIY Entry Update (1 of 1)

The black trim adds a cohesive (and grand) look to our entry.

DIY Black Trim (1 of 1)

How to update an entryway (1 of 1)

Want to see more painting ideas besides our entry makeover? Check out FrogTape® painting inspiration!

Go create something!

Are you new to my blog? Go HERE to see my home tour and HERE to shop for items I use in our home.

Find me on Facebook | Instagram | Twitter Pinterest


Home

Inexpensive Window Treatment Ideas

Today I’m sharing some inexpensive window treatment ideas.

Tips and Tricks for Inexpensive Window Treatments

Here in Indiana, we have had a crazy hot end to summer.  Most days, I love opening my window treatments to let the sunshine in, but lately, I have been using my shades and window treatment to help conserve my air conditioner.  

Window treatments are used throughout our home.  Not do curtains help conserve the air conditioner, but they look pretty.  On the back (East) side of our home, we only have curtains which can be closed if necessary.  However, since this side of the home sees the morning sun there isn’t a privacy issue (there is a field behind our home), we rarely need to use these window treatments.

Elegant-Kitchen-Nook-Decor (1 of 1)

The front of our home faces the west and sees the hot afternoon/evening sun.  We have blinds AND curtain panels on these windows, and lately, we have been closing both to keep our home cooler.

Minted Silhouette Artwork

Window treatments can get expensive, but here are a few DIY tips for inexpensive window treatment ideas:

Often, the longer odd-sized curtain panels can be found on clearance.  Snatch them up because there are three simple ways to adjust them so they fit your window.

1. Adjust the length by hemming them.  If sewing is not your thing, recruit someone who can help.

 How to save on window treatments (1 of 1)

2. Use drapery ring hooks. Fold over curtain panels that are too long on drapery ring hooks to hold the fabric in place.  This method also helps extend the length if your curtain panel is just a tad too short.

Inexpensive Window Treatment Ideas (1 of 1)

3. Use hem tape.  The iron-on version works great for lighter-weight fabrics.

New Sew Curtains (1 of 1)


Go create something!
Are you new to my blog? Go HERE to see my home tour and HERE to shop for items I use in our home.
Find me on Facebook | Instagram | Twitter Pinterest


Printables

Printable Dish Soap Label

I’m excited to share this printable dish soap label with you today.

 Printable Dish Soap Label

I like when things are clean.

But when things can be clean AND cleaned with a non-toxic product, it is a win-win in my book.

ecover-Liquid-Dish-Soap (1 of 1)

I recently had the opportunity to test ecover liquid dish soap in Pink Geranium.  Not only did it give me spot-free, sparkling clean dishes, but ecover is made with naturally derived ingredients (it is people, pet and planet-friendly).

ecover-Liquid-Dish-Soap-Geranium (1 of 1)

One squeeze is all you need for a sink full of dirty dishes.  And that one squeeze gives you a sink full of bubbles – which is important to me.  I want lots and lots of bubbles.

ecover soap (1 of 1)

ecover Dish Soap has a soft, pretty scent and is gentle on your skin!  It almost makes doing dishes (a little) fun!

Printable-Vintage-Dish-Soap-Label (1 of 1)

I am pretty minimal when it comes to what I put on my kitchen counter.  I love the look of vintage bottles and labels, so I decided to recreate that look for my new dish soap.  This may be one of the easiest DIYs ever, and you can also recreate this vintage dish soap dispenser with my free printable (a super easy tutorial)!

Here’s a close up on the label:

Print

Do you think I won’t find any more dirty dishes sitting in the sink anymore? A girl can dream, right?!

Print

You can print the PDF of the dish soap label file HERE ->

Dish Soap Label

The bottle is an inexpensive dispenser I found online.  You may have an old soap dispenser just sitting around that could work for this project.

DIY-Decorative-Dish-Soap-Bottle (1 of 1)

I spray-painted the pump gold because I have to paint something in every DIY project (and I love the gold with the amber glass).  I just added a bag around the part of the pump I didn’t want to be painted.  I also spray-painted the pump in a shoebox.  It is easy and mess-free (but make sure you paint outside)!

Gold-Spray-Paint (1 of 1)

I printed out a label and used spray adhesive to place it around the bottle.  If you are concerned about getting the label wet, you can put packing tape over the label to protect it from water.

Adding-a-label-to-glass (1 of 1)-2

And it really is that easy to create a “vintage” dish soap dispenser that is pretty enough to sit out all the time (and maybe encourage dish-washing)!

DIY-Vintage-Soap-Dispenser (1 of 1)

ecover Dish Soap works (1 of 1)


Go create something!

Are you new to my blog? Go HERE to see my home tour and HERE to shop for items I use in our home.

Find me on Facebook | Instagram | Twitter Pinterest


This is a sponsored post written by me on behalf of ecover. All opinions are 100% mine.

Home

Hide Ugly Outdoor Units

Here’s an easy way to hide ugly outdoor units.

Hide Ugly Outdoor Units with Freedom Connections™

This is a sponsored post written by me on behalf of Freedom Outdoor Living. All opinions are 100% mine.

We have a pool heater, pool filter, and two air conditioning units on the side of our home.  They are along the sidewalk that everyone uses to walk around our home, and there is nothing pretty about it.

Fencing BEFORE

Adding a fence around pool filter

Even my flowers could not make that ugly pretty.

I was excited to partner with Freedom Connections Decorative Fencing and fence everything in!  Freedom Connections™ is a flexible, decorative fencing product available exclusively at Lowe’s. It’s easy to install with materials you can find at Lowe’s (requires no hardware or glue) and can be reconfigured as your needs change. It can be installed without digging holes, which is often the toughest part of installing a fence.

The vinyl fencing is available in three heights, three decorative panel options, and a two-sided solid panel that can be mixed and matched, stacked, staggered, used in straight runs, or joined to form corners.  For my project, I used 10 3-tier posts (you always need one more post than panels to finish your design).

Freedom Connections 3-Tier Post

I also used 20 plain panels.

Freedom Connections Solid Panels

And finished the fence with 5 circle panels.

Freedom Connections Circle Panels

To begin, you take out the stake stored in the post and pound it into the ground.

Installing Connections Fencing

I marked off the halfway point on the stake, and we drove them into the line.

Installing stakes

The stakes are put 37 1/4″ apart.  It’s very important you get the link of stakes and straight as possible.

Spacing Stakes

Once the stakes are down, you can add the posts.  Then, you simply begin sliding the panels in.

Freedom Connections

The bottom panels require removing the top.

Remove top piece on panel

 I used two solid panels and finished with the decorative panel.

Hiding air conditioner

Adding fence to outside

Once the side was complete, we worked on the other side repeating the process.

Fencing around air conditioners

Easy panel installation

And she looked great.

Fence Complete

Until we realized our mistake.

Fence Mistake

The fence went beyond the house which meant this panel would be set back further than the other side since it had to be in front of our house.

So, I pulled down the panels we had just installed (which was really easy), and I began working on the other side first.

We had trouble with the wall being unlevel on our first attempt, so I leveled the ground before I installed the panels this time.

Adding a DIY fence around air conditioners

Steve was gone, but I was able to install everything completely on my own.

Freedom Connections from Lowes

How to hide air conditioner unit

Unfortunately, we have high winds in Indiana, and there is no windbreak coming from the field behind us.  After a storm and some higher than normal winds, one of the panel’s end stakes bent.

Fencing too heavy

We added a 2×2 to the end post of both sections of the three-paneled fencing.

Adding post to fence

We made sure the post was level, and my husband drove it into the ground and secured the fencing post to the 2×2 with screws.

Adding support to fencing

If you need to reinforce the fencing, an easier option I just discovered is the Blue Hawk Steel rebar, available at Lowe’s in a .75″ X 36″ Size that would be long enough to support three Connections panels. The rebar is available in stores for $4.88 per stake. Lowe’s also has a Blue Hawk Steel rebar that is even stronger and it is available online.

Freedom Connections Fencing

This fencing is really easy to install (one person can do the installation), and the sides which only have two panels are very secure.  If you go longer than two panels on the three-tier fencing, you may want to secure using the suggestions I mentioned.

Circle Panels

I love how tidy the side of the house looks with all the ugly units tucked away inside the fence.

Hiding ugle outdoor units

And my boys love their new nerf gun war fort.

Love outdoor projects?  Check out how we added curb appeal to our home HERE.  

Go create something!

Are you new to my blog? Go HERE to see my home tour and HERE to shop for items I use in our home.

Find me on Facebook | Instagram | Twitter Pinterest


Home

Organizing the Garage

When the weather gets warmer, it’s always time to think about organizing the garage.

This is a sponsored post written by me on behalf of Gladiator GarageWorks. All opinions are 100% mine.

 Organizing the Garage with Gladiator

Our driveway wraps around to the side of our home where our garage is.  Because of this, most of our guests end up parking outside our garage and walking through the garage before entering our home.

This past winter, it was just too cold to deal with the garage chaos.  Instead, I did a lot of apologizing to my guests.  However, springtime is here, and it is time to start cleaning and organizing!

Here’s what my garage looked like before:

Garage Storage BEFORE

We do a pretty good job of not keeping a lot of junk, but with a family of five, we manage to have a lot of things.  The unorganized clutter was embarrassing and a better storage solution was needed.

Garage Storage - AFTER

The timing was perfect when I was asked to partner with Gladiator GarageWorks and show my “Spring Keeping” with their great product.

Gladiator Storage Wall

Gladiator sent me the highly-rated Premier Series Modular GearBox.  It was delivered almost fully assembled.  I only had to add the side bumpers and wheels – which was really easy.

Whirlpool Gladiator

I love that the GearBox has a round key door lock.  Although I am currently storing my kids’ things inside, I have the option of storing our power tools in a safe place – out of their reach!

Locking Gladiator Cabinet

Gladitor Quality

The heavy gauge top mat of the GearBox is cushioned and removable, providing a work surface that is great for small repairs. The cabinet has a bucket-top design that keeps your tools and small parts from rolling away

Gladiator Storage Cabinet Breaks

The GearBox travels on durable five-inch by two-inch casters — the rear casters swivel for easy steering, and the front casters lock the unit in place.

Gladiator Cabinet Doors

Gladiator Storage

The Gladiator GarageWorks Premier Modular GearBox provides versatile and accessible storage for the tools, parts, and household items that you keep in your garage. The GearBox features a non-slip, cushion-lined shelf that extends 20 inches beyond the cabinet front, ensuring easy access for loading and unloading. You can also remove the tray glides and reinstall them in different positions to customize the GearBox for your tools and gear.

Gladiator Sliding Door

Gladiator Garage Storage System

I was such a fan of the Gladiator Gearbox that I went ahead and ordered some additional storage system from their line.

The ball caddy allows access to any ball in the caddy, and you do not have to pull out other balls in the process.  The basket is larger and stronger than I expected.  The channels were easy to hang using screws, and the hooks are great for hanging all types of things.

Gladiator Garage Storage

Now I can be proud of the garage and welcome my guests in!

Don’t forget to check out Gladiator Garage Works on Facebook: Gladiator GarageWorks Facebook

Go create something!

Are you new to my blog? Go HERE to see my home tour and HERE to shop for items I use in our home.

Find me on Facebook | Instagram | Twitter Pinterest