Paint

Decorating with Navy

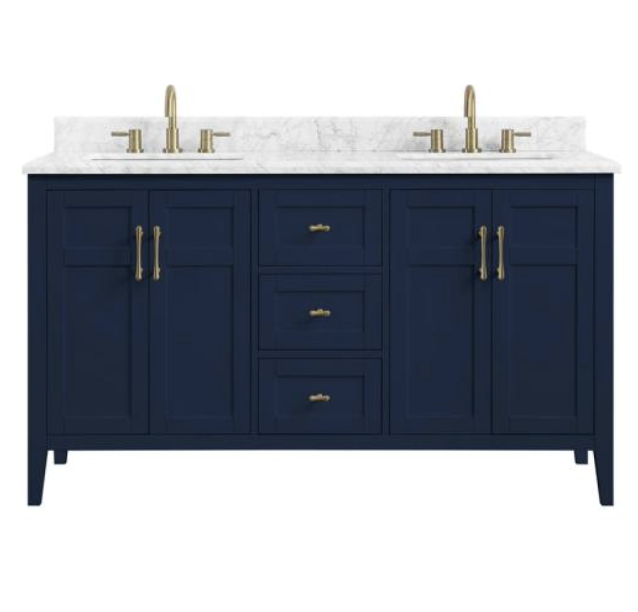
Navy blue is a modern neutral that plays well with just about any color, including every other shade of blue which is why decorating with navy is so easy.

I partnered with Amy Howard Home to share their Color of the Month. This is a new monthly subscription where Color of the Month subscribers will receive a new color every month exclusive to the club. This month’s Color of the Month is Button Up Blue, and it is a beautiful navy blue.

Navy Blue is a very dark shade of the color blue, and it got its name from the dark blue worn by officers in the Royal Navy (which was adopted by other navies around the world).

Blue is one of the world’s most popular colors (with nearly half of men (42%) and one-third of women (30%) claiming blue as their favorite color). It is the color of skies and oceans and is often described as being tranquil, peaceful, secure, and full of serenity. Blue can lift our mood and improve the energy of a space.

From a color psychology perspective, blue is typically associated with stability and trustworthiness—there is a reason blue is universally appealing. By incorporating this shade of blue into your designs, you can create a sense of stability in your space.

Digging even deeper into blue tones, different blue tones evoke different feelings:

  • DARK BLUE: trust, dignity, intelligence, authority
  • BRIGHT BLUE: cleanliness, strength, coolness
  • LIGHT BLUE: peace, serenity, spiritual

Navy’s dark tones capture the eye and cause brighter colors to pop. It compliments all styles of decor, and is a wonderful color to add to any space. However, it is a very dark color that should be balanced to ensure it doesn’t overwhelm.
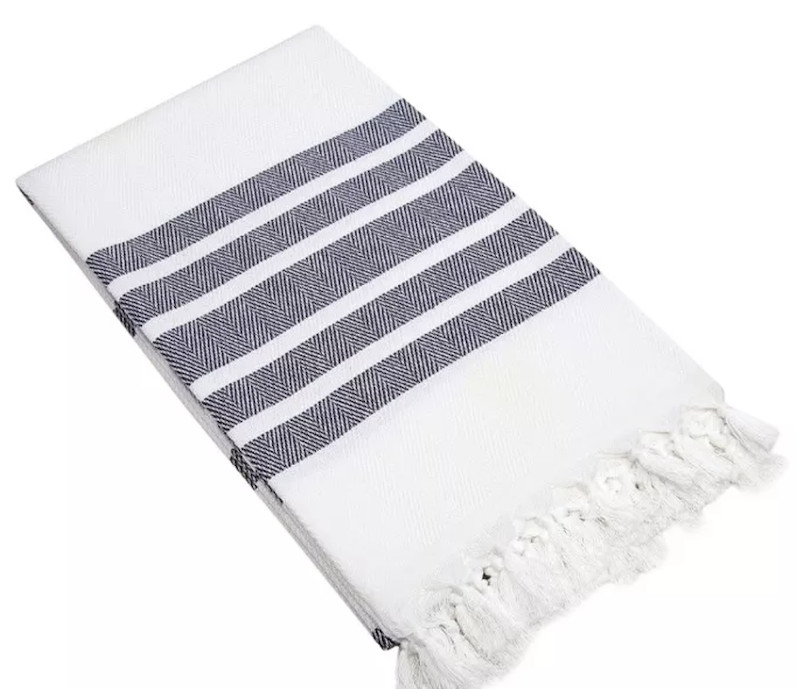
Navy & White

White is a classic high-contrast partner that compliments navy well. Consider painting furniture or cabinets in Button Up Blue with a backdrop of crisp white walls for an energizing effect. In addition to white, consider cool snow-white, off-whites and creams to partner with navy.

I’ve paired Button Up Blue with various colors from the One Step Paint line (minus gold) for each color palette:

Navy & Yellow

Yellow creates a dynamic color scheme when paired with navy blue. Shades of yellow (soft butter yellow and rich mustard yellow) offer warmth and brilliance as they stand out vividly against the cool deep tones of navy blue. Us this color combination for your space as blue and yellow are opposites on the color wheel and play well together

Navy & Gold

Similar to yellow, gold is a perfect complement to navy blue. Incorporate the color into your navy blue room with metallic gold accents and this hue lightens up dark navy blue colors to ward off a gloomy look. A large gold mirror on a navy blue wall, for example, will reflect light around the space to create an expansive effect.
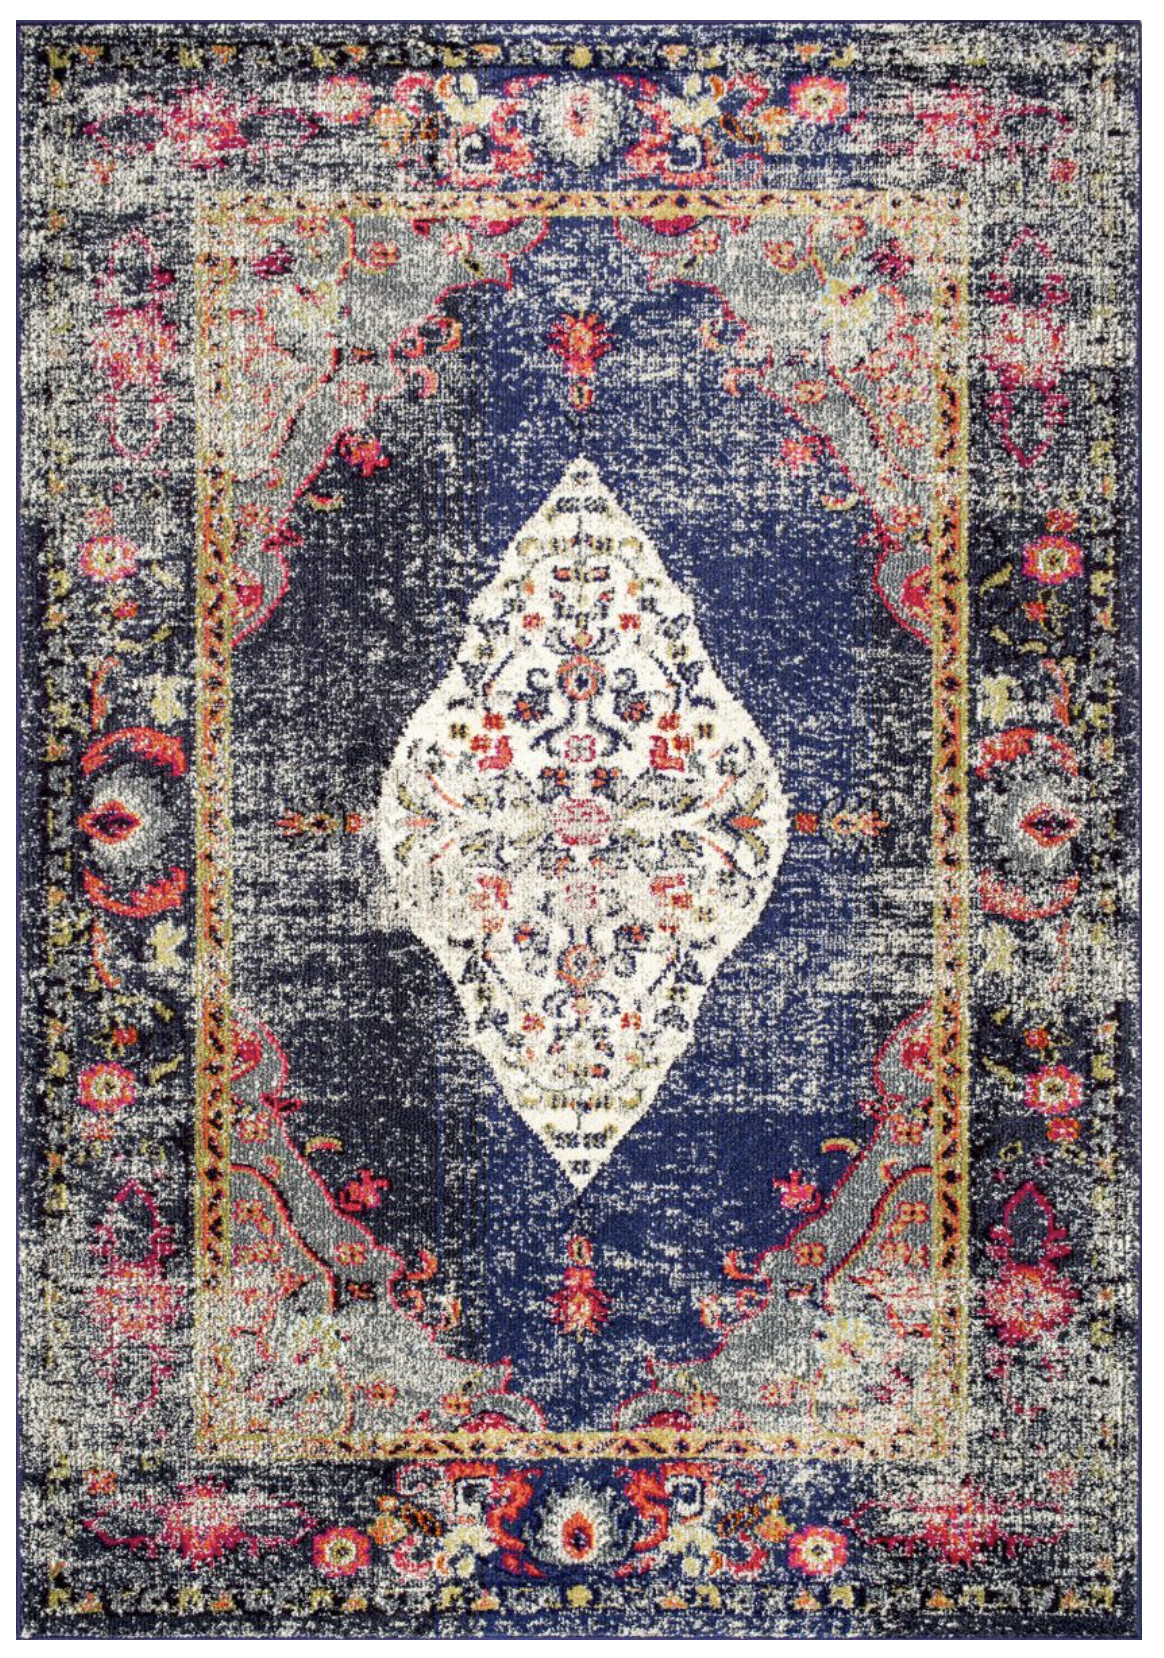
Navy & Pink

Decorating with Navy

Pink adds a sweet note to the soft navy, and just about any shade of pink works well with navy – everything from the most subtle blush to the loudest fuschia.

Navy & Red

Red and navy is an all-American pairing. It is a classic interior color scheme, and red provides a striking contrast against navy blue – especially in more modern or eclectic designs. Consider pairing navy with more muted shades of red such as salmon, burgundy or brick red to provide a more sophisticated tone.

Navy & Green

Navy and green work well together because green is created from blue (mix yellow with blue and you have green). Both are colors of nature and live together in perfect harmony. The luxurious tones looks gorgeous together – think about more jewel-toned hues of green to make an space feel sumptuous.
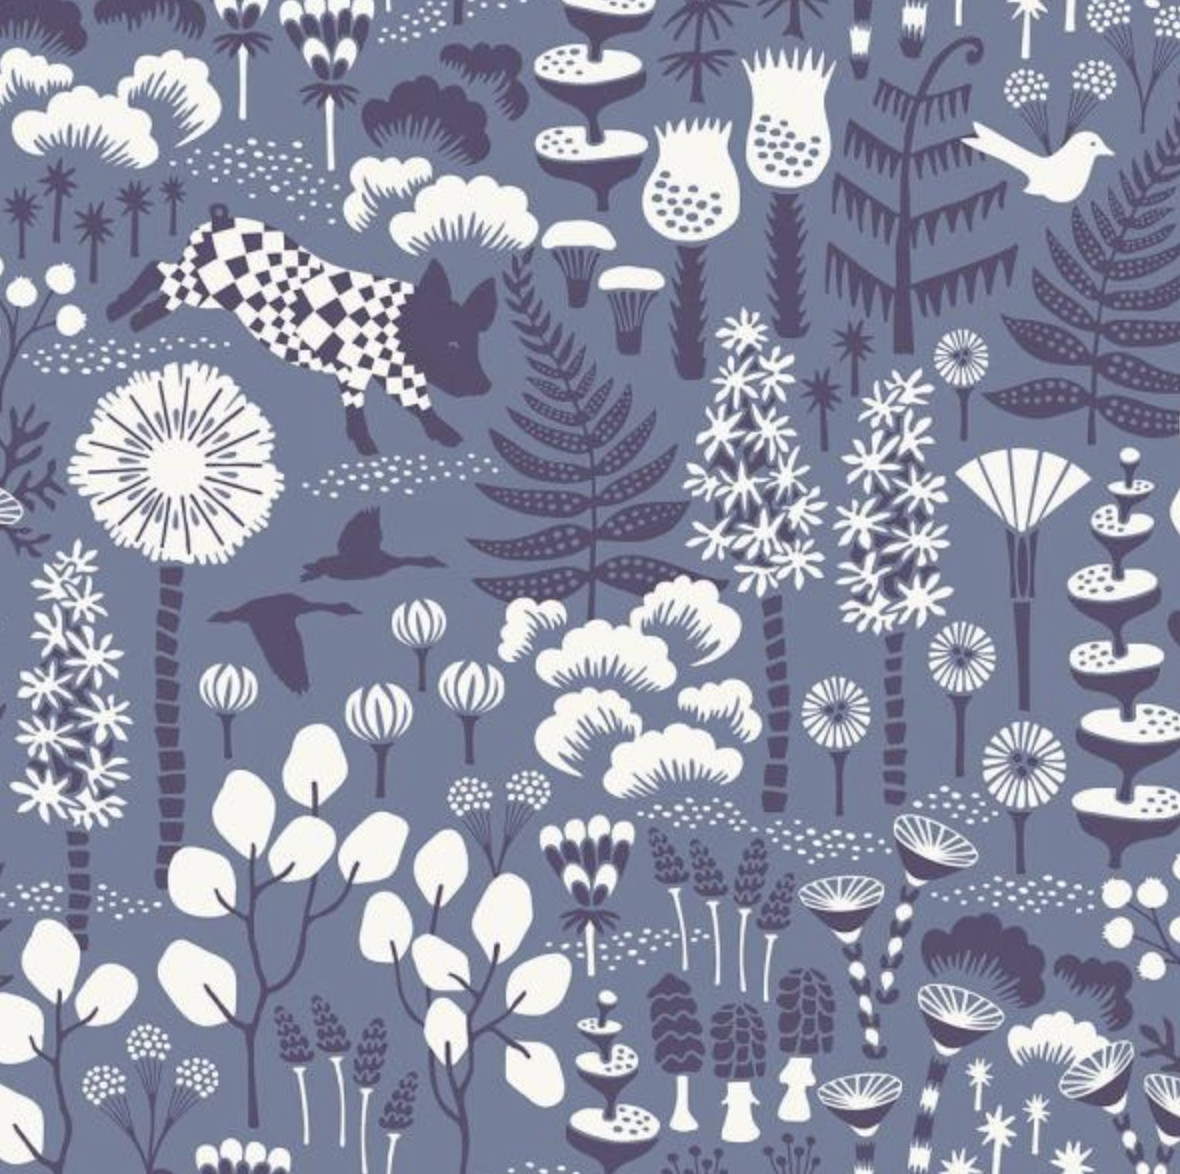
Navy & Blue

Mix blues together to create a serene color scheme that is reminiscent of clear blue skies over large bodies of water. For a monochromatic color combination, select lighter shades of navy or for a more tropical look, choose green-tinted colors such as aqua and turquoise.

Go create something!

Are you new to my blog? Go HERE to see my home tour and HERE to shop for items I use in our home.

Find me on Facebook | Instagram | Twitter Pinterest

*This post contains affiliate links and is a sponsored post by Amy Howard at Home. I take pride in reviewing only products that fit my brand and will be beneficial to my readers. And while this post is sponsored, all the opinions are my own.

Shop the Post
Paint

Majesty: a Gorgeous Aubergine Color

Majesty: A Gorgeous Aubergine Color

I partnered with Amy Howard Home to share their Color of the Month. This is a new monthly subscription where Color of the Month subscribers will receive a new color every month exclusive to the club. This month’s Color of the Month is Majesty, and it is a gorgeous Aubergine color.

Majesty: A Gorgeous Aubergine Color

Majesty: a Gorgeous Aubergine Color

If you’re not familiar with One Step Paint, it is the easiest paint to use. It requires no sanding or priming, and I used Majesty One Step Paint on my bedroom nightstands and love the result! I also used One Step Paint on my laundry room cabinets, and they have held up so well.

Join me LIVE on Amy Howard Home’s Facebook page on October 22nd at 8pm EST where Amy Howard and I will talk about Majesty and the Color of the Month subscription!

I love to talk color theory, and I’m talking specifically about why the color of the month is so special while sharing several different accent colors to pair with October’s Color of the Month (Majesty). Read on to learn more!

AUBERGINE (ow·br·zheen)

Aubergine is a dark, brownish-purple hue resembling skin of eggplants. It’s the perfect fall color and is flattering both in home décor and in fashion. It has the warmth and energy of red and the calmness and coolness of blue – to create any purple color, a mix of red and blue are needed. Red, blue and yellow are primary colors, aka, the root colors of all the other colors that are created.

In color theory, these three colors (red, blue, and yellow) are the building blocks of the color wheel. The combination of these primary colors creates secondary colors. Mixing blue and yellow together creates green, mixing yellow and red creates orange and mixing blue and red creates purple. The simple mix then needs tone, tint and shade to build a more complex color like an aubergine color. The resulting mix is called a tertiary ( TER-she-err-ee ) color. Red and purple mixed together create a complex tertiary color that can be used with white or brown to create an eggplant hue.

Majesty: a Gorgeous Aubergine Color

What is Aubergine Color Like?

Because this color falls into the middle of the color spectrum, meaning it isn’t too warm or too cool, it makes a fabulously flattering color. The director of the Pantone Color Institute calls the tone “the perfect purple” because it is extremely versatile, almost like a black, a dark brown, or a navy. In ancient times, purple was associated with rank and royalty.  In psychology it radiates confidence and self-esteem, so it’s a fantastic color all around. In design, aubergine looks very solid and luxurious which is why I love it.  It can create a cozy and comfortable environment while being sophisticated.

White and Aubergine Color

White is by definition all colors combined, which might be exactly why it goes together so well with pretty much any color.

Aubergine and Cream

The slight touch of pink in this off-white color helps to create a relaxing balance to the vibrant, energetic vibe that comes with a purple color palette. The end result feels fresh without feeling overwhelming.

Aubergine and Greens

Aubergine is a color that goes particularly well with other colors with which it might be paired in nature. That is particularly true when it comes to green, which is one of the best colors to complement purple of all shades. The nature-inspired pairing is sure to create a sense of positive energy in any room.

Brown and Aubergine

Similarly, a deep brown looks perfect with aubergine, as it is reminiscent of an eggplant growing in fertile soil. This color pairs well with dark brown and the combination with natural textures such as wood and leather it creates a very masculine and sophisticated look.

Aubergine and Gray

Going along with the whole eggplant in nature theme, gray is a perfect shade to match an aubergine color scheme. The clean, earthy tones will create a warm, pleasant and sophisticated look.

Dark Blue and Aubergine

While aubergine is well suited to match many natural shades, blue can be difficult to pair with it since purples naturally have so much blue. However, rather than shying away from the blue, go with a nice deep shade that stands out even against the vivid shade of aubergine. The dynamic color scheme creates a vibrant feel in a room.

Aubergine and Purple

Purple on purple? Yes! Purple on purple creates a dramatic, vibrant look sure to catch the eye. If you like purple, consider layering aubergine with shades that have more white (lilac) or more red (plum) for a look that is sure to impress.

Black and Aubergine

Not everyone will feel comfortable with a space this dark in the home, but it does provide a warmth and mystery created by these dark colors.

Aubergine is the perfect color to add to any home – especially as we all gravitate towards deeper fall colors. To make it easy for you, I created three different Amy Howard at Home One Step Paint color combinations using Aubergine as the focal point.

Favorite Aubergine Color Combinations

As I mentioned earlier, Majestic is only available to Color of the Month subscribers. However, you can get a similar look with Amy Howard Home’s One Step Paint in Aubergine (although the paint color Aubergine is darker than Majestic). I’ve paired the Aubergine paint color with other beautiful One Step Paint Colors.

Aubergine, Lilacs a Bloomin’ and Orchid.

Aubergine, Lime Lime and Mai Dragon

Aubergine, Dunavant Green and Palmer Pink

Aubergine is the perfect fall color for any home and any style. Don’t forget to check out Amy Howard Home’s new Color of the Month subscription, so you can have the exclusive Majesty: a gorgeous Aubergine paint color. If you join, you’ll have video training with me talking all things color theory along with:

  • 32oz can of the color of the month
  • Free Shipping
  • 10% off site-wide discount code
  • Stir Stick

Go create something!

Are you new to my blog? Go HERE to see my home tour and HERE to shop for items I use in our home.

Find me on Facebook | Instagram | Twitter Pinterest

*This post contains affiliate links and is a sponsored post by Amy Howard at Home. I take pride in reviewing only products that fit my brand and will be beneficial to my readers. And while this post is sponsored, all the opinions are my own.

Home

Barn Wood Fireplace Makeover

If you’re a fan of primitive or rustic farmhouse decor, then you need to check out this barn wood fireplace makeover.

 Fireplace Makeover with Paint and Barnwood

A friend of mine recently moved into a new home, and she wasn’t in love with her fireplace and surrounding bookshelves.  We completely transformed the area with barn wood and some paint. Here is a photo of the before:

Fireplace BEFORE makeover

She wanted to update it without doing any major renovations.  With my limited Photoshop skills, I came up with a plan:

Print

My suggestion was to add a mantel, install wood paneling on the back of the fireplace, paint the bookshelves gray, and add new hardware to the cabinets.

Here’s our after:

Making over a Fireplace

Inspire, a local company that specializes in unique construction and remodeling added old barn wood to the fireplace and created a rustic mantel to complete the look.

Adding Barnwood to fireplace

After the barn wood was installed, I painted the bookshelves and cabinets with Amy Howard’s One Step Paint in Selznick Grey.

Amy Howard Selznick Grey

I used the Matte Sealer to complete the look.

Amy Howard Sealer

We ended up using the same hardware, and I painted it using Rust-Oleum’s Metallic Spray in Oil Rubbed Bronze (affiliate link):

Painting Bookshelves with Chalk Paint

I also spray painted the fireplace screen and surrounding brass with Rust-Oleum’s High Heat Enamel Spray in black (affiliate link):

My friend went to a local store called Open Gate Design and Decor and had a blast shopping for the mirror and all the accessories.

Barnwood on Fireplace and Painted Bookshelves

Accessories for Bookshelves

Barnwood on Fireplace

It was fun to help transform the fireplace and bookshelves into a centerpiece for my friend’s home.

Painted Bookshelves and Paneled Fireplace

Fireplace Makeover Thanks for letting me help with your barn wood fireplace makeover, Kate!

Go create something!

Are you new to my blog? Go HERE to see my home tour and HERE to shop for items I use in our home.

Find me on Facebook | Instagram | Twitter Pinterest

Fireplace Makeover with Paint & Barnwood

Paint

Painting Cabinets with Chalk Paint

Today I’m sharing all about painting cabinets with chalk paint.

Painting Cabinets with One Step Chalk-Type Paint

I recently shared my laundry room makeover (to see more, click here). My laundry room lacks natural light, and I painted the cabinets to brighten the space.

Here’s the before:

Laundry Room - BEFORE

And the after:

Laundry Room Makeover To paint my cabinets, I used a chalk-type paint from Amy Howard at Home.  I love this paint because it eliminates the need for sanding or priming.  There is no prep work!  Here’s what is needed:

To begin, remove the hardware from the cabinets.

Remove Hardware before Chalk Paint

 Next, wipe down the cabinets with Simple Green All-Purpose Cleaner.

Clean Cabinets Before Painting

Use painter’s tape to tape off areas where needed.

Taping off Cabinets Before Chalk Paint Now it is time to paint!

Amy Howard One Step Paint Linen Begin with a brush to get all the areas the foam roller will not reach.

Using a Brush with Chalk Paint After the hard-to-reach areas are done, add a coat of paint to everything with the foam roller.

Rolling Chalk Paint Amy Howard Once the first coat of paint is dry, give everything a second coat.

Amy Howard Paint on Cabinets

I painted the insides of my cabinets with Vintage Affliction.

Amy Howard at Home One Step Paint

I painted the inside of the cabinets similar to how I painted the cabinet doors.  I used a brush for the hard-to-reach areas and went back through with the foam roller.  I gave the insides of the cabinets two coats of paint.

Trimming cabinets with Brush

Amy Howard One Step Paint Cabinets

I also painted the shelves.

Painting Cabinets with One Step Paint

Once the paint is dry, finish with Amy Howard’s Matte Sealer.  Add two coats using the brush and foam roller.

Amy Howard Sealer

My laundry room cabinets were painted in one day, and what a difference it made!

Starched Fabric Walls in Laundry Room

Laundry Room Reveal

I’ve painted a lot of cabinets over the years.  Here are a couple of other tutorials you may be interested in:

Happy Painting, and let me know if you try painting cabinets with chalk paint!

Are you new to my blog? Go HERE to see my home tour and HERE to shop for items I use in our home.

Find me on Facebook | Instagram | Twitter Pinterest

*This post contains affiliate links and is a sponsored post through Amy Howard at Home. I received compensation in the form of product in exchange for my review. I take pride in reviewing only products that fit my brand and will be beneficial to my readers. And while this post is sponsored, all the opinions are my own.    

Paint

One Step Paint Tutorial

Amy Howard One Step Paint Tutorial – this paint is SO easy to use!

Amy Howard at Home One Step Paint Tutorial

About a month ago, I bought a bench at an auction.

I bought it because I saw what it could be, and it had beautiful bones.  I knew I could fix the dark brown (cracked and peeling) faux leather cushion and the (chipping) finish.

EBTH close up

This post contains some affiliate links for your convenience. Click here to read my full disclosure policy.

I recently spent some time in Memphis with the Amy Howard team.  I was excited to use what I had learned while there, and I gave the bench a makeover with Amy Howard at Home One Step Paint.

One Step Paint by Amy Howard

One Step Paint eliminates the need for sanding, stripping, and priming, and it has the chalky finish you know I love.   I cleaned my bench, and I was ready to paint!

Amy Howard at Home One Step Paint

One step paint is meant to be sheer, but you can add a second coat if you prefer complete coverage.  For my bench, I was looking for more of a washed look, so I painted only one coat of Atelier.

Amy Howard at Home One Step Paint on fabric

Although I eventually want to reupholster the bench seat (the faux leather is in bad condition), I decided to paint it as a temporary fix. I used the One Step Paint in Bauhaus Buff.  I stippled it on using a large round brush.

Painting Leather Amy Howard at Home One Step Paint

Since I wanted complete coverage, I added a second coat once the first coat was dry.  (I finished the seat by sealing it with antique wax, and the cushion was complete!)

Covering Paint brushes

In-between coats, it’s a good idea to cover your brushes to avoid drying them out.

Amy Howard at Home Gilding.

To bring out all the details, I added gold gild to areas of the bench.

Amy Howard at Home Sizing

Once my paint was dry, I brushed on size, a special adhesive for the gold leaf.  I brushed it on using long clean strokes.  I waited until it came to tack – meaning it was sticky.  I waited around 15 minutes for it to come to tack, but it does depend on how thick you paint on the sizing.

Amy Howard at Home Gilding Sheets

The gold leaf comes in a booklet.  I cut my book in half so it was the right size for my piece, and I didn’t waste the leaf.

Amy Howard Gilding Sheets

Applying the gold leaf takes a little practice, but the more you do it, the easier it becomes!

Amy Howard at Home Gilding

Pull the tissue back and while holding onto the tissue and the gold, turn it toward your piece and hold the end with your left hand and lay down firmly.

Amy Howard Gold Gilding

While holding the tissues – in place – rub your fingers back and forth – burnishing them into the surface.

Amy Howard at Home Gilding Process

When you pull up, pull the tissue away.  (When laying multiple pieces, do not try to match lines.  Overlap for full coverage.)

Buffing Gilding

Take a rag, burnish it and clean it up really well.  Then, take steel wool and lightly rub it in one direction.  This allows for some of the paint to show through.

Amy Howard at Home Waxes

Once the gilding process is done, you can begin the waxing process.  Although One Step paint doesn’t require sealing, I used light wax to give my piece some age.

Amy Howard at Home Light Antique Wax

I put my brush into the wax and offloaded it to get the wax even on my brush.

Amy Howard Light Antique Wax

Next,  I went over the entire piece and allowed it to dry for around 20-30 minutes.  Once dry, I did the same process with the dark wax.

Amy Howard Dark Antique Wax

The dark wax is what makes the piece look aged.  Place it where the piece would have gotten age and wear – the top of the piece, around the hardware (if it has any), legs, arms – anywhere your hands would go!

Amy Howard Dark Wax

Once the waxing process is complete, I used Dust of Ages powder.  This powder gets in the crevices and gives your piece an authentic old look.

Amy Howard Dust of Ages Powder

Amy Howard at Home Dust of Ages

I dipped my brush in the Dust of Ages and pounced it on – getting it in the crevices.

Amy Howard Dust of Ages

Using a clean rag, lightly buff to get the patina.

Final Light Buff

And my bench makeover was complete!

Amy Howard Paint Tutorial

I now have an elegant bench (that looks to be a fine antique!) at the end of my bed.

Amy Howard One Step Paint Tutorial

Amy Howard At Home One Step

You can find Amy Howard at Home One Step Paint at Ace Hardware and on their website by clicking HERE. I hope this Amy Howard One Step Paint Tutorial was helpful!

Go create something!

Are you new to my blog? Go HERE to see my home tour and HERE to shop for items I use in our home.

Find me on Facebook | Instagram | Twitter Pinterest

*This post contains affiliate links and is a sponsored post through Amy Howard at Home. I received compensation in the form of product in exchange for my review. I take pride in reviewing only products that fit my brand and will be beneficial to my readers. And while this post is sponsored, all the opinions are my own.