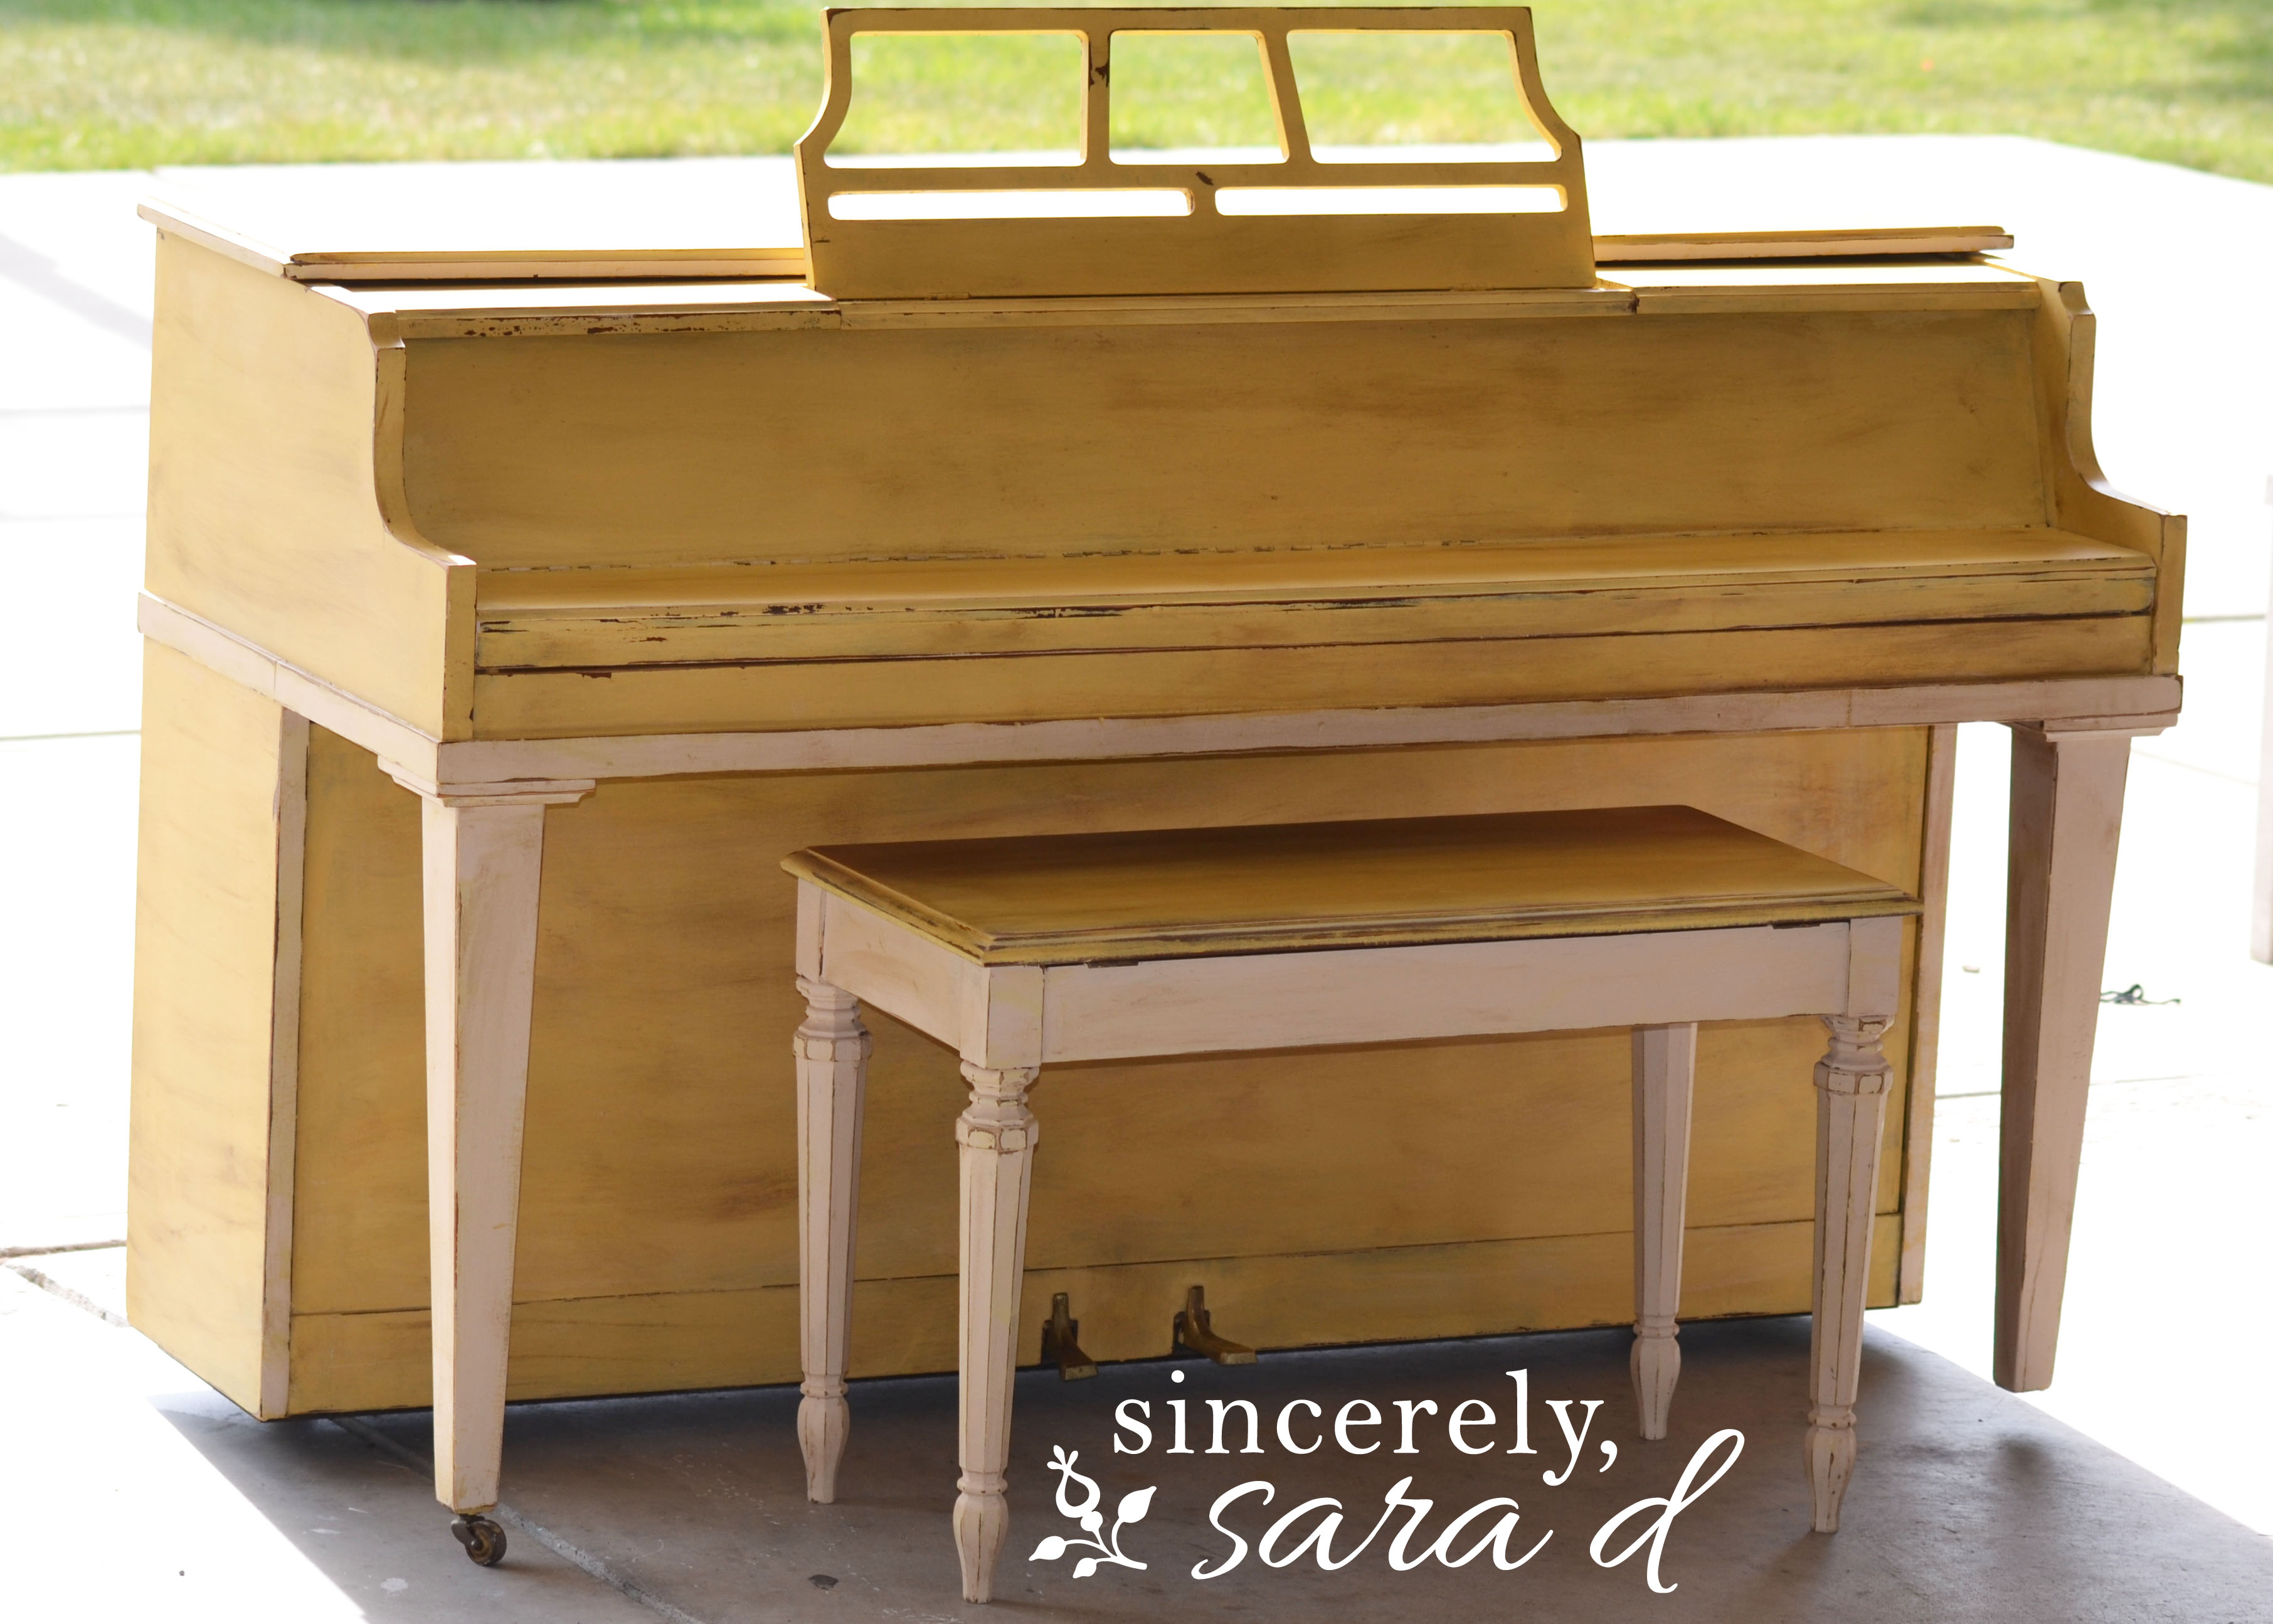
A painted piano adds so much character to any home.
I painted a piano this week.

We’ve been talking about getting a piano for a little while since our oldest son is going to start lessons this fall. While on Facebook a couple of weeks ago, I ran across someone selling an upright for $50. I was excited because it obviously needed help. My husband would definitely be okay with me painting it, and it was so inexpensive that I couldn’t mess it up. Plus, how cool would a painted piano be?!
 Now, I decided to use milk paint for the first time ever. Note to self: Don’t try a paint you’ve never used next time you paint a piano. I’ve heard a lot about milk paint because I follow Miss Mustard seed, and she has her own line of (Miss Mustard Seed) Milk Paint. Her stuff always looks so amazing.
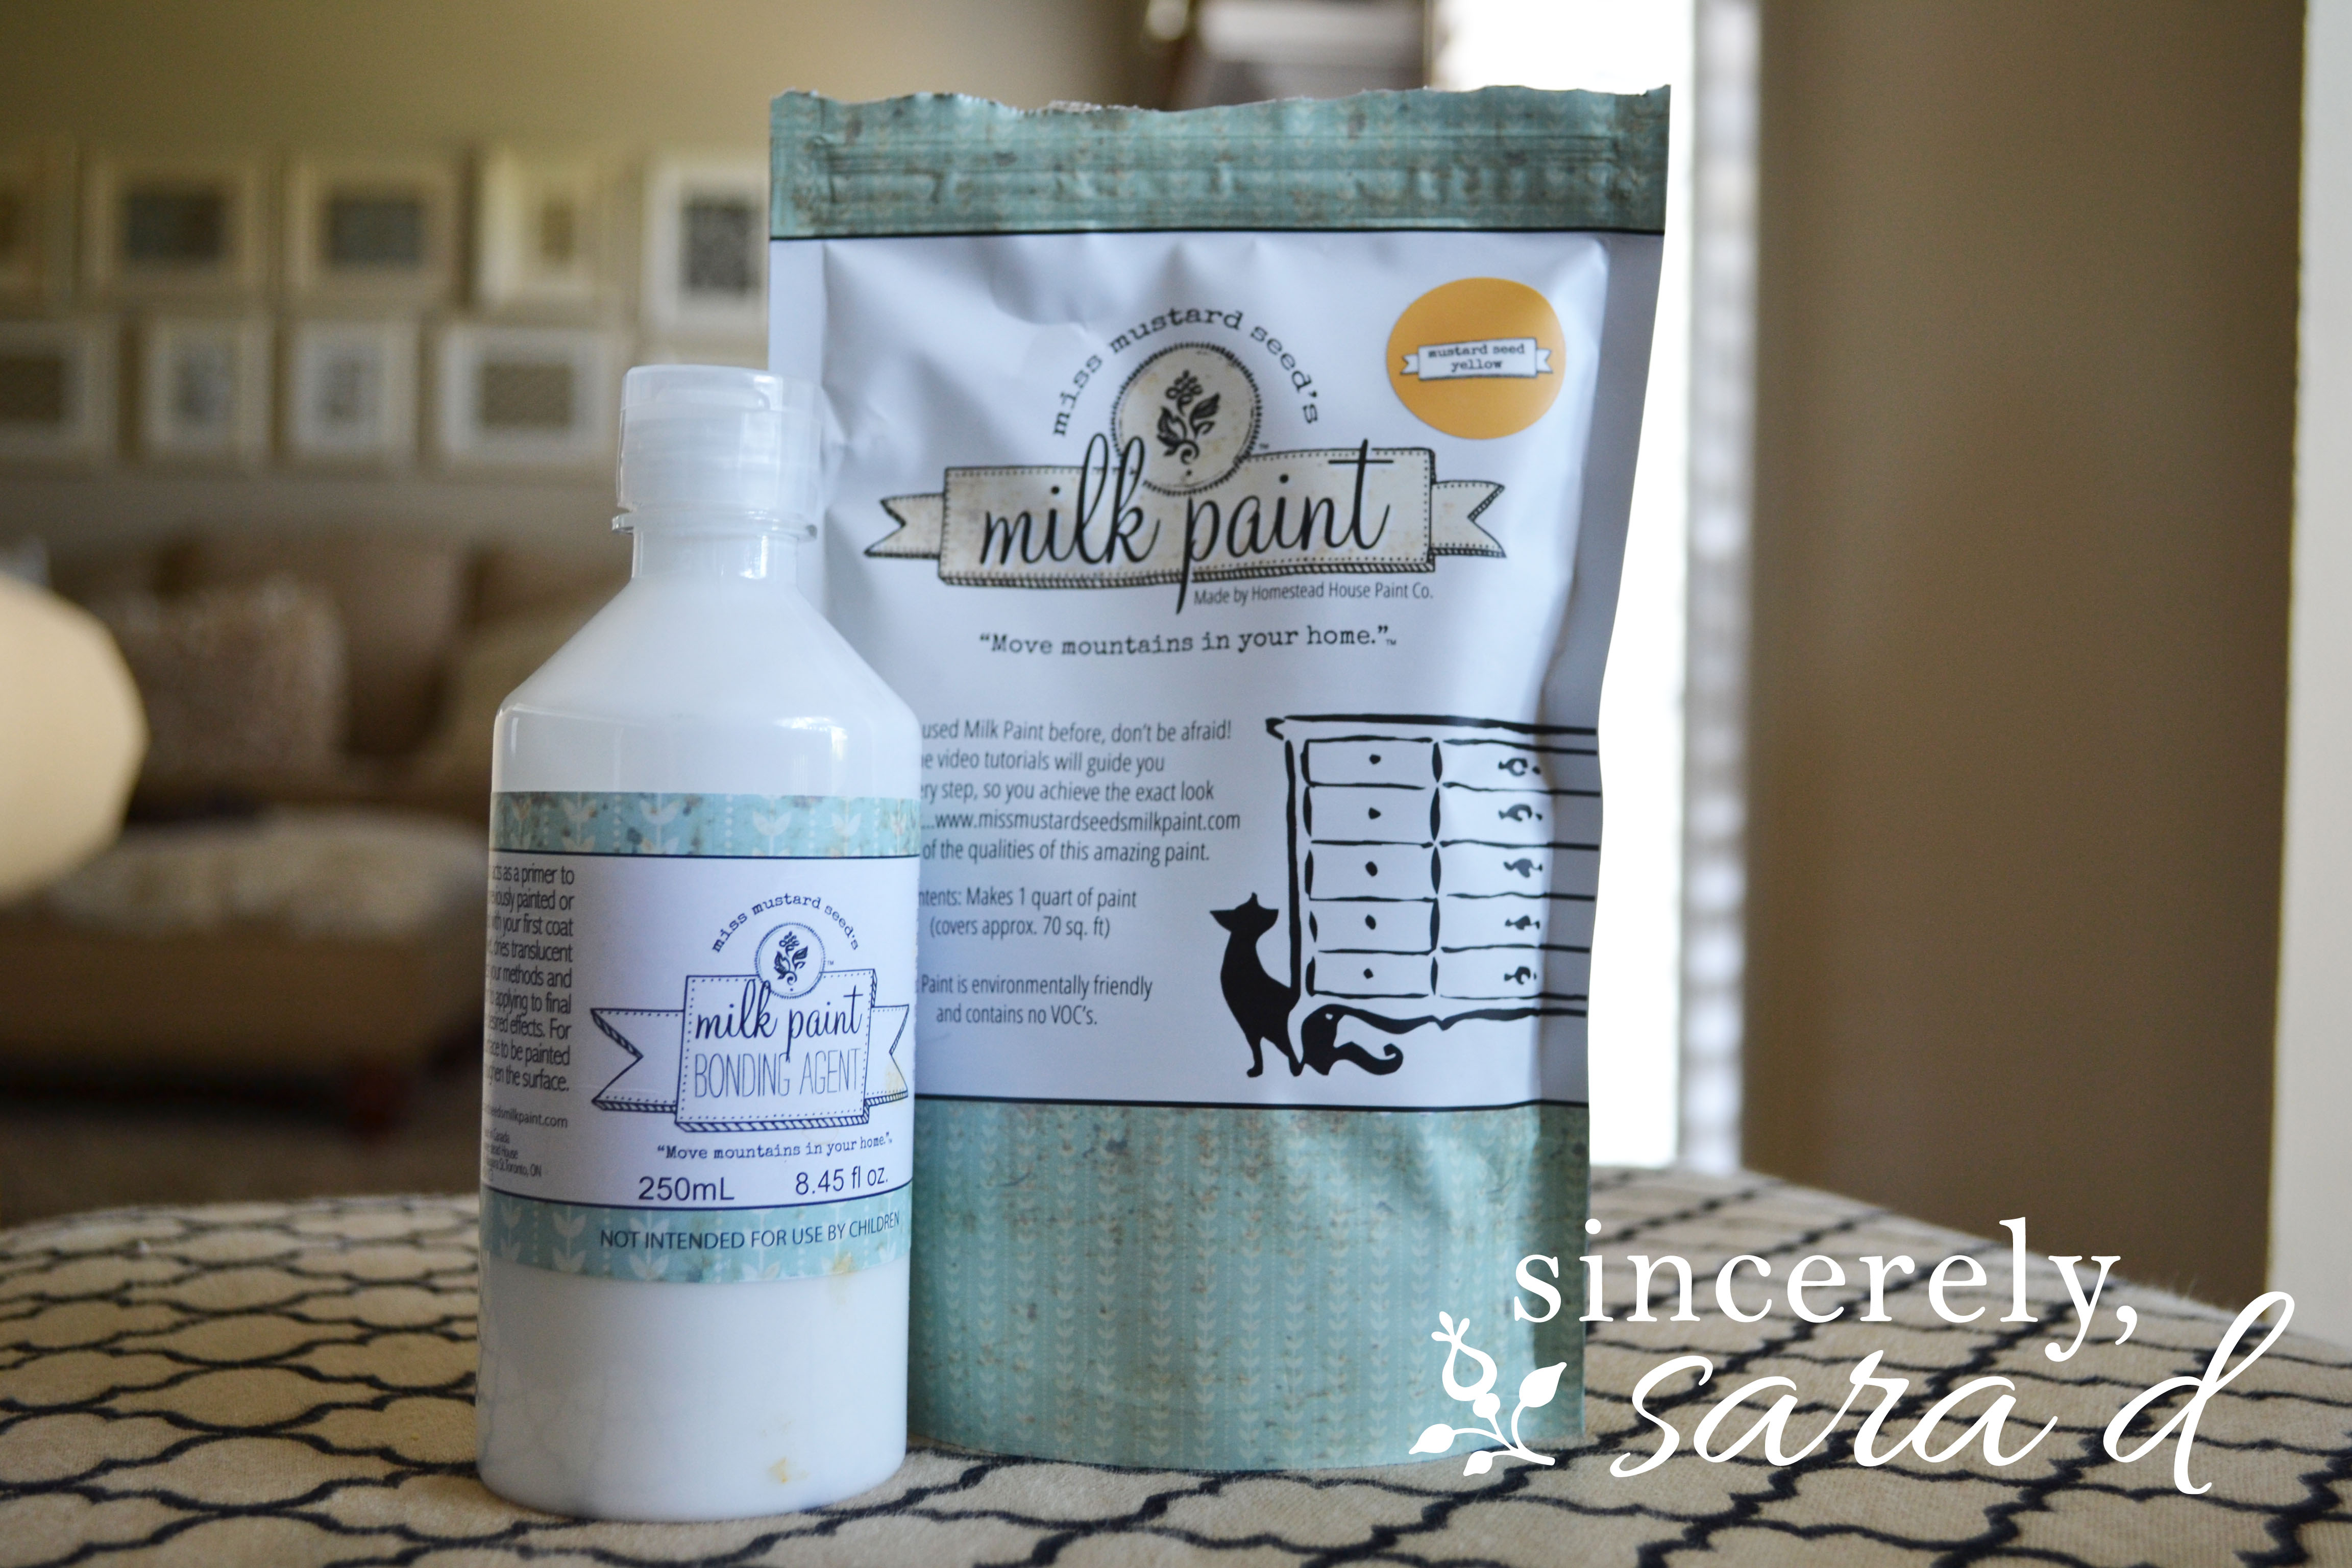 What I didn’t think about was how unpredictable it can be. For someone like me, this isn’t really a good thing. I like plans and predictability. I like to be the one to distress where I want to distress. I’m not saying this is a good thing, but it’s how I work. So you can imagine my frustration when this started to happen:
  The charm of milk paint is that it does have a tendency to chip. However, to avoid this, you can mix a bonding agent with the first paint layer. I did – but I ran out of paint for the first batch and got a little lazy with my second batch and didn’t add the bonding agent. The areas I painted without the bonding agent (obviously) are where the major chipping occurred. Another thing about milk paint is that it comes in powder form. I didn’t love having to mix my own paint. I’m a pretty impatient person and mixing just added another layer in the process of painting. It’s not a huge deal to mix, but there’s something great about just popping a can of paint open… All that being said, milk paint does have its charm. If you like the (very) distressed look, this paint is for you. It comes in a bunch of BEAUTIFUL colors and it does have a unique look. It’s also a great paint for color washing pieces – you can easily water the paint down to achieve the washed look. So, after I painted the piano, I used (cream) chalk paint to accent some of the parts – and I also used the chalk paint on the areas that I hadn’t used the bonding agent in my first layer of paint. I wasn’t loving the extreme chipping happening in these areas and luckily my cream “accents” look intentional.
  After everything was painted, I took a sander to the entire piano. All the tutorials I watch show the people sanding by hand. Again, I don’t have patience for this. So, I used this big guy:
  At the end, I did wax the entire piece with both clear wax and a small amount of dark wax. I used Annie Sloan wax because I had it on hand. Overall, it’s a little more distressed than I had originally planned. However, I think I’m starting to like the piano more and more. It may be because we have a family pass to Conner Prairie and have been spending too much time there, but I think it will work well in my house. And, my son has a piano to practice on!


Are you new to my blog? Go HERE to see my home tour and HERE to shop for items I use in our home. Find me on Facebook | Instagram | Twitter | Pinterest
