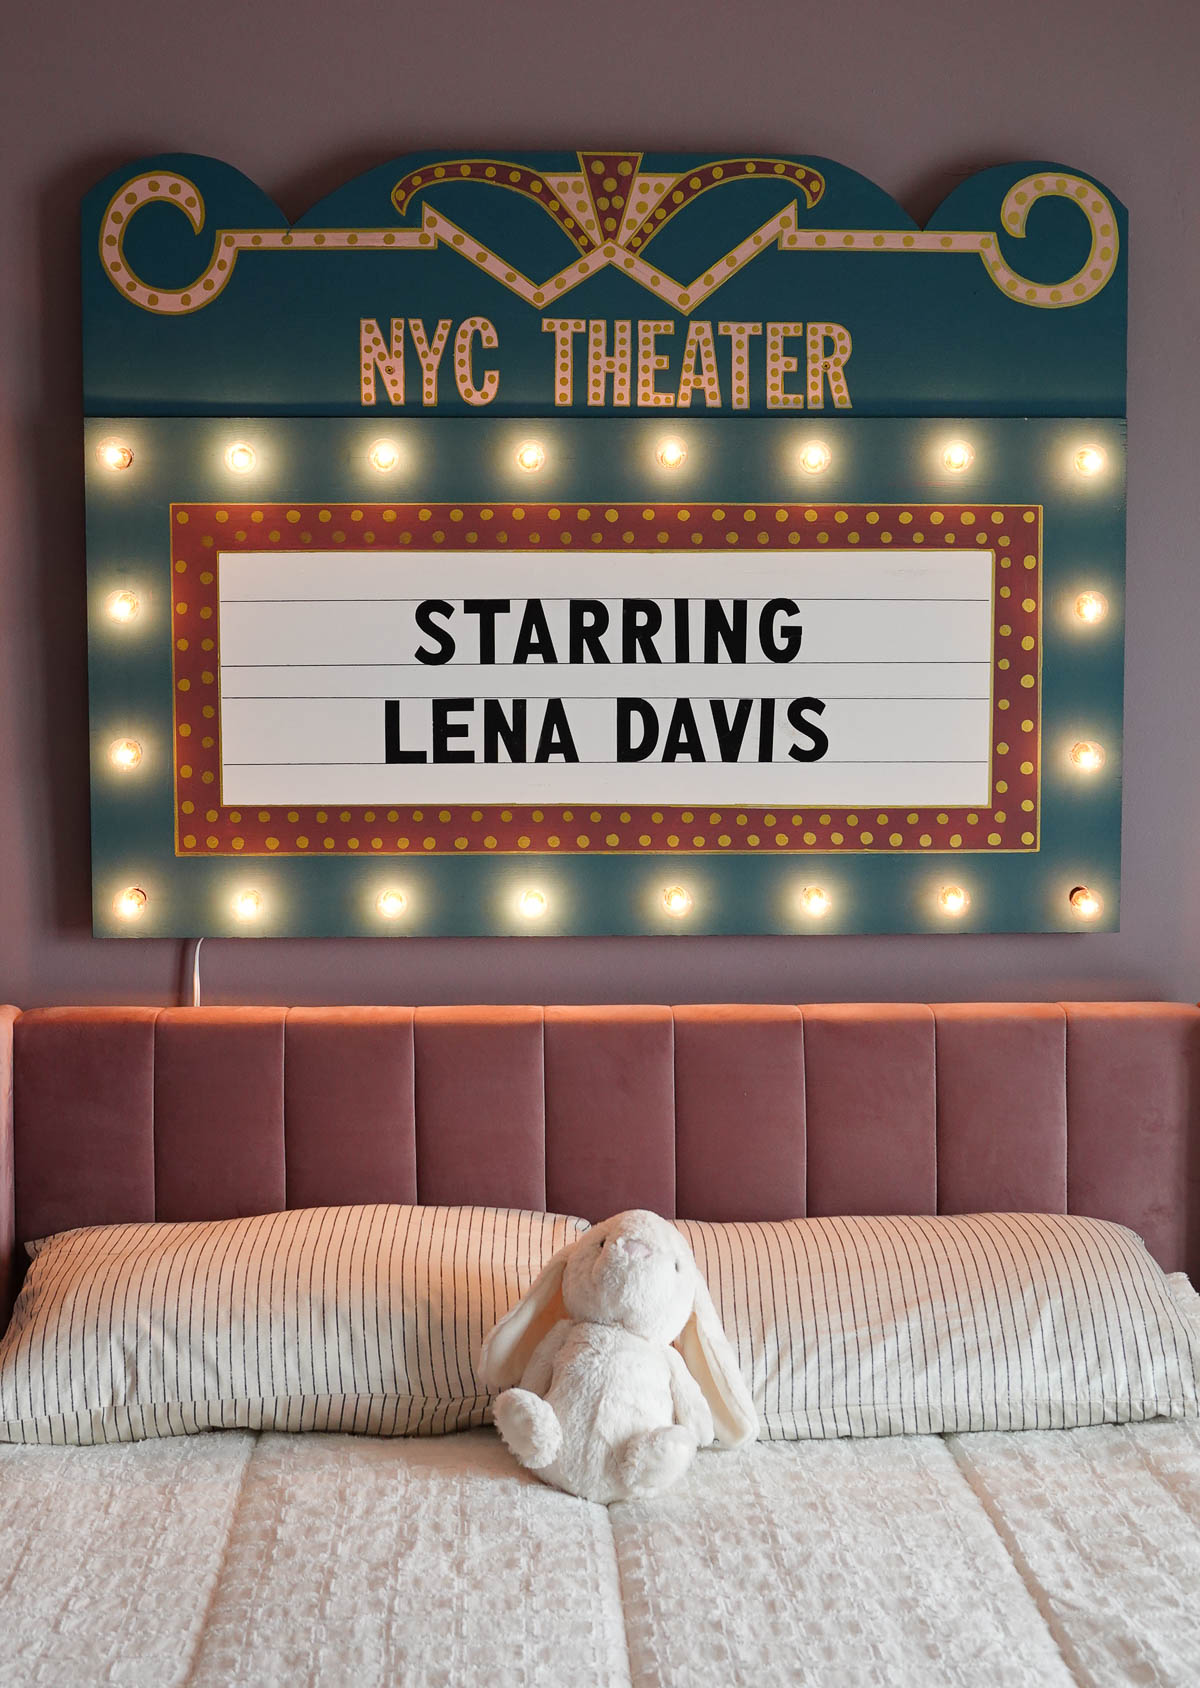
My daughter LOVES the stage and performing and has been dreaming up her theatre room for some time now. I wanted a centerpiece for the room, so I decided I would surprise her with a DIY Marquee Sign.
We recently saw Frozen the musical in Chicago, so I was feeling extra inspired and knew I definitely wanted the sign to light up.
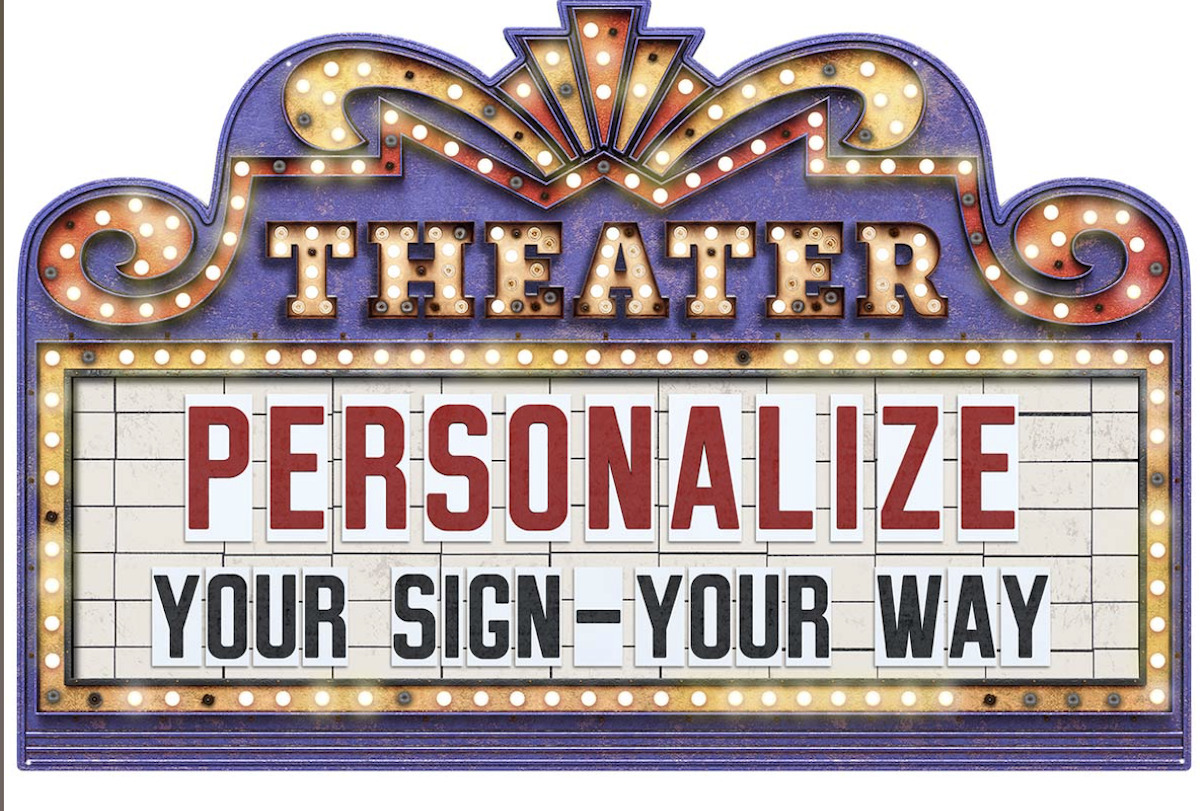
I started by searching google images, and found this piece to be my inspiration:
Supplies for DIY Marquee Sign:
- 2’x4′ half inch board
- 2’x2′ quarter inch board
- Small Cafe Lights
- Die Cut Letter Stickers
- Painter’s Tape
- Paint
- Paint Brushes
- Paint Pens
- Duck Tape
- Drill
- Jigsaw
Tutorial for DIY Marquee Sign:
To begin, you will need a 2’x4′ half-inch board for the main marquee sign. I was able to buy in already cut at Menards, but some of the other hardware stores may require you to buy a full sheet, BUT they should be able to cut it to size for you.
For the top piece, I used a 2’x’2 quarter-inch board, but you can also use a piece from the half-inch board if you had to buy a full sheet. I went thinner since it was easier to cut with the jigsaw and I saved some money. I drew out a pattern:
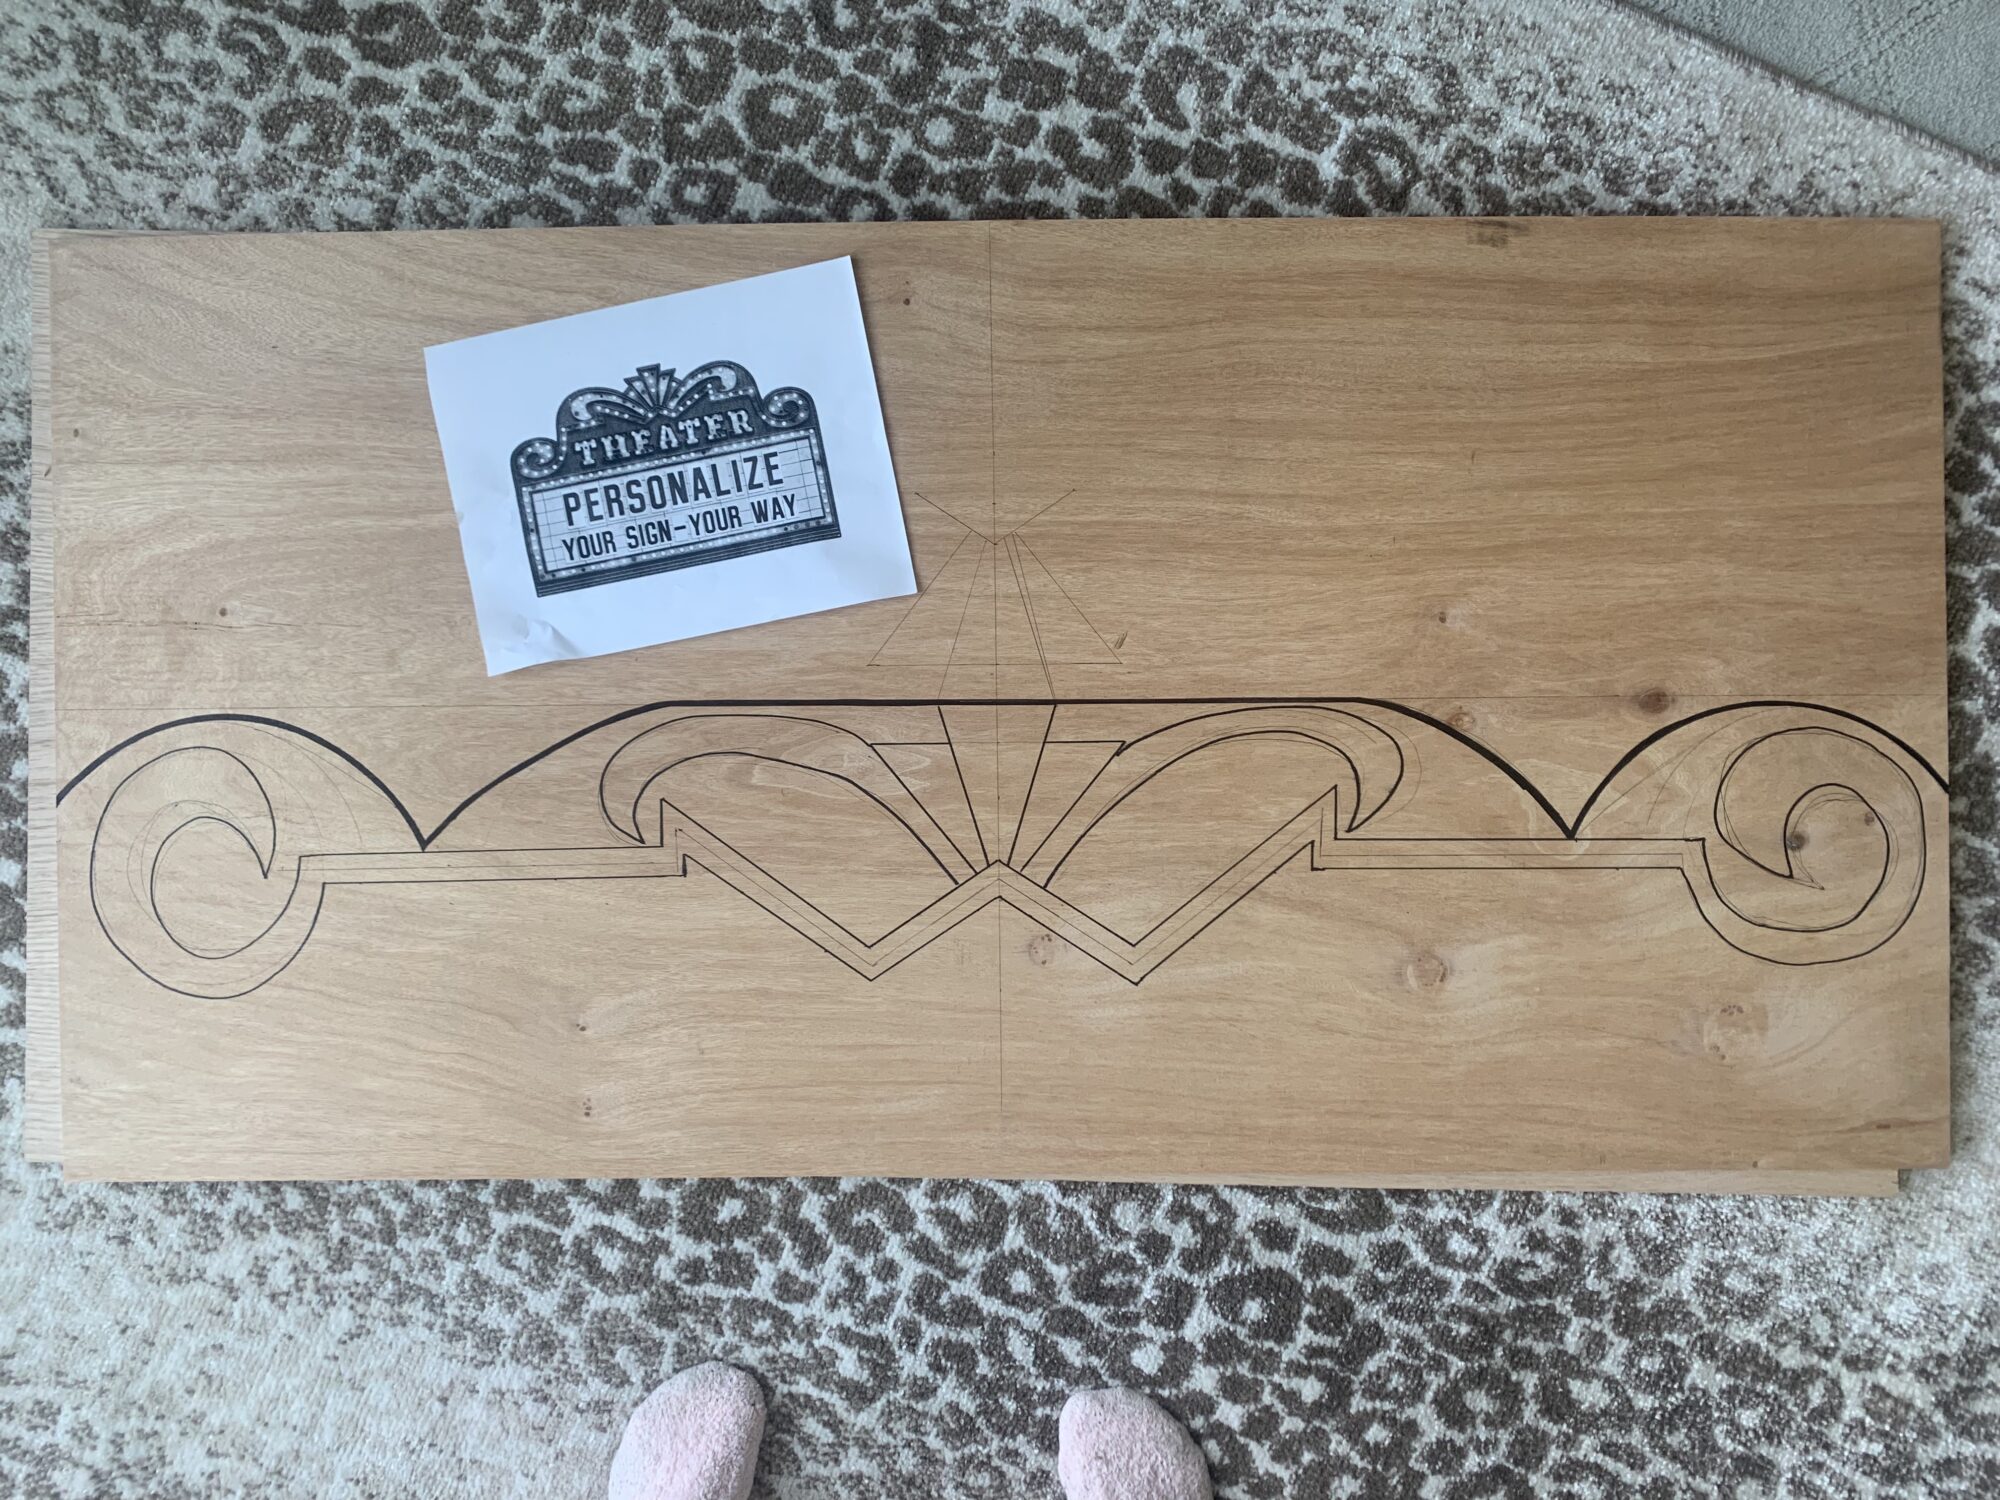
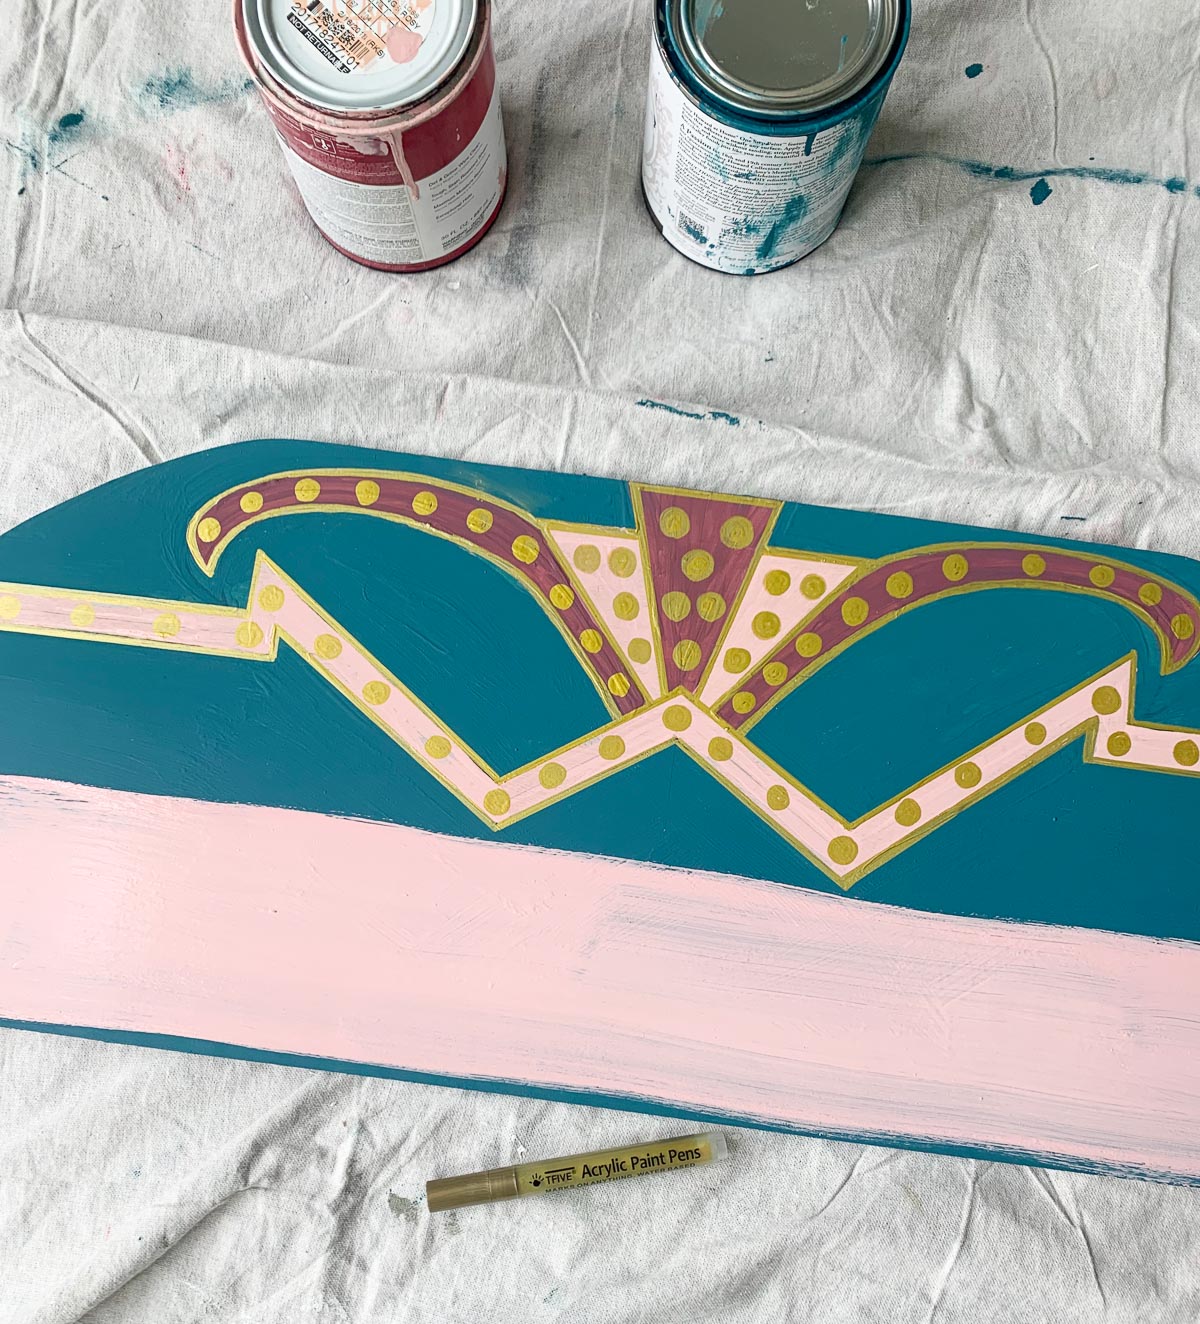
Once the top piece was cut out, I went to work painting both pieces.
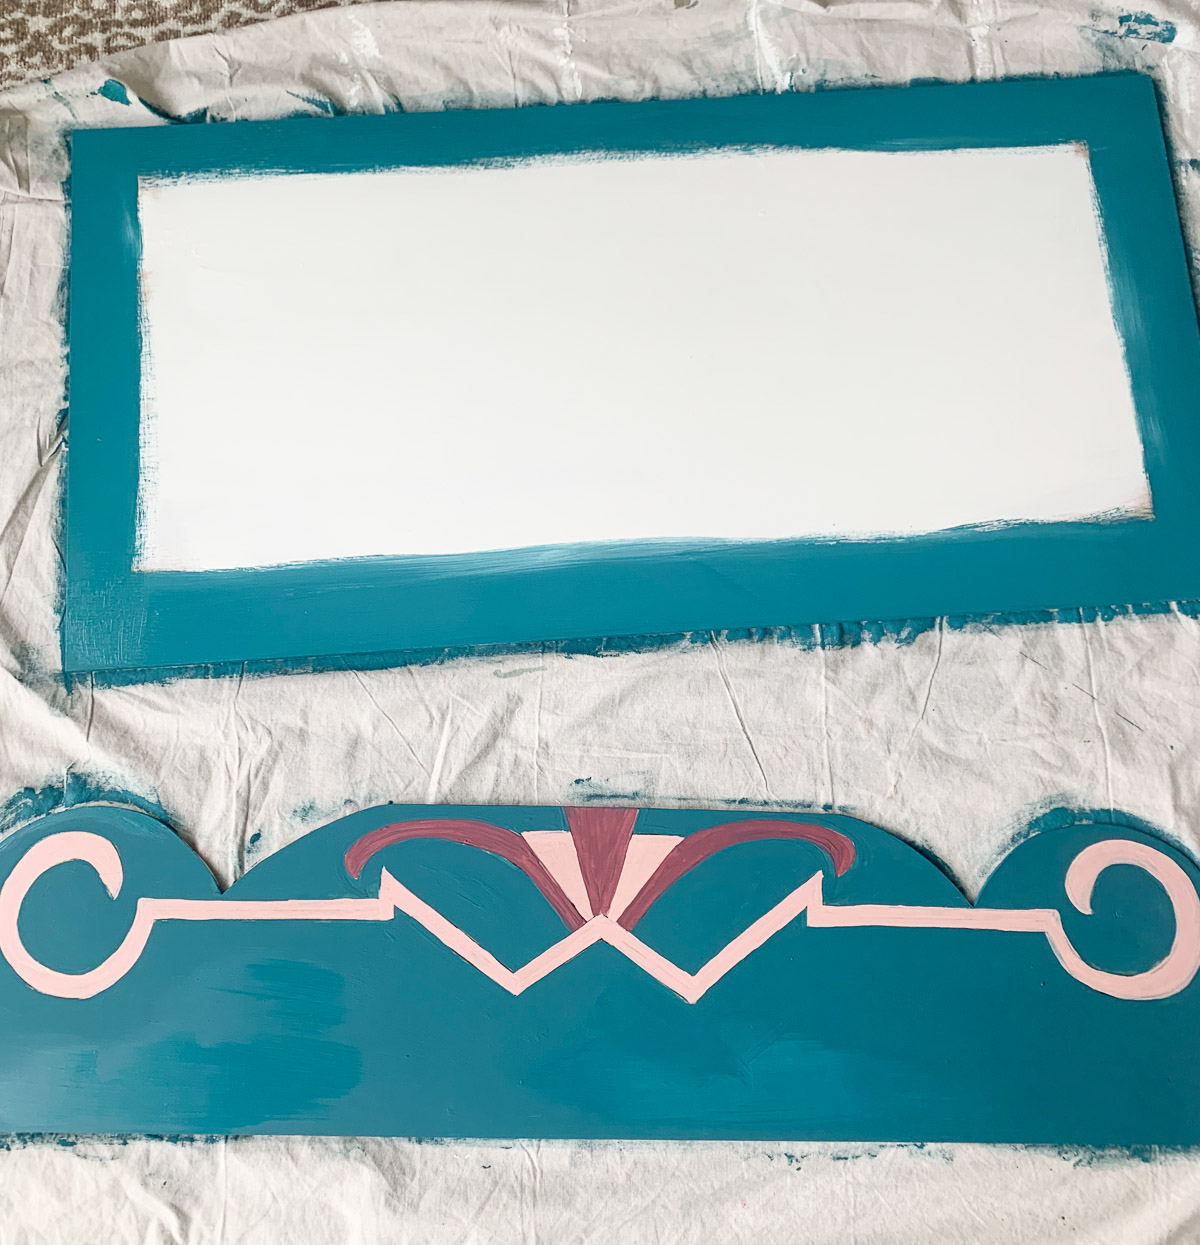
I used extra paint I found in our paint closet and used a gold paint pen to outline everything and add “lighting.”
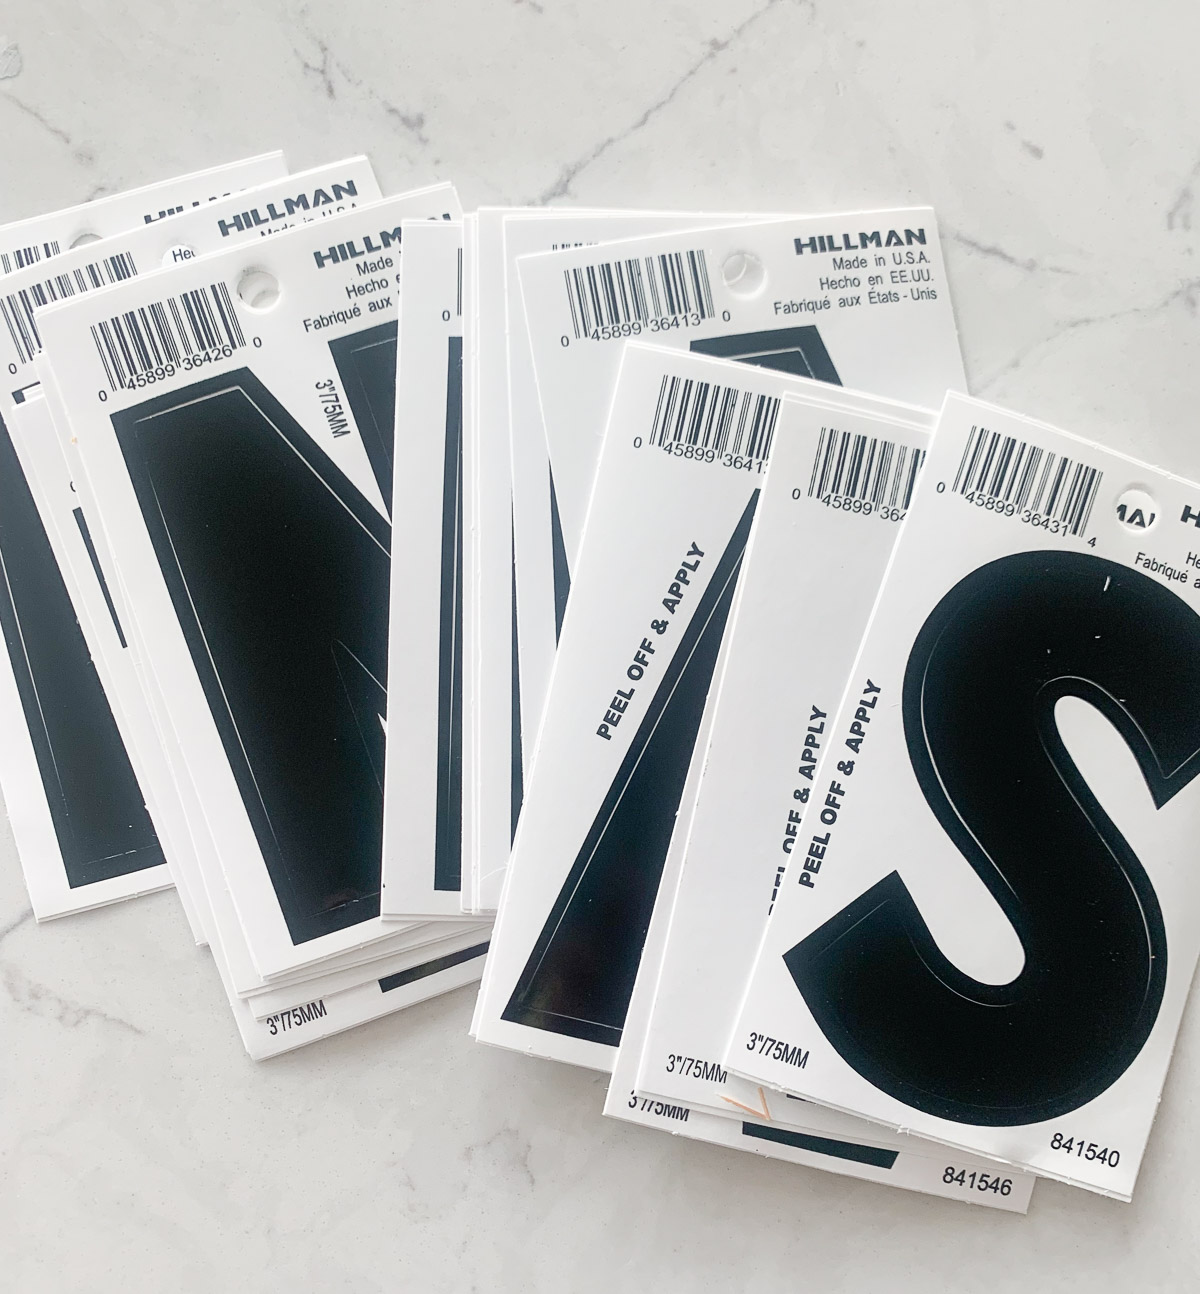
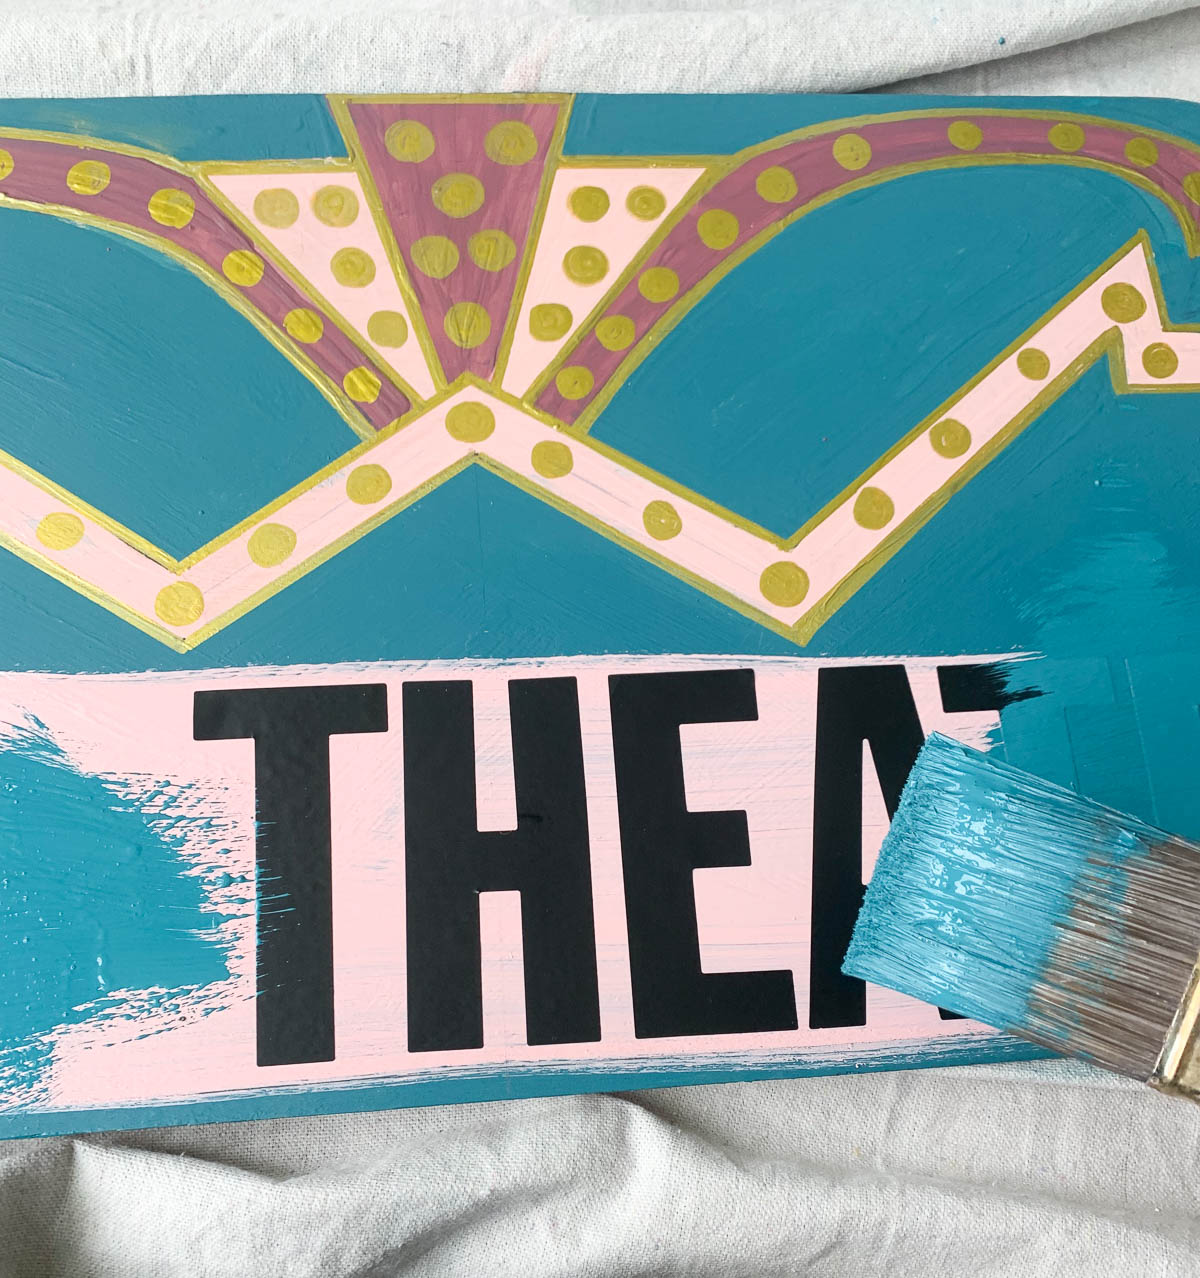
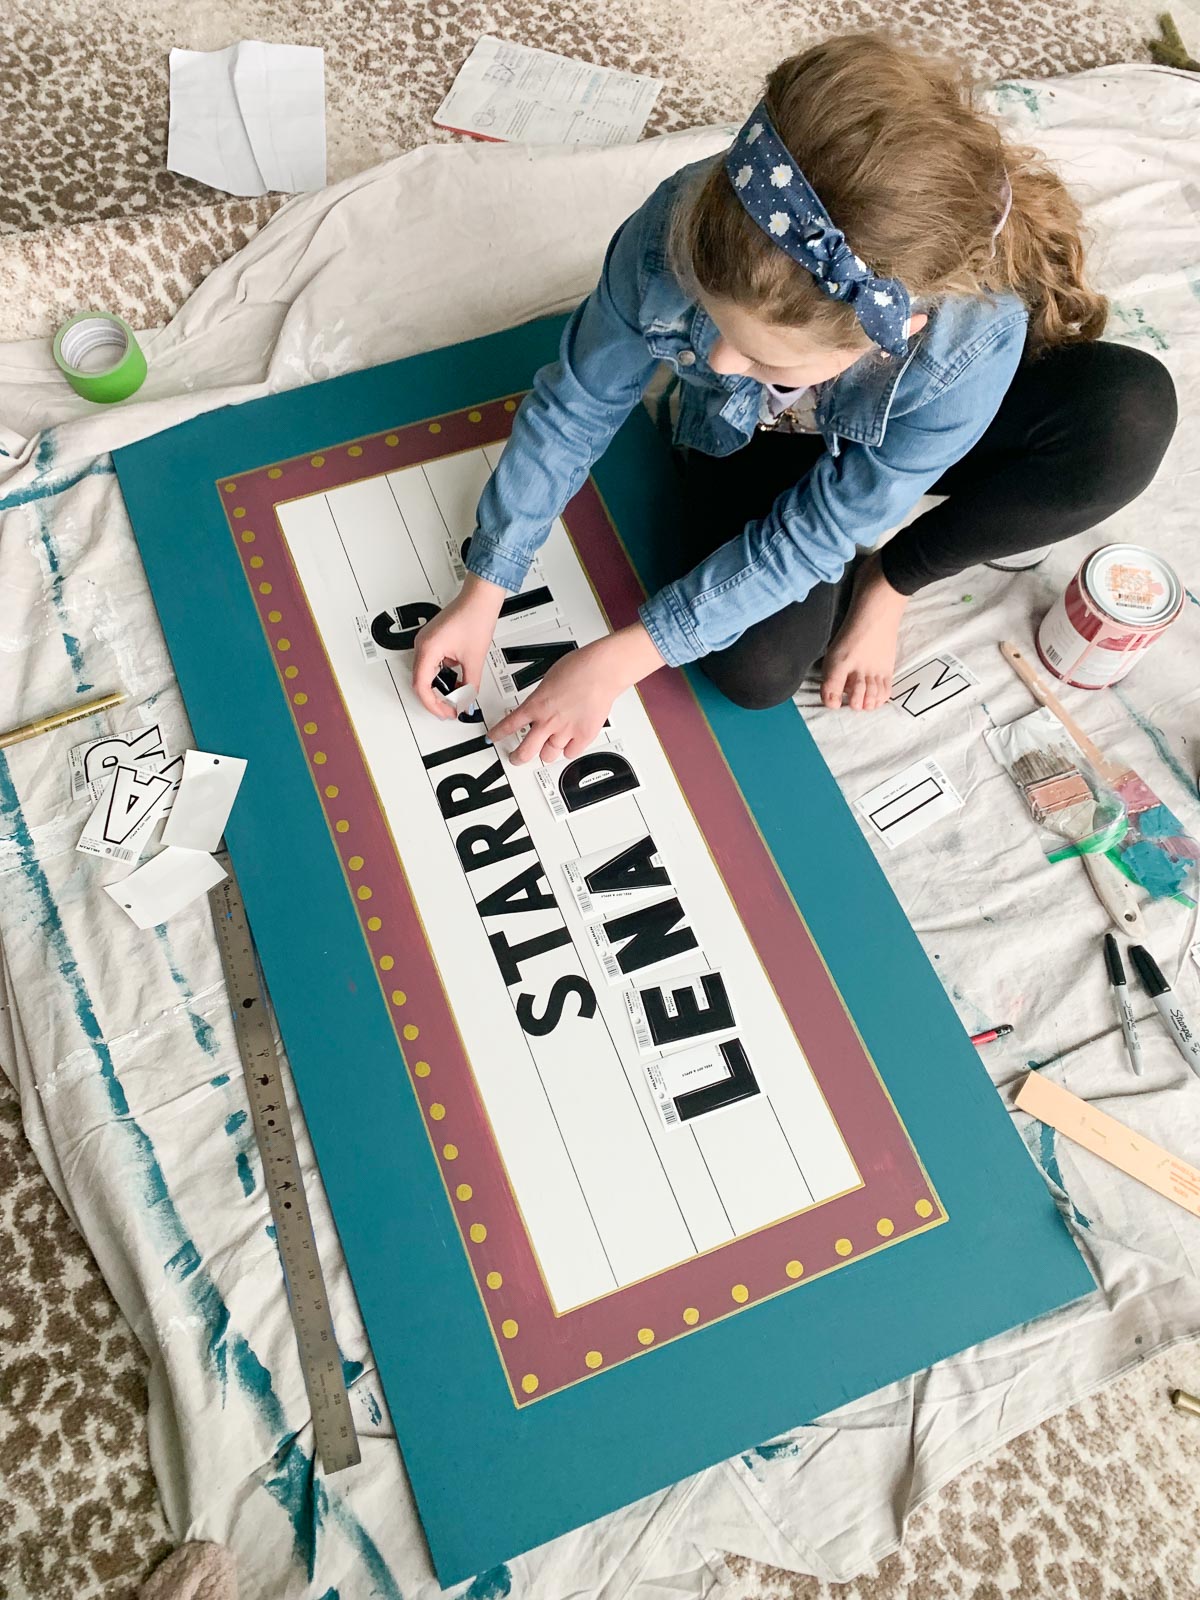
I bought die-cut letter stickers (found at any hardware store) and used them as a stencil. For the Theatre’s name, I painted over the sign with the light pink – the color I wanted the lettering to be.
Once the pink paint dried, I added my letter stickers and painted back over them in the sign background color.
After the paint is dry, the letters can be pulled off.
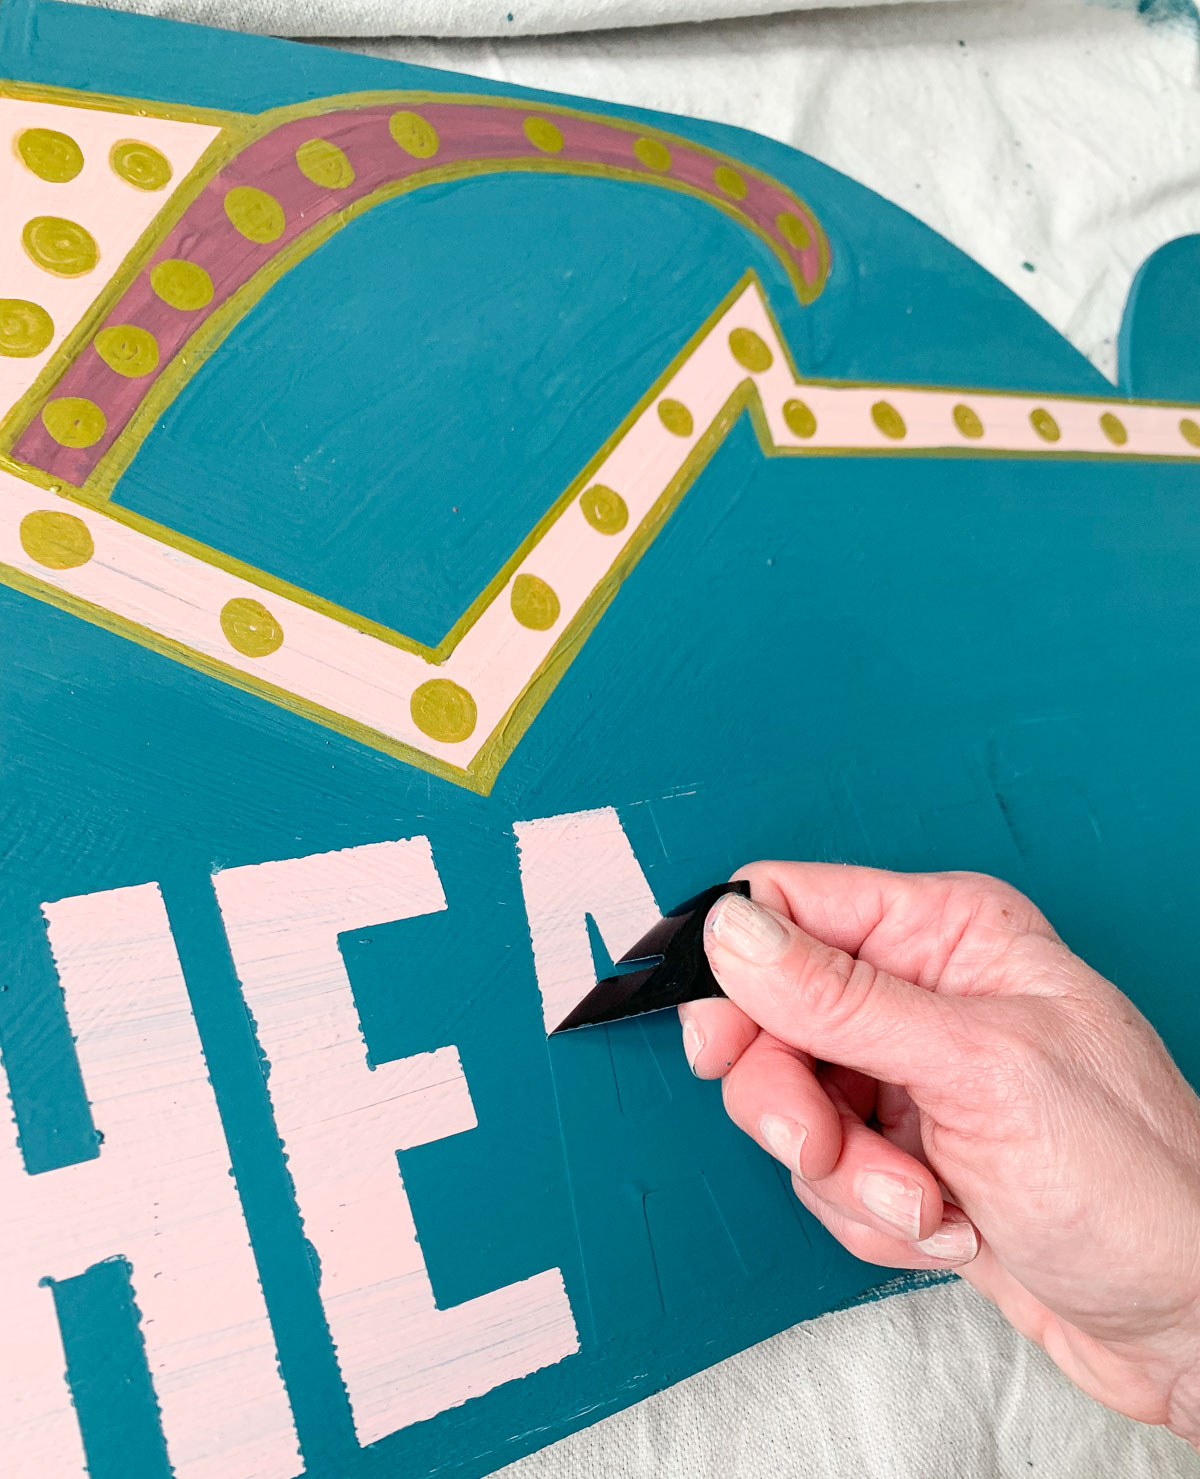
There was paint seepage, but I outlined the letters with the gold paint pen.
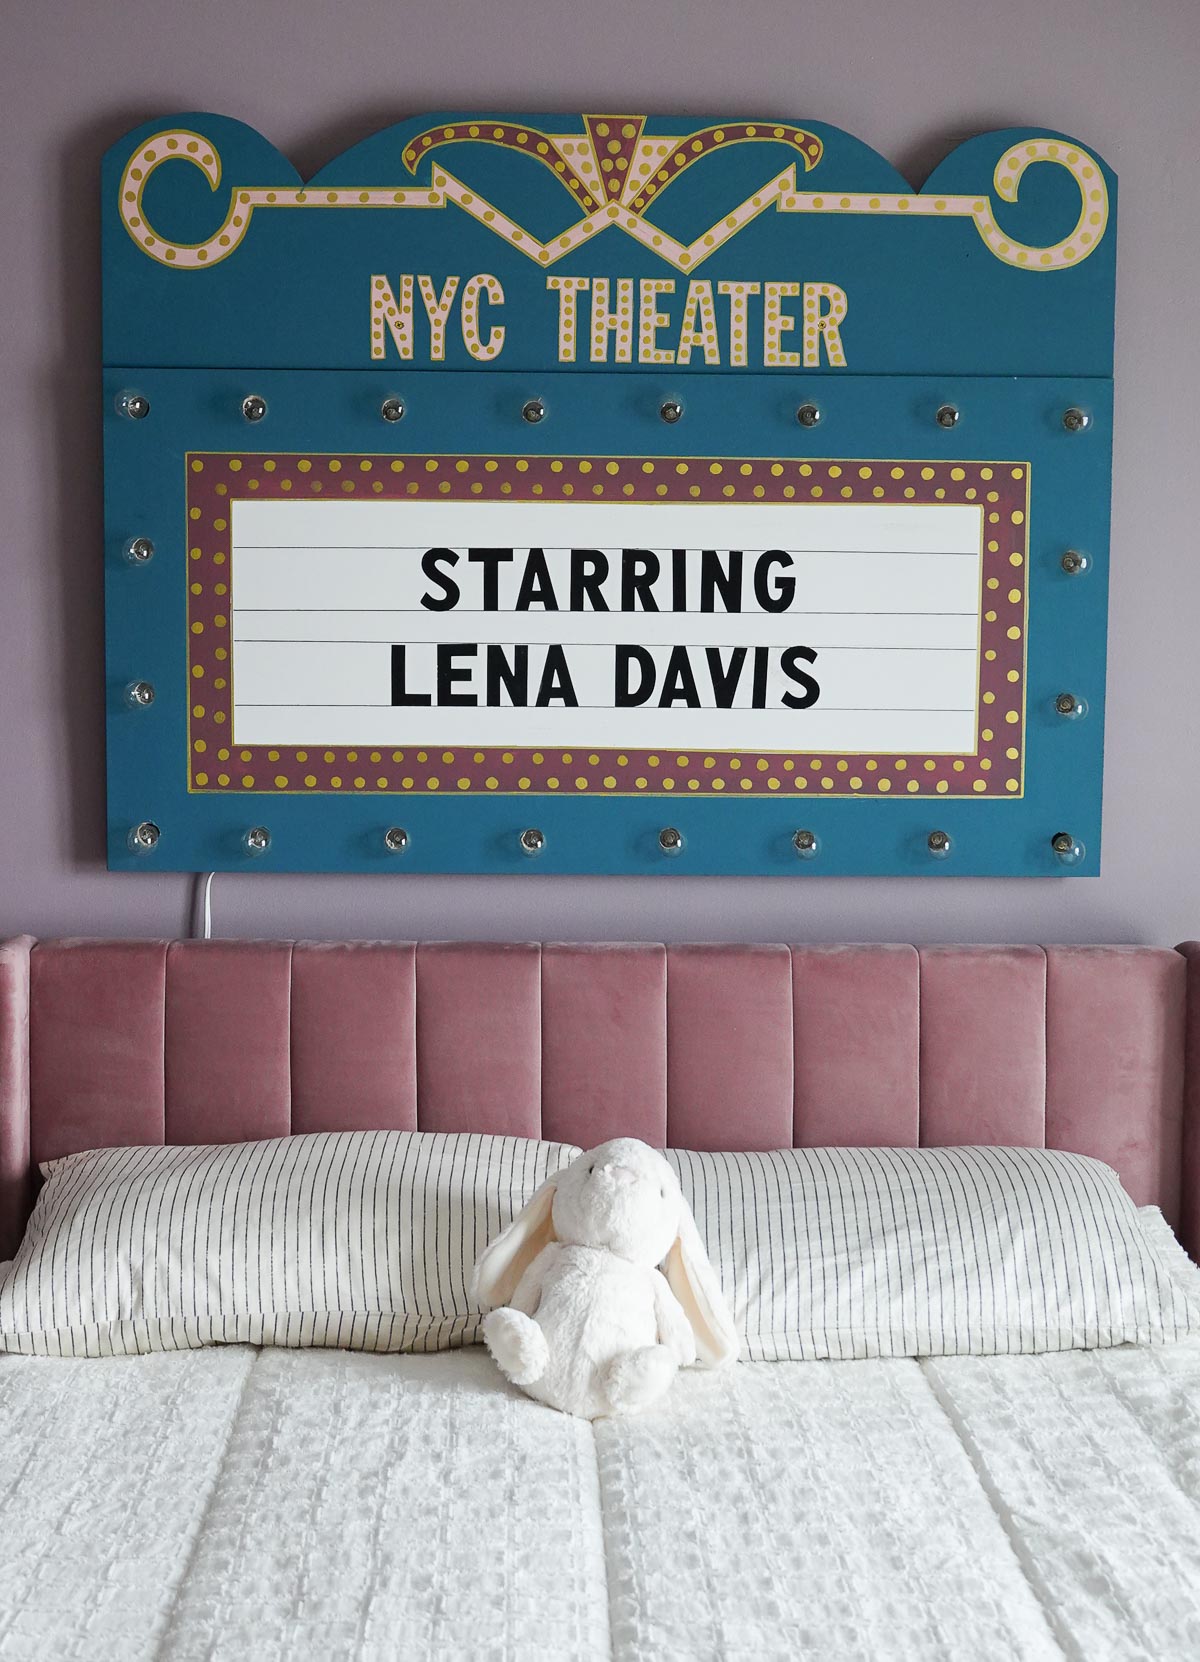
Next, I went to work creating the main sign. I had Lena help me with what the sign would say, and she of course wanted it to mention starring her…
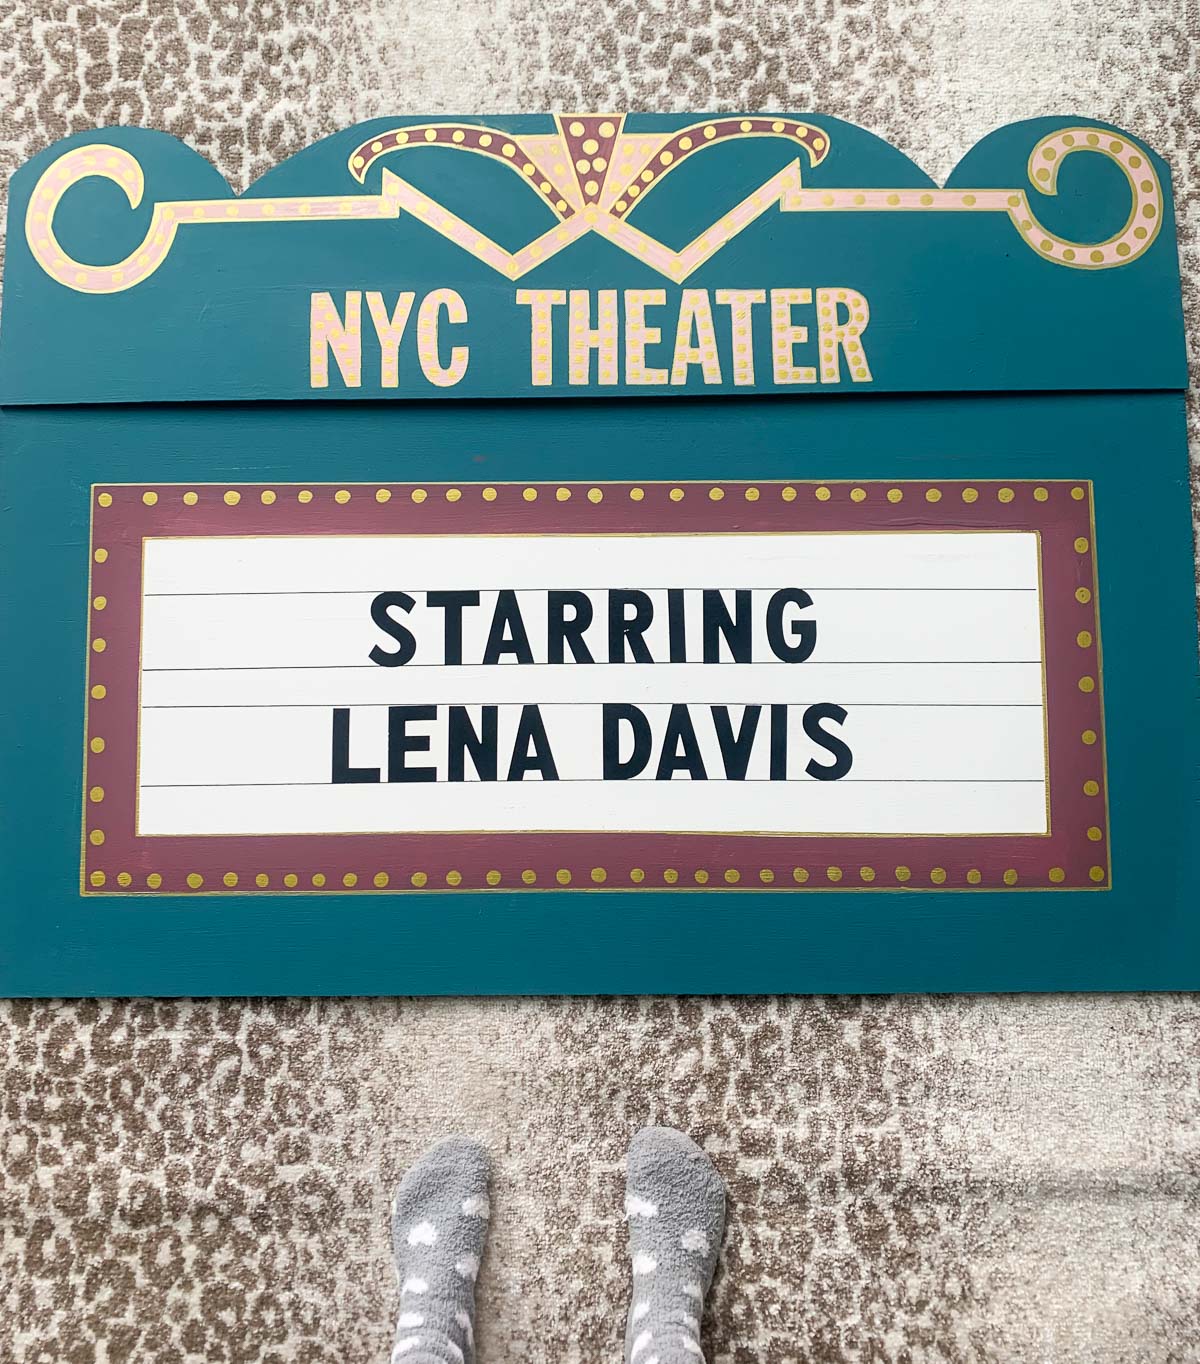
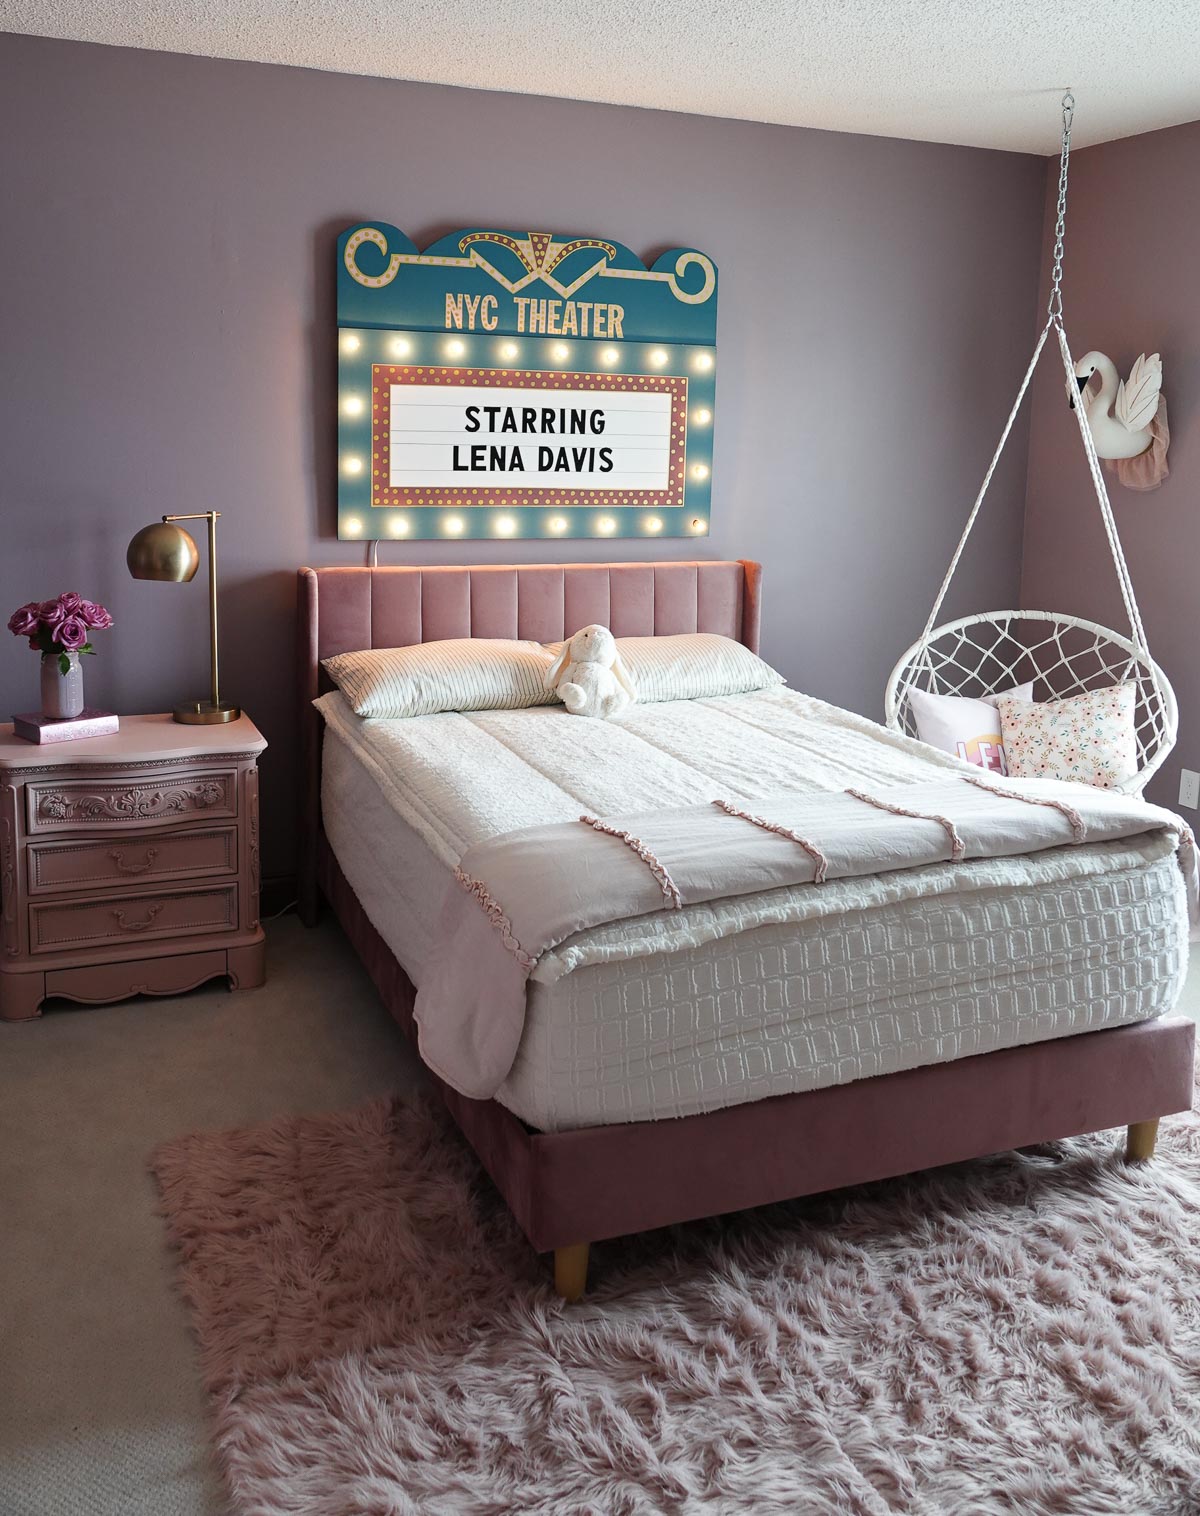
Here’s a look at the finished sign. Now it was time to add the actual lights!
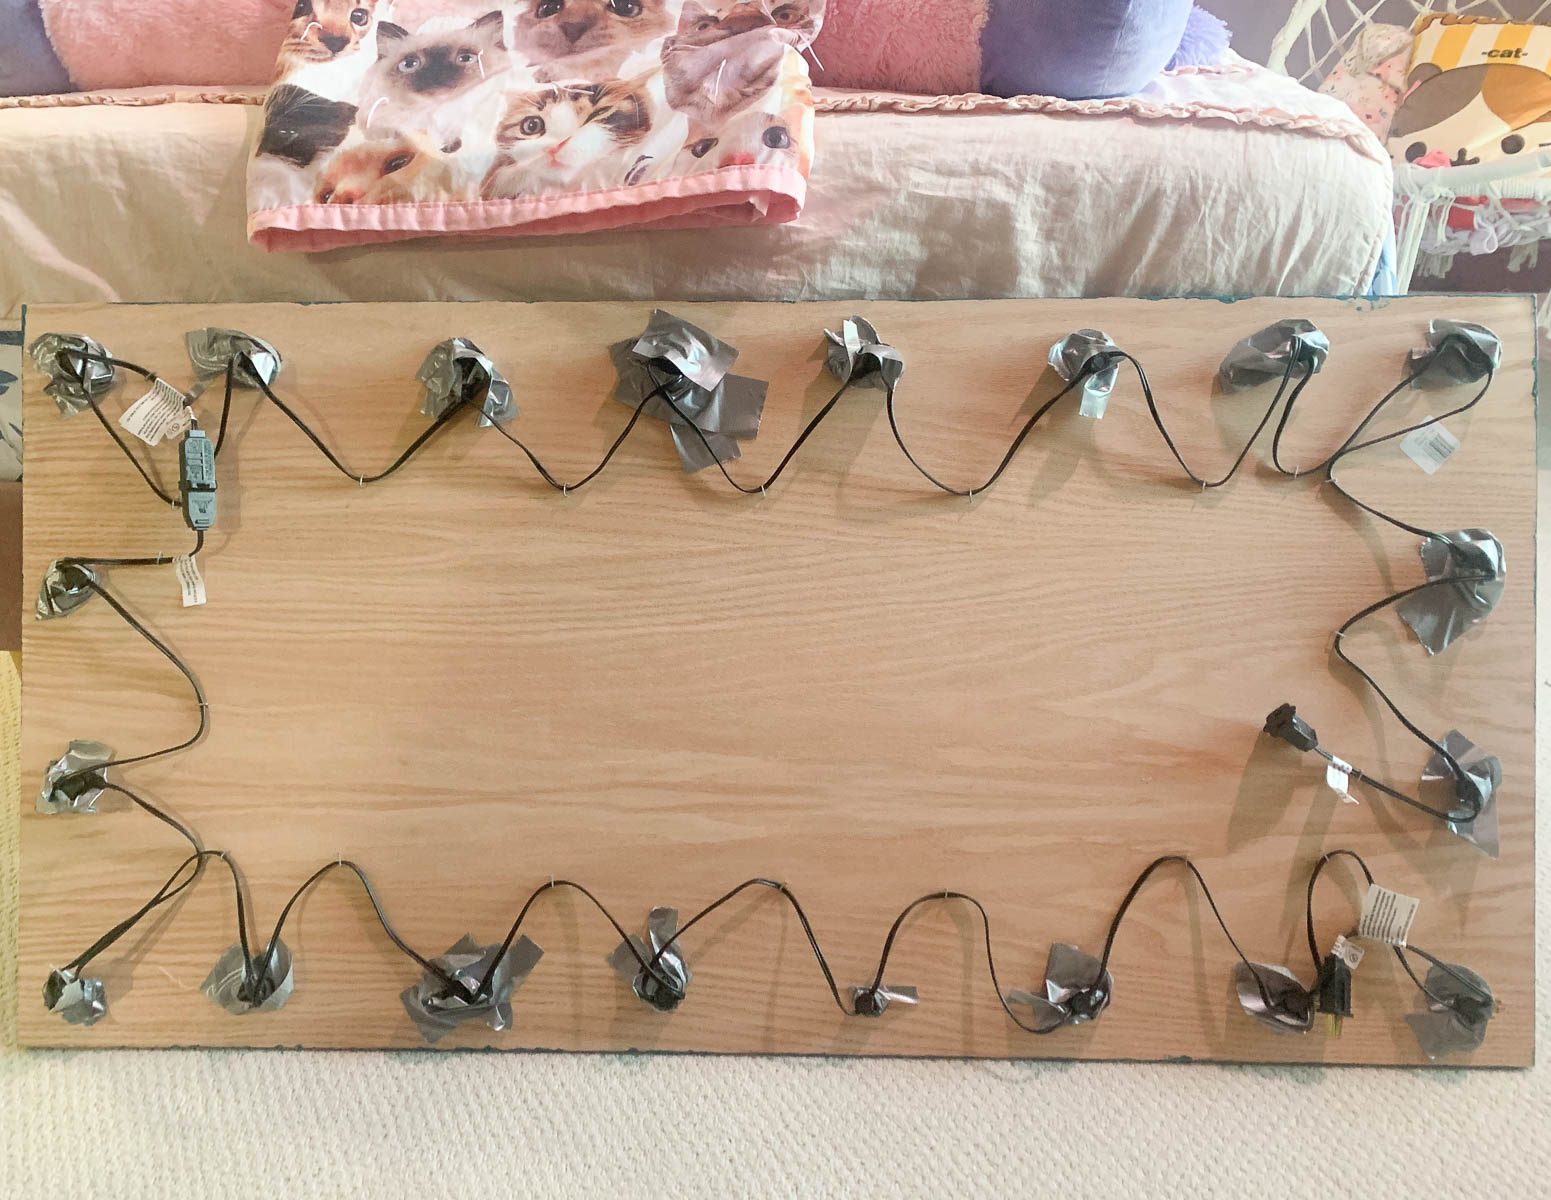
I drilled holes around the sign that were large enough to hold the base of the bulb but not too large that the bulbs fell through.
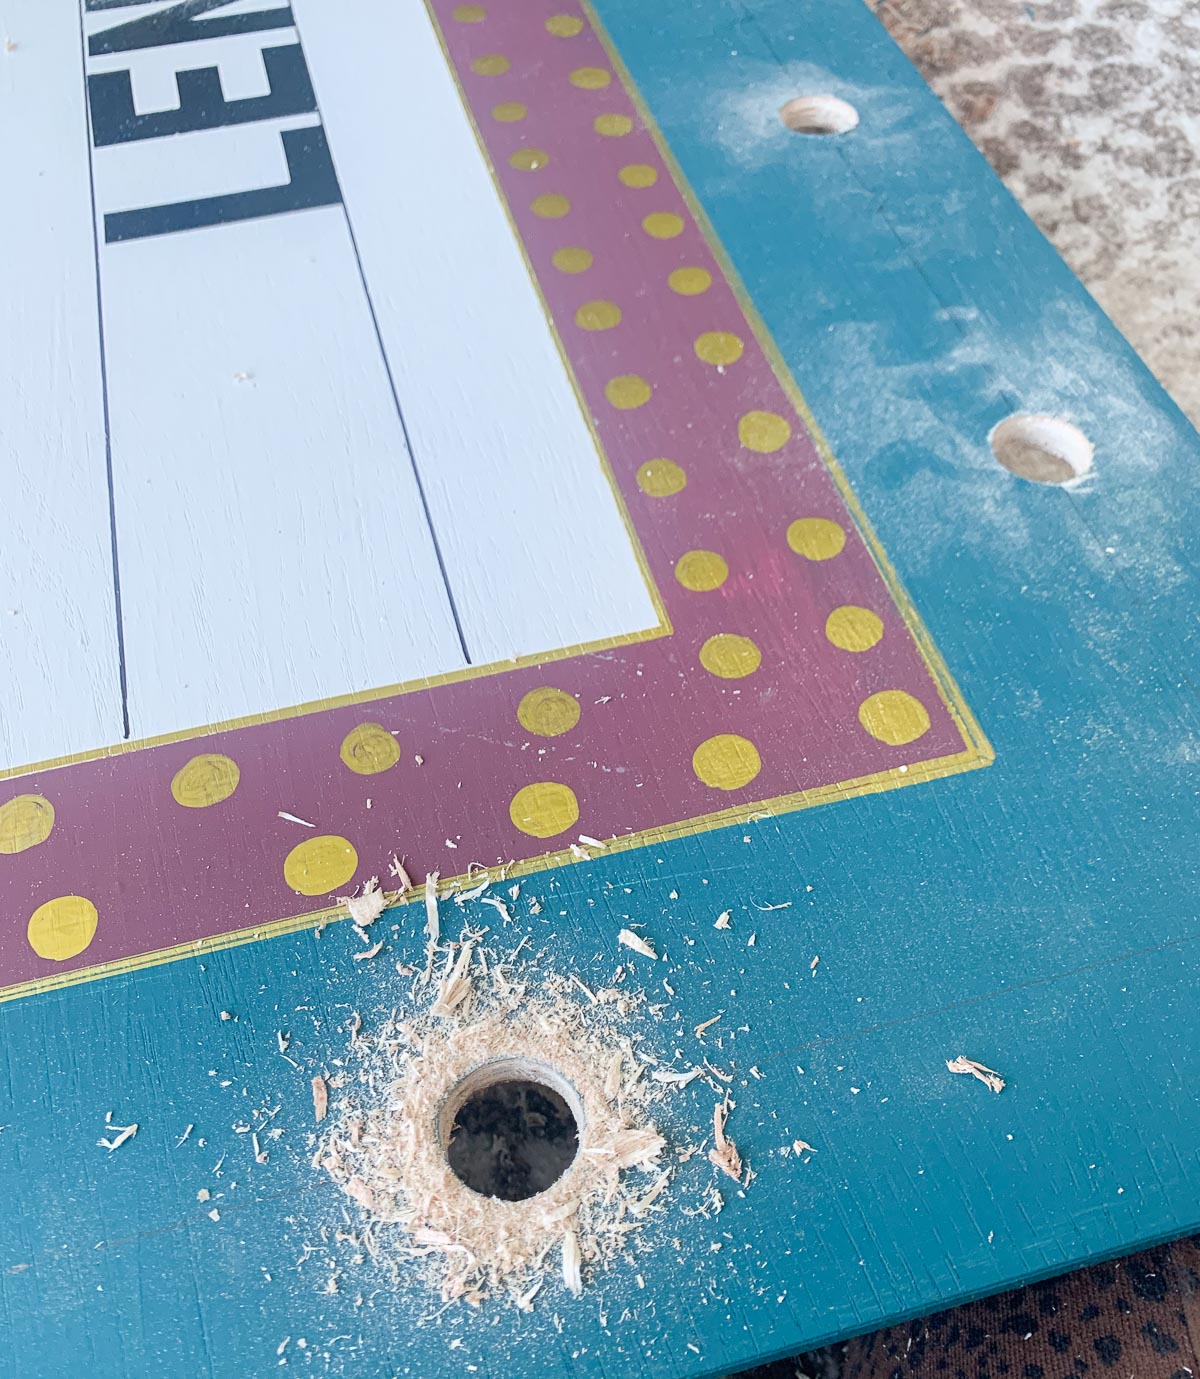
I had 20 lights, so I drilled 20 holes. I used duck tape to hold the bulbs in place and carefully staple the wires to the board to keep them from sticking out all over.
The result is magical. We have it hooked up to Alexa so when Lena says, “Alexa, it’s showtime,”
Alexa responds with “Lights, camera, action” and turns on the marquee sign.

Are you new to my blog? Go HERE to see my home tour and HERE to shop for items I use in our home.

