Paint

Geometric Wall Mural

I was inspired to create this Geometric Wall Mural after seeing the 2023 FrogTape® Design Trends. Travel is the trend for 2023 (we are all ready for some change of scenery), and here are the four design trends:

  • Redrock Renewal
  • Bohemian Bazaar
  • Nordic Nature
  • Midtown Modern

This is a sponsored post written by me on behalf of FrogTape® . All opinions are 100% mine.

You can see more details on these design trends HERE, and I chose to add the Midtown Modern design trend to our home.

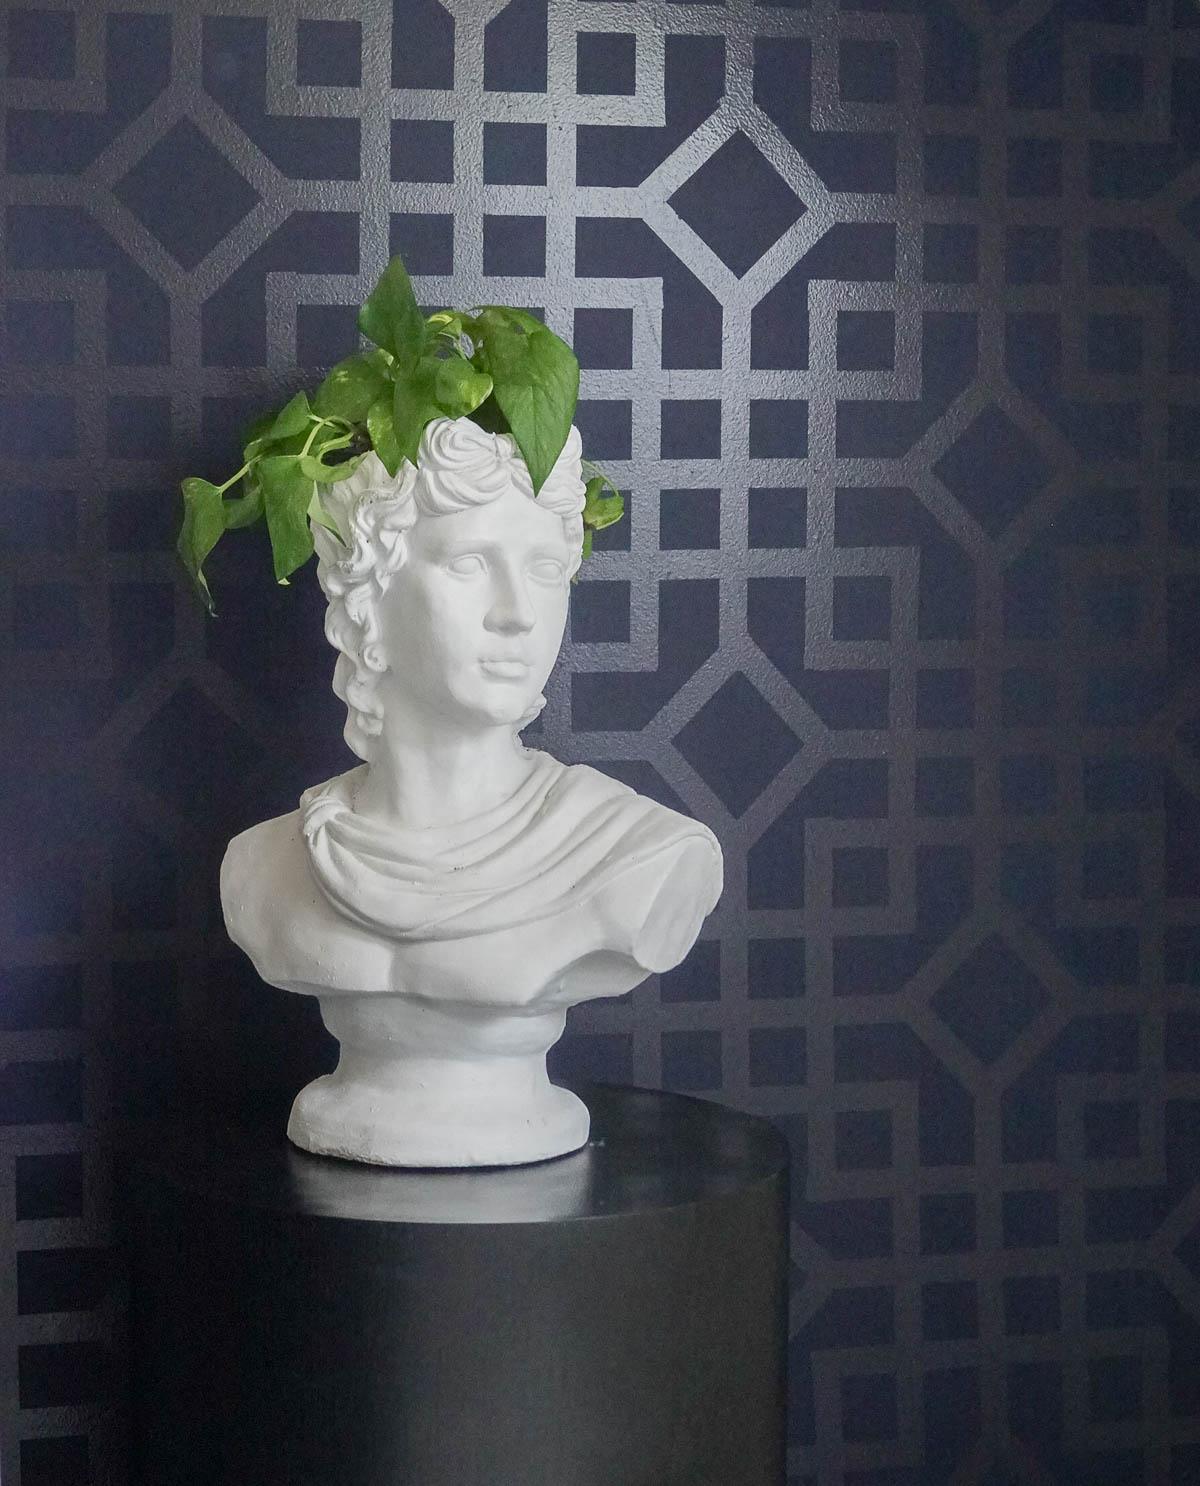
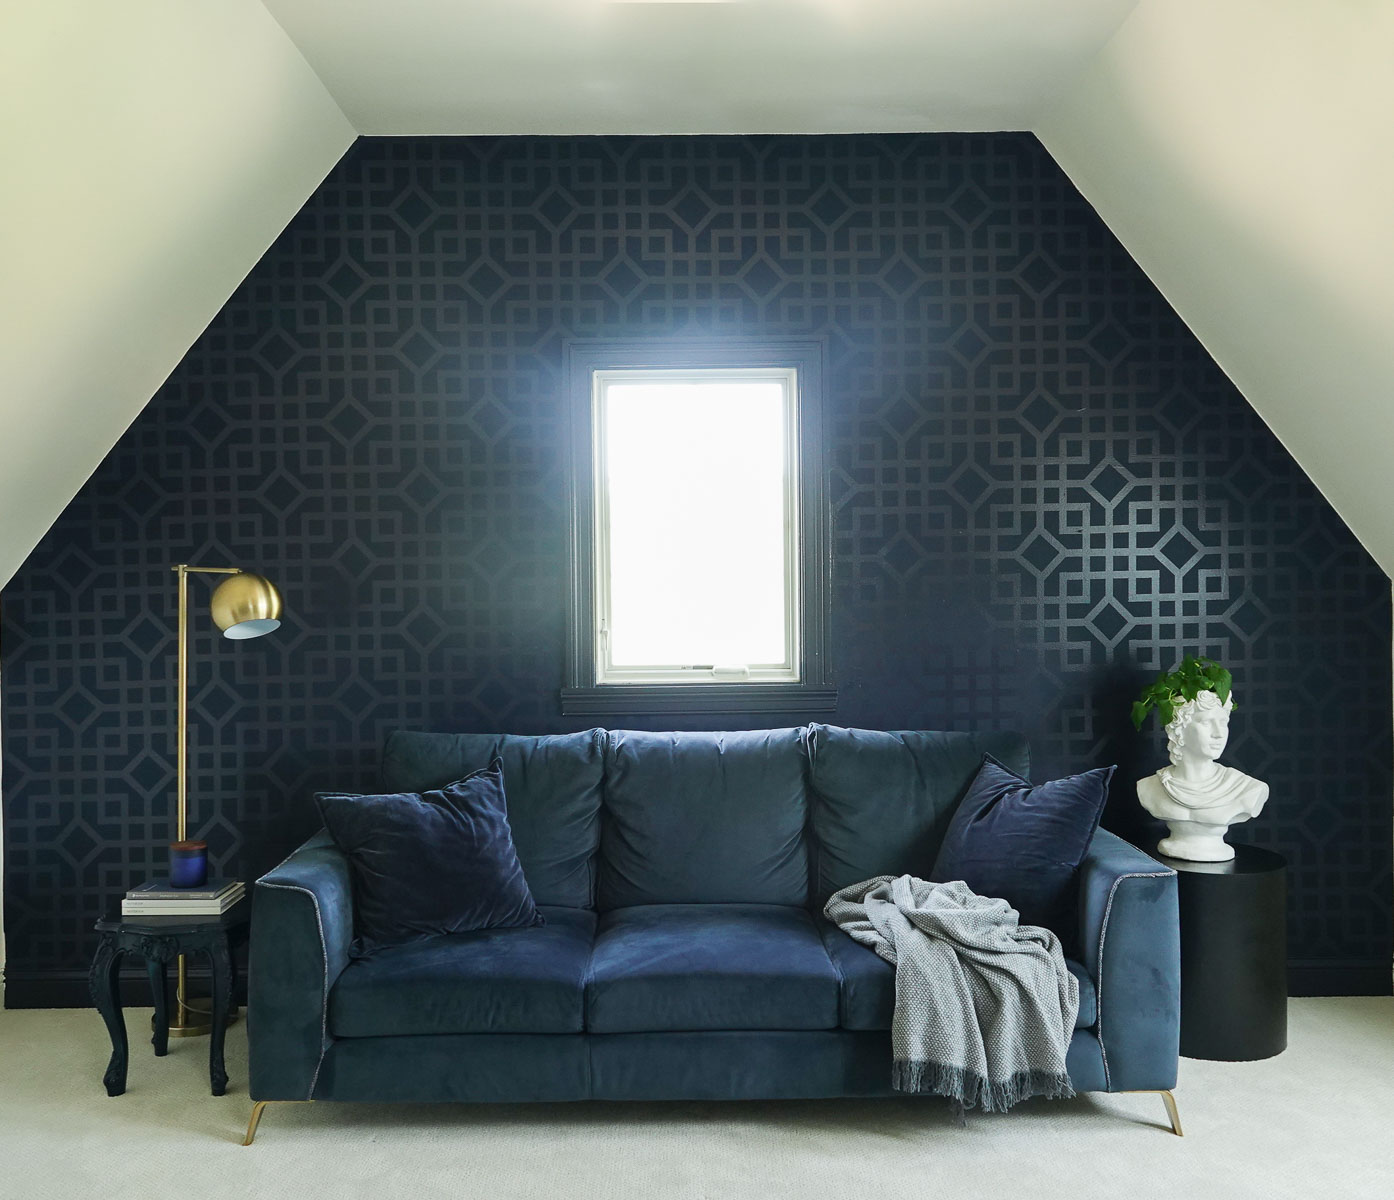
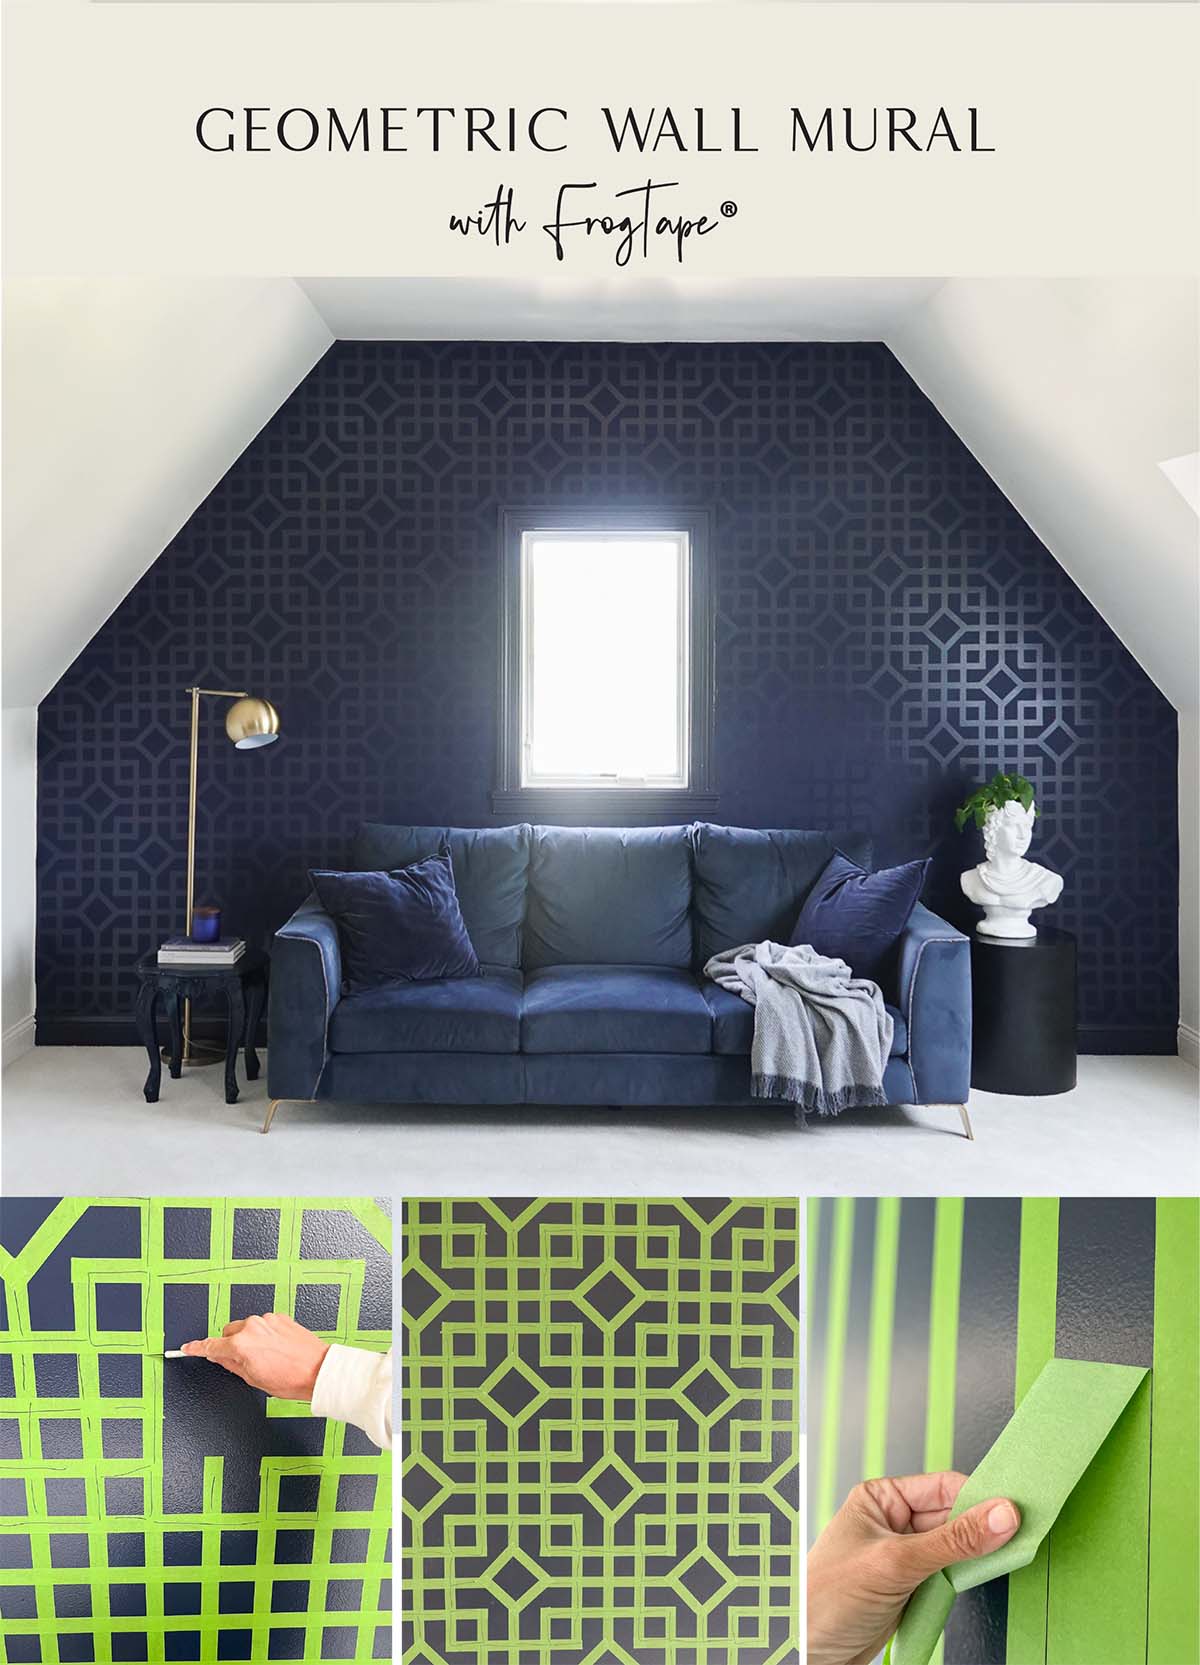
The Midtown Modern trend is all about a “rich” urban lifestyle using saturated hues like black or navy. Accent with bright brass and use plush fabrics like velvet and satin.

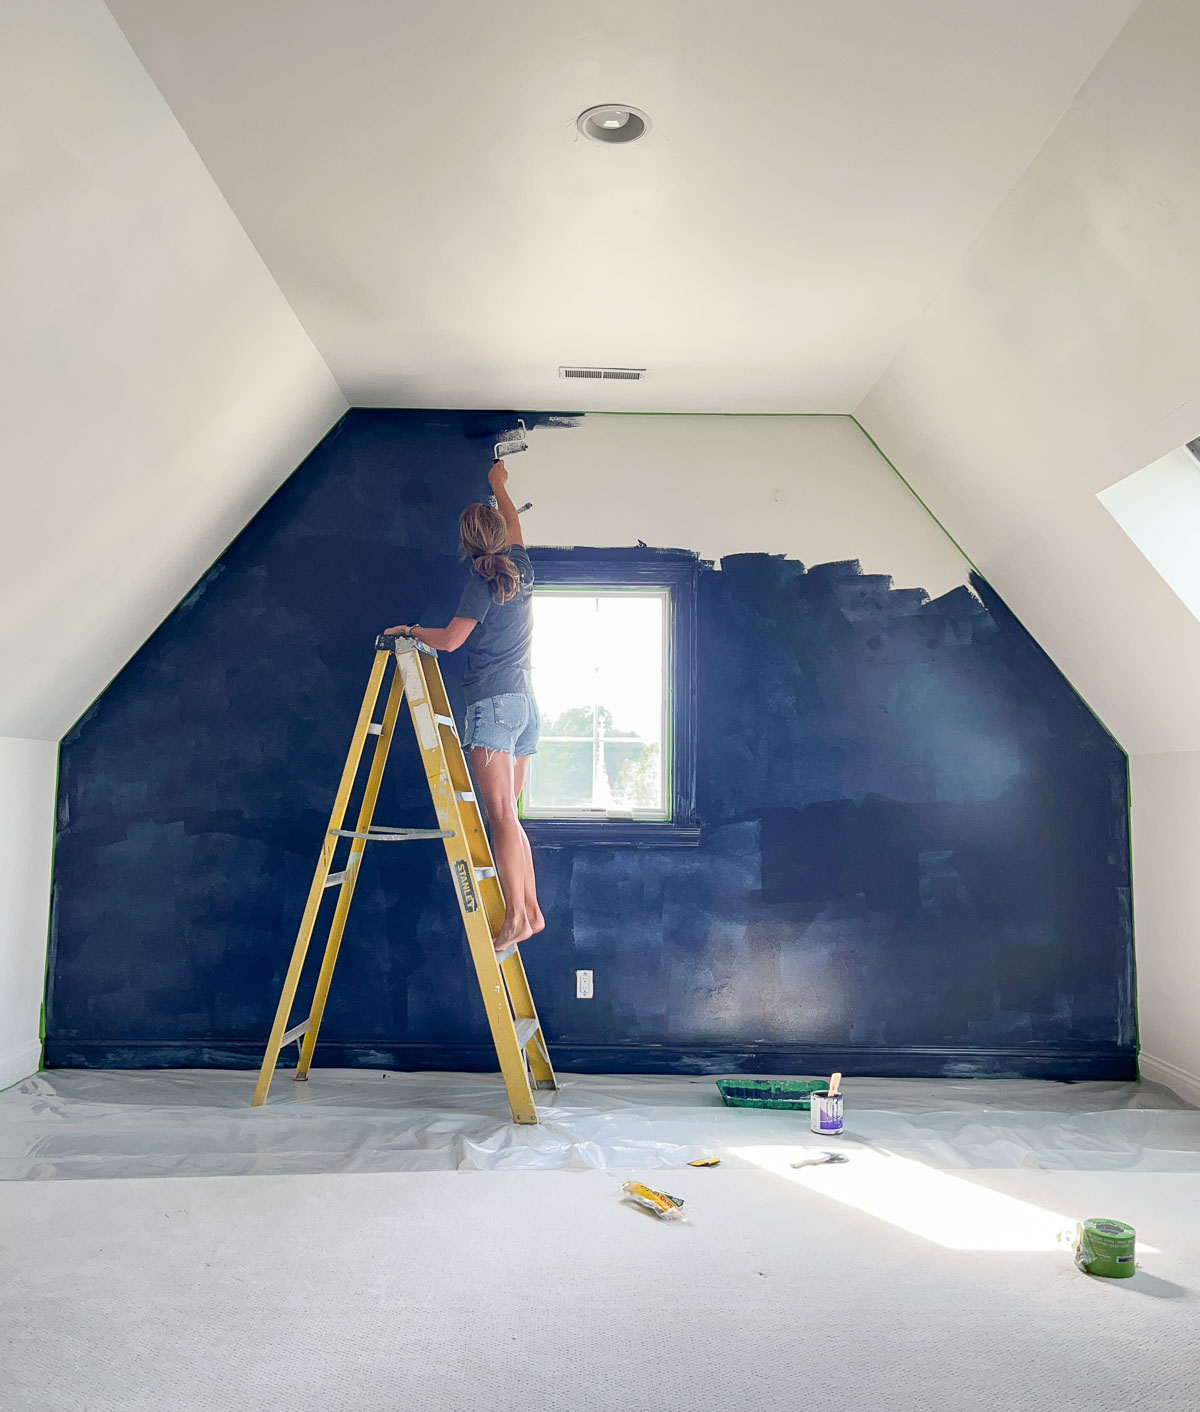
I added the look to our home by creating a unique geometric wall mural. I painted the base coat in a high-gloss finish and l created a design using FrogTape® I painted over the wall with flat paint, removed the tape, and I had a unique and gorgeous accent wall.

To create your own Geometric Wall Mural, here are the supplies you will need.

Supplies for Geometric Wall Mural:

  • 5 rolls of FrogTape® Multi-Surface Painter’s Tape – Green, 0.94 in. x 60 yd.
  • 2 rolls of FrogTape® Multi-Surface Painter’s Tape – Green, 1.88 in. x 60 yd.
  • Drop Cloth
  • 1 quart of high gloss finish paint
  • 1 quart of matte finish paint
  • Level
  • Paint Brush
  • Paint Roller
  • Paint Tray
  • Scissors
  • Exacto Knife

How to Create a Geometric Wall Mural

  • Paint the entire wall with a high-glossy finish paint.
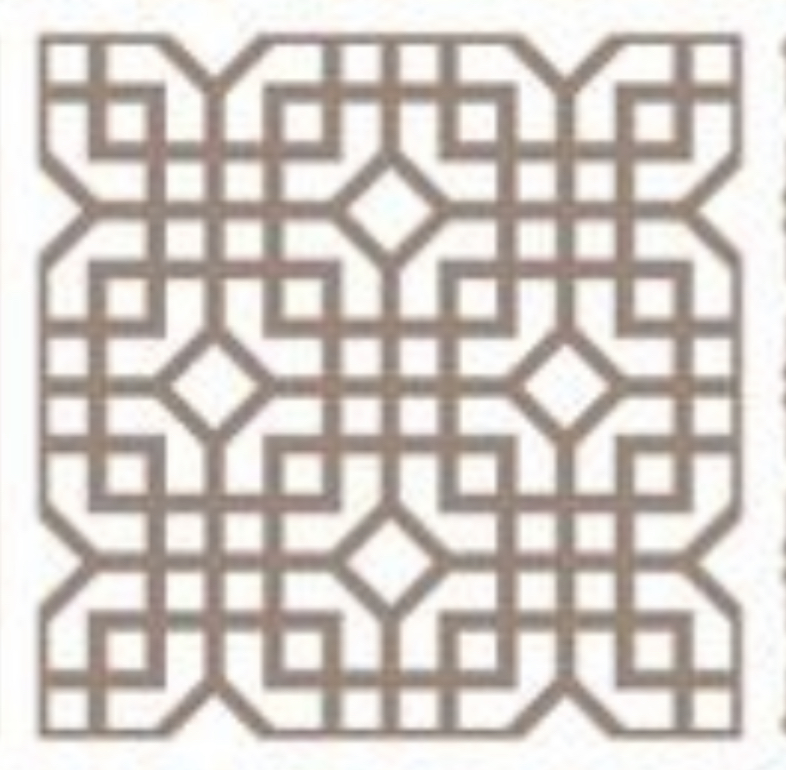
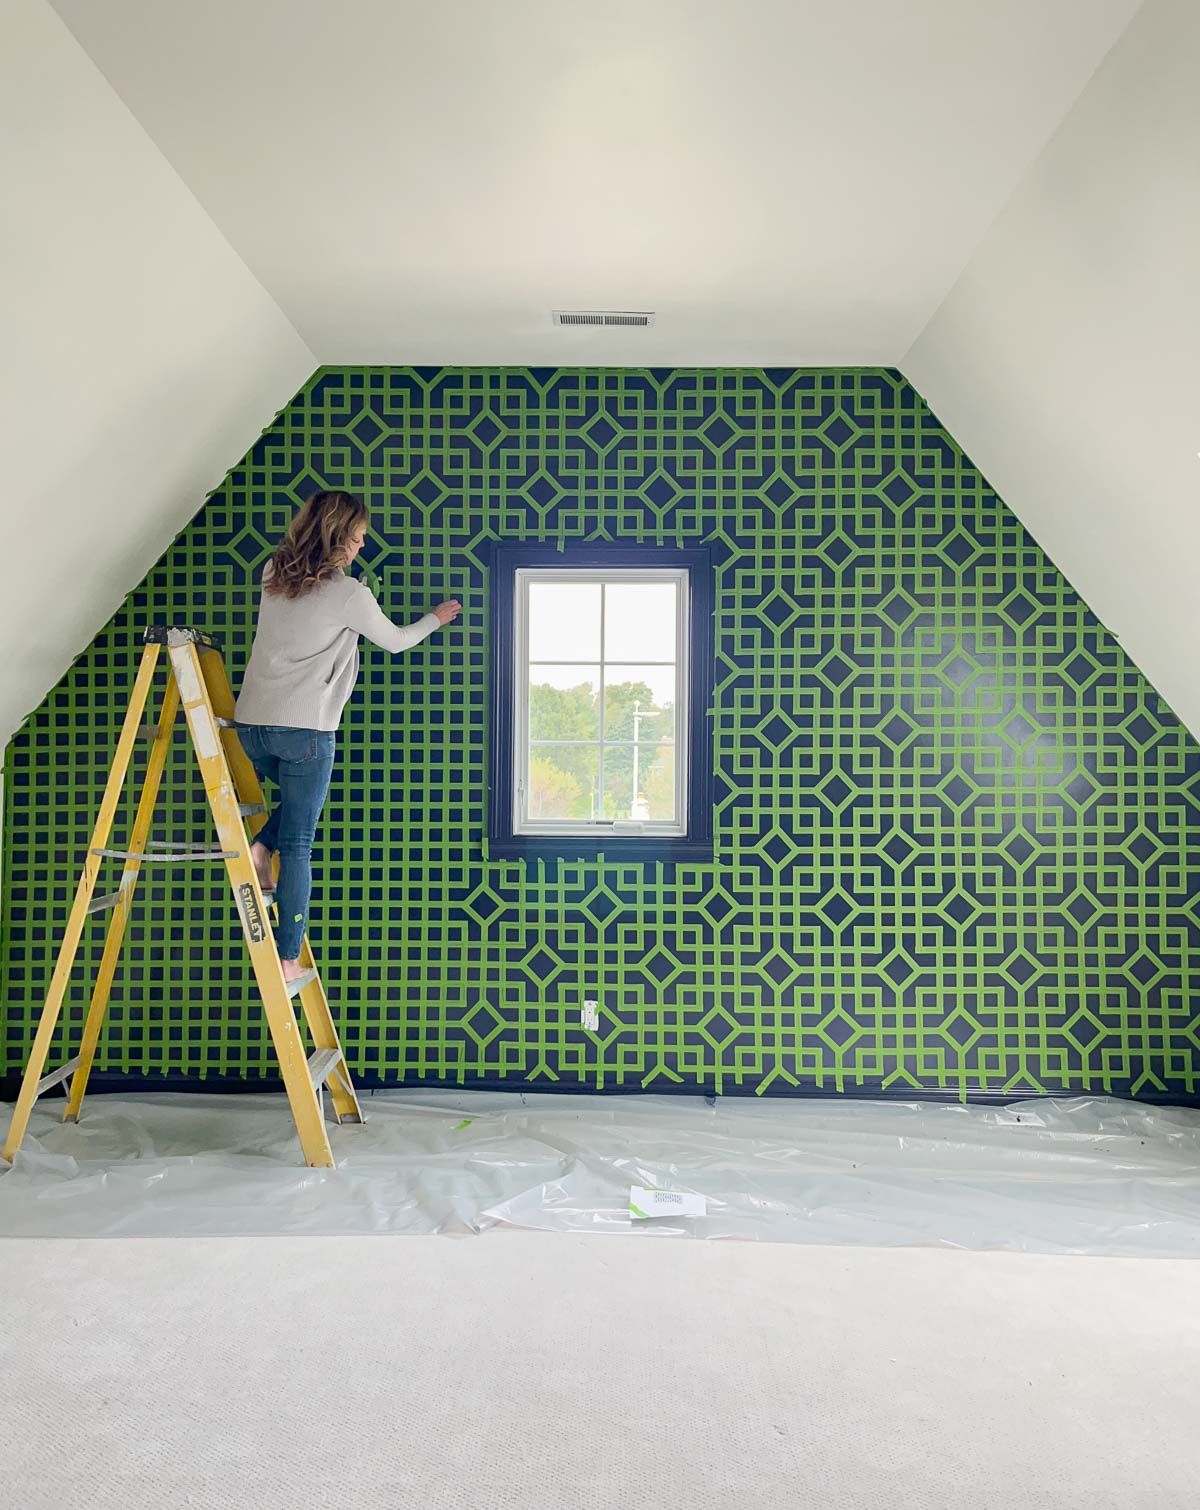
  • Plan your design. I found an image online and decided to begin with a grid pattern to create the geometric design.
  • To create the grid pattern, I used .94-inch tape for the lines and used 1.88-inch tape for the spaces. Begin at the center of the wall – use a level to make sure that the first line is straight. Continue to proceed across the wall.

If the wall was recently painted (less than a month), use FrogTape® Delicate Surface Painter’s Tape.

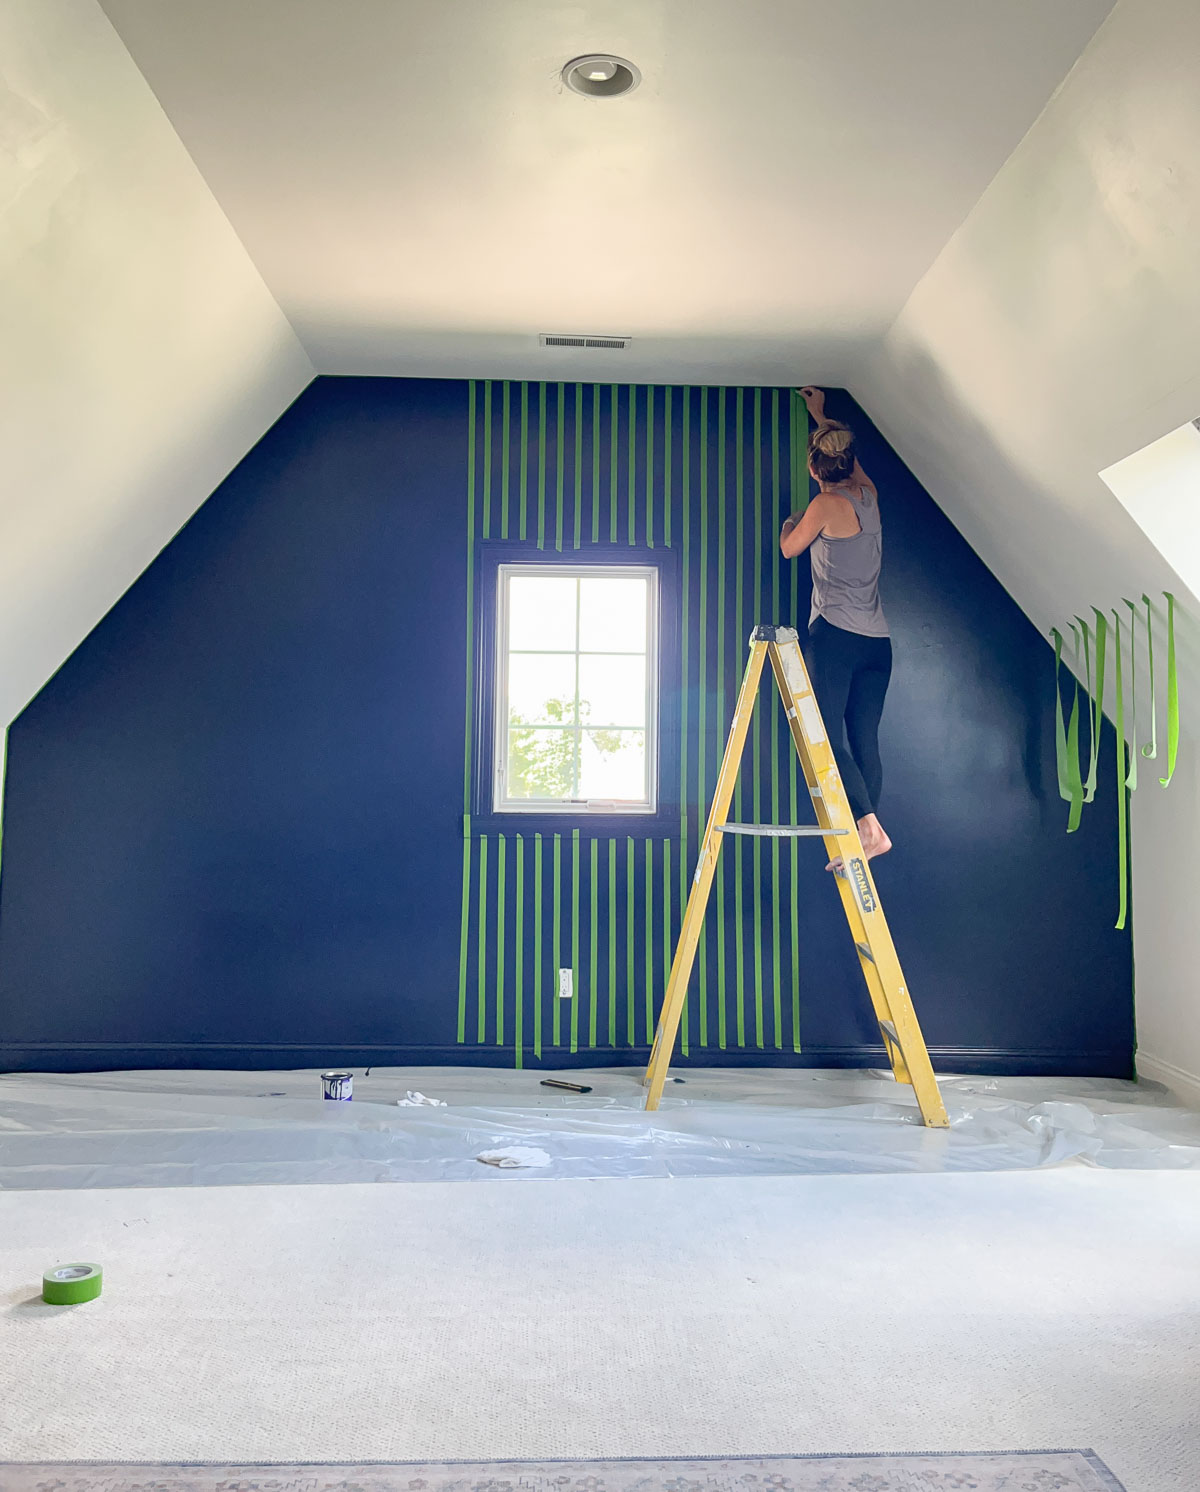
  • For the horizontal lines, begin at the top of the wall and continue down the wall repeating the taping pattern.
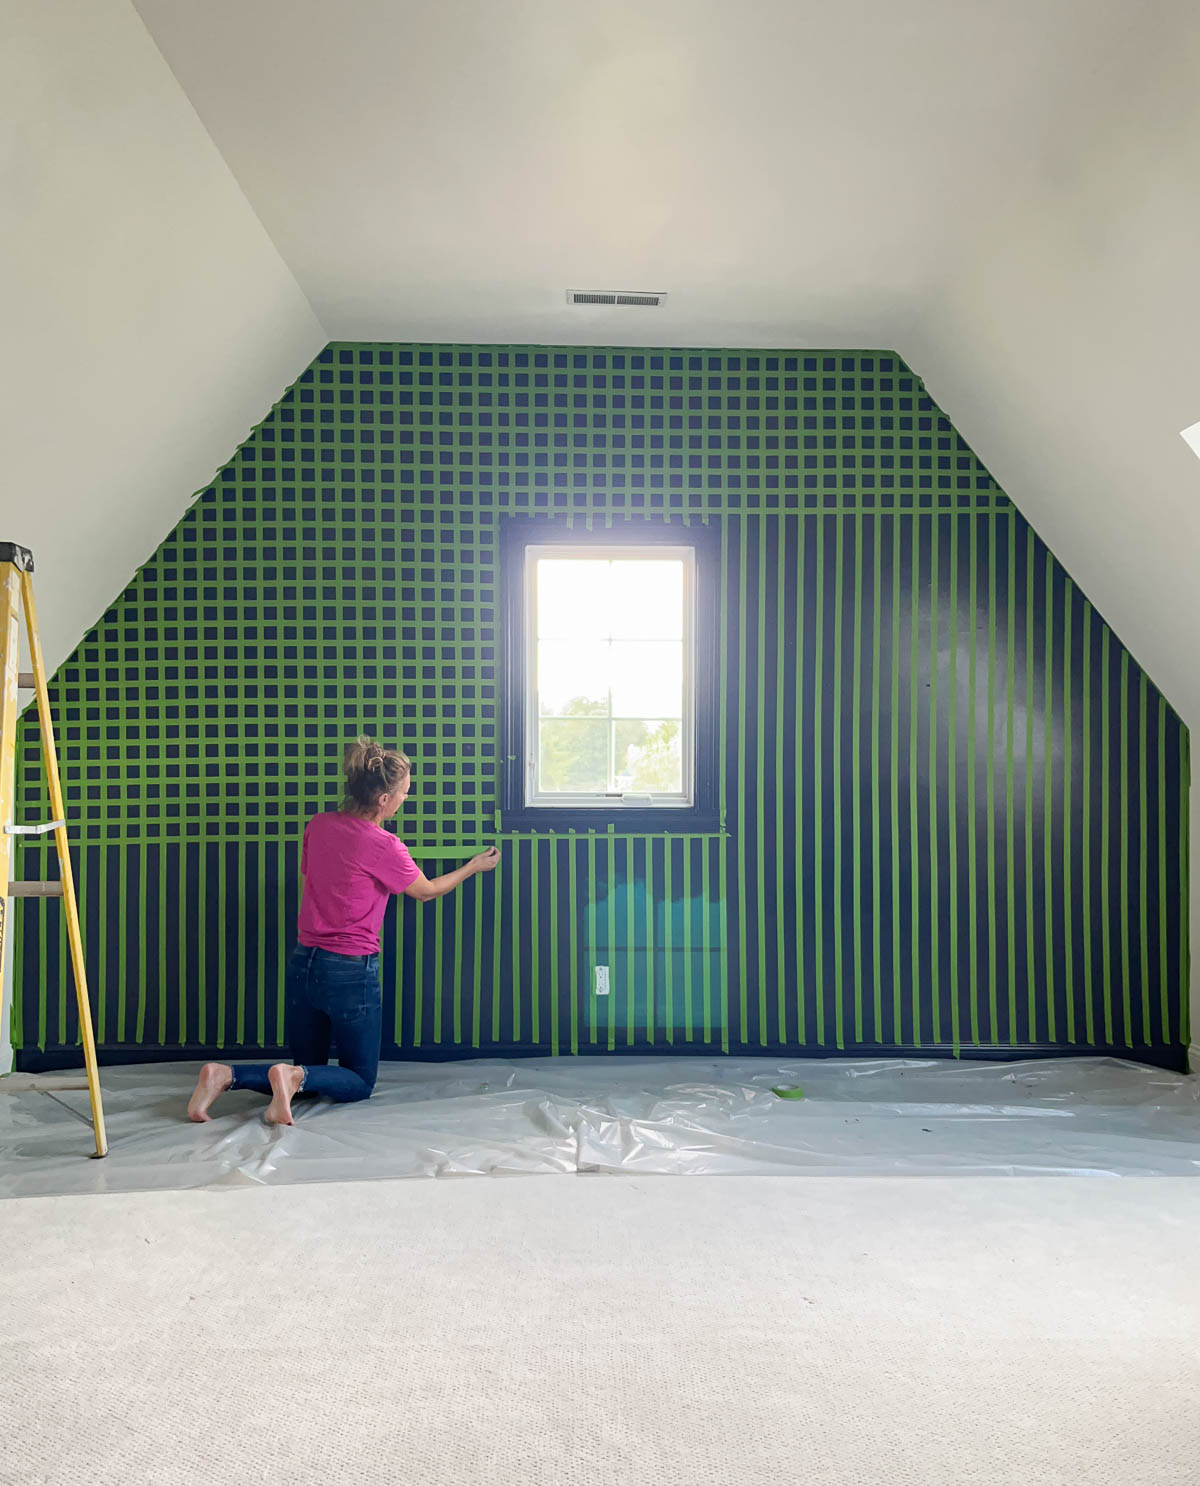
  • Once the wall is a large grid, begin to work on the details. Using the printout I found online, I drew out the pattern in sections.
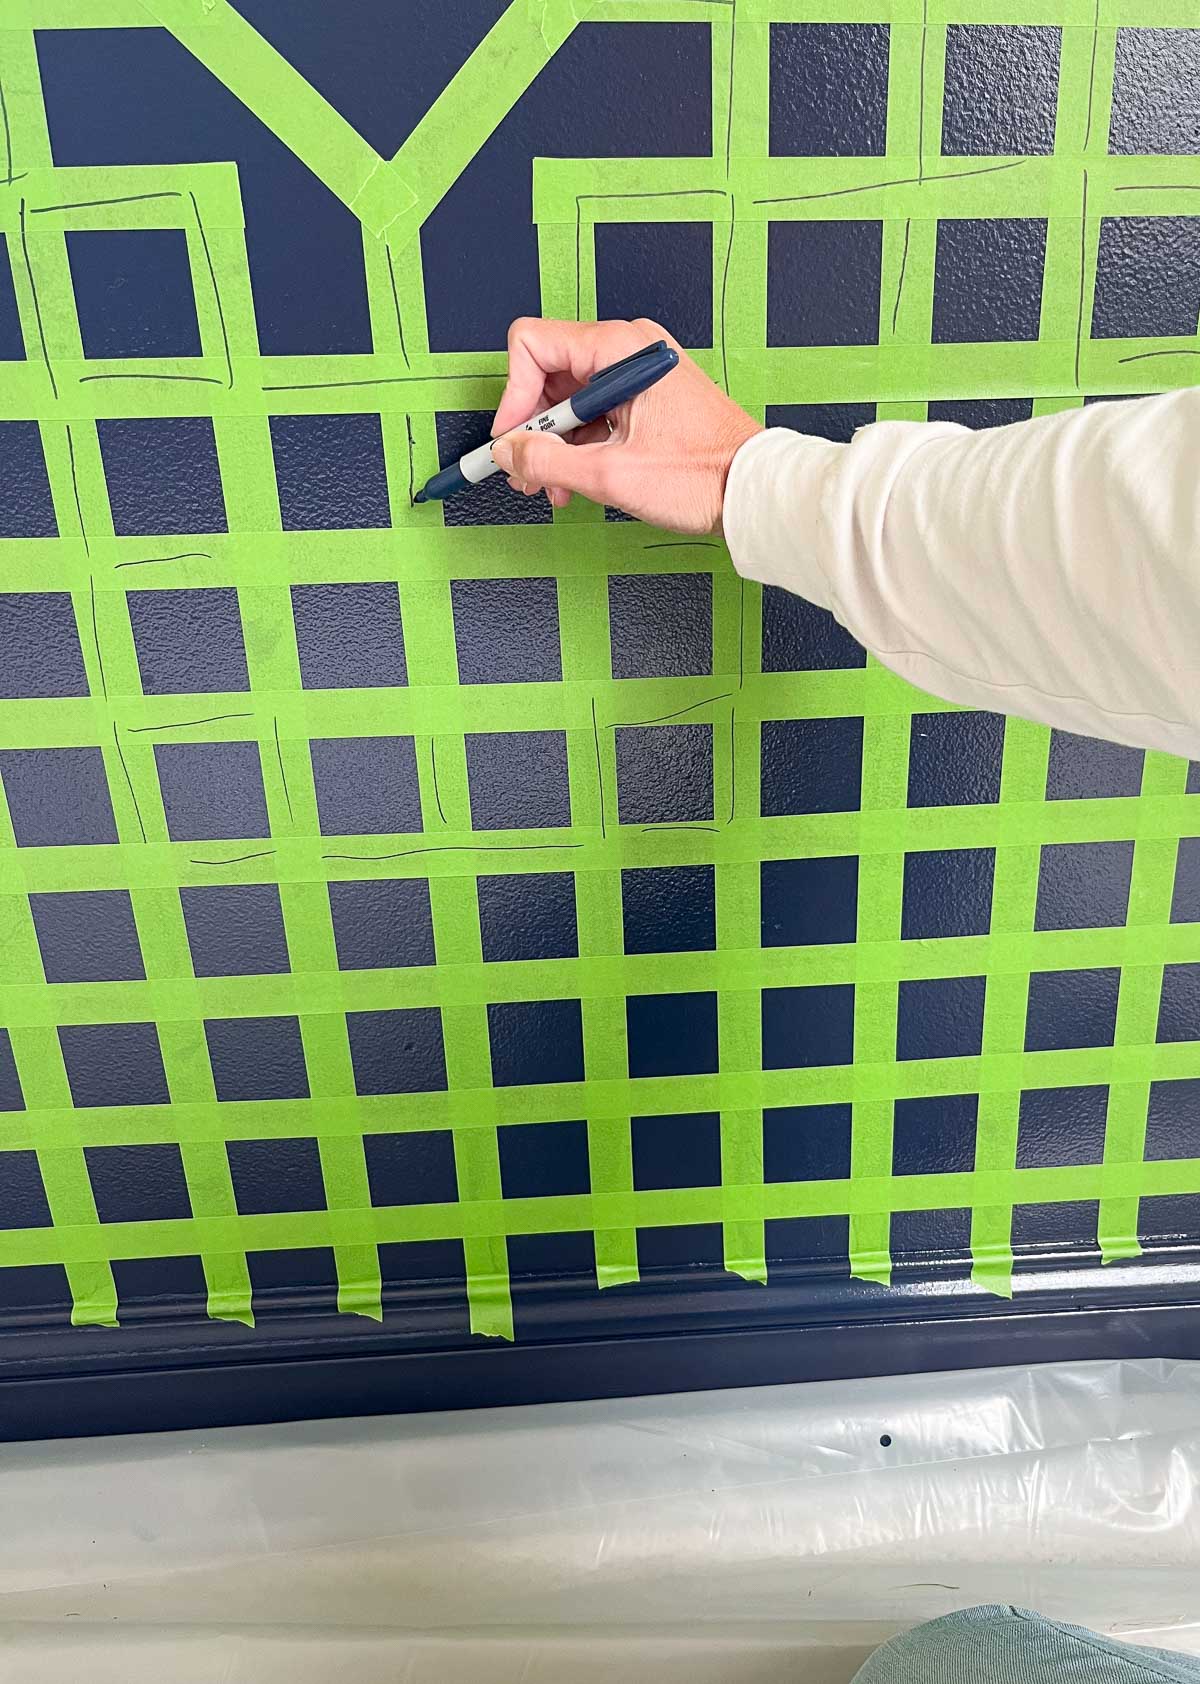
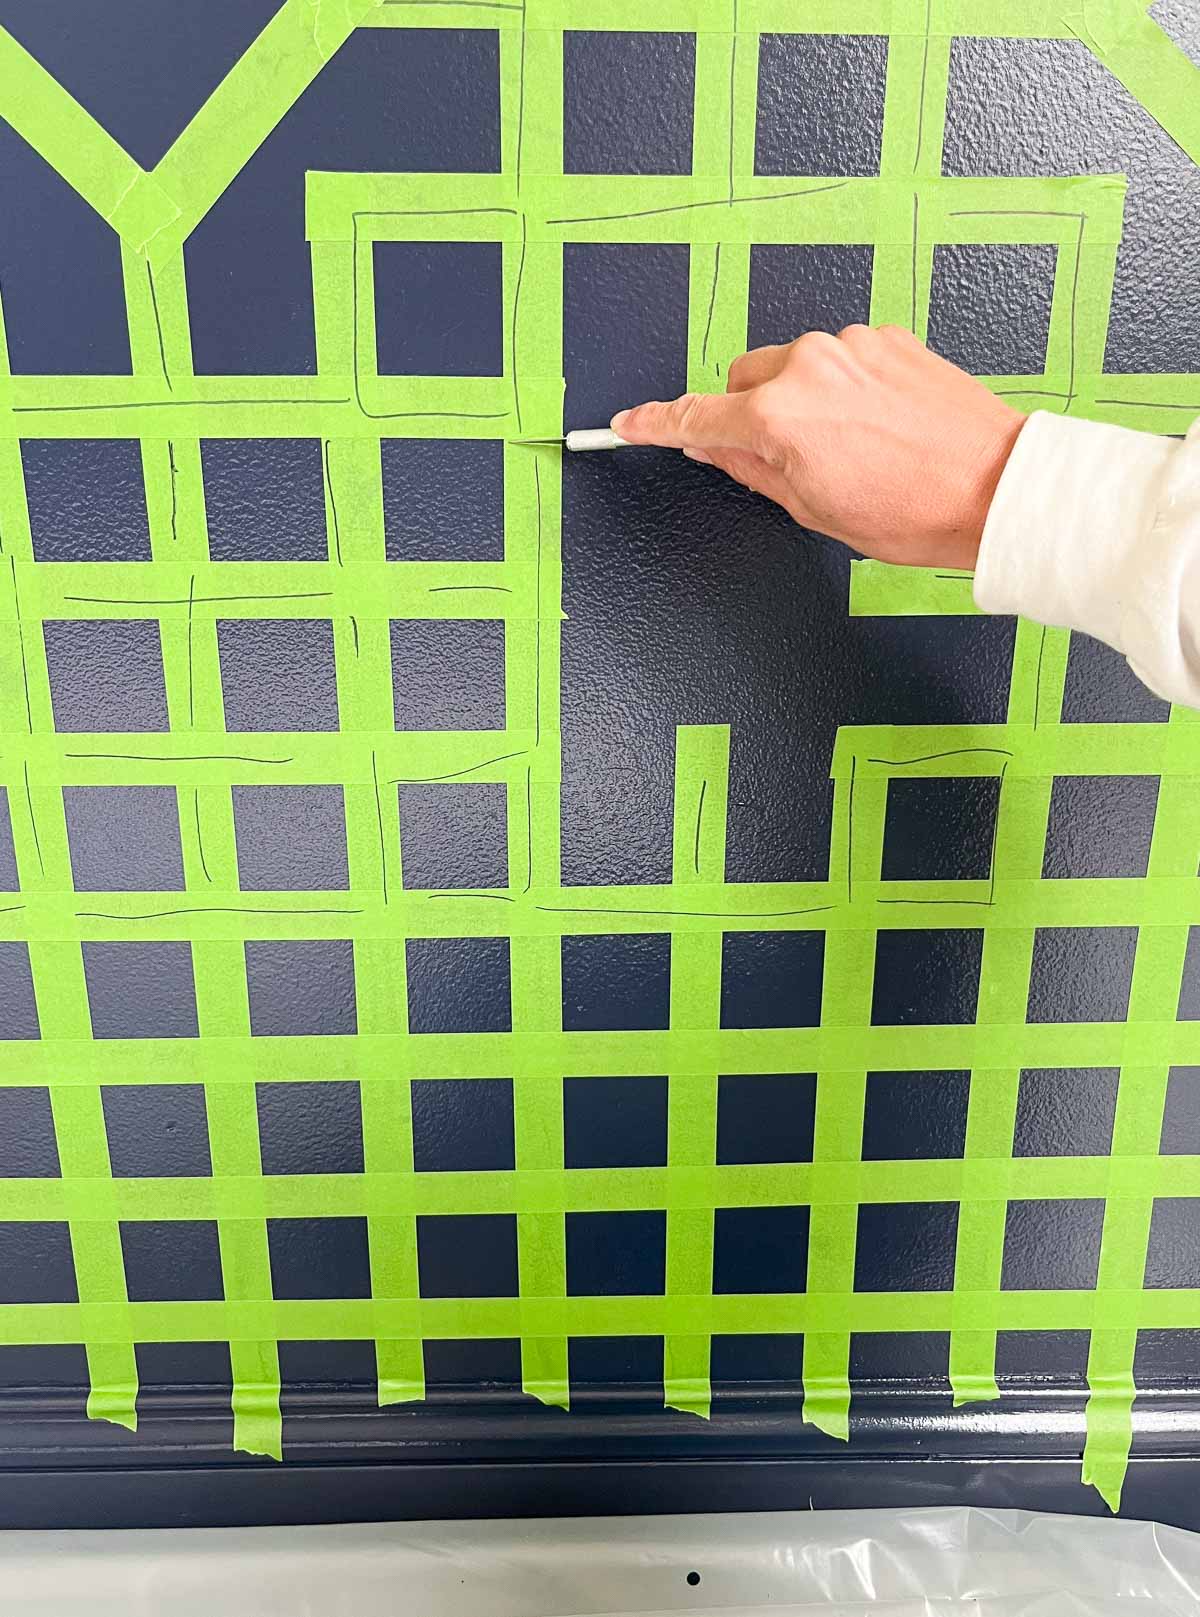
  • Once the pattern is drawn out, take the Exacto knife and cut away what isn’t needed. Be careful not to press too hard – you need just enough pressure to cut the tape and not damage the wall.
  • Next, create the diamond pattern using fresh tape and cut it with scissors.
  • Once the pattern is complete, make sure the FrogTape adheres wall to the wall. I went over the entire wall with a dry paint roller.
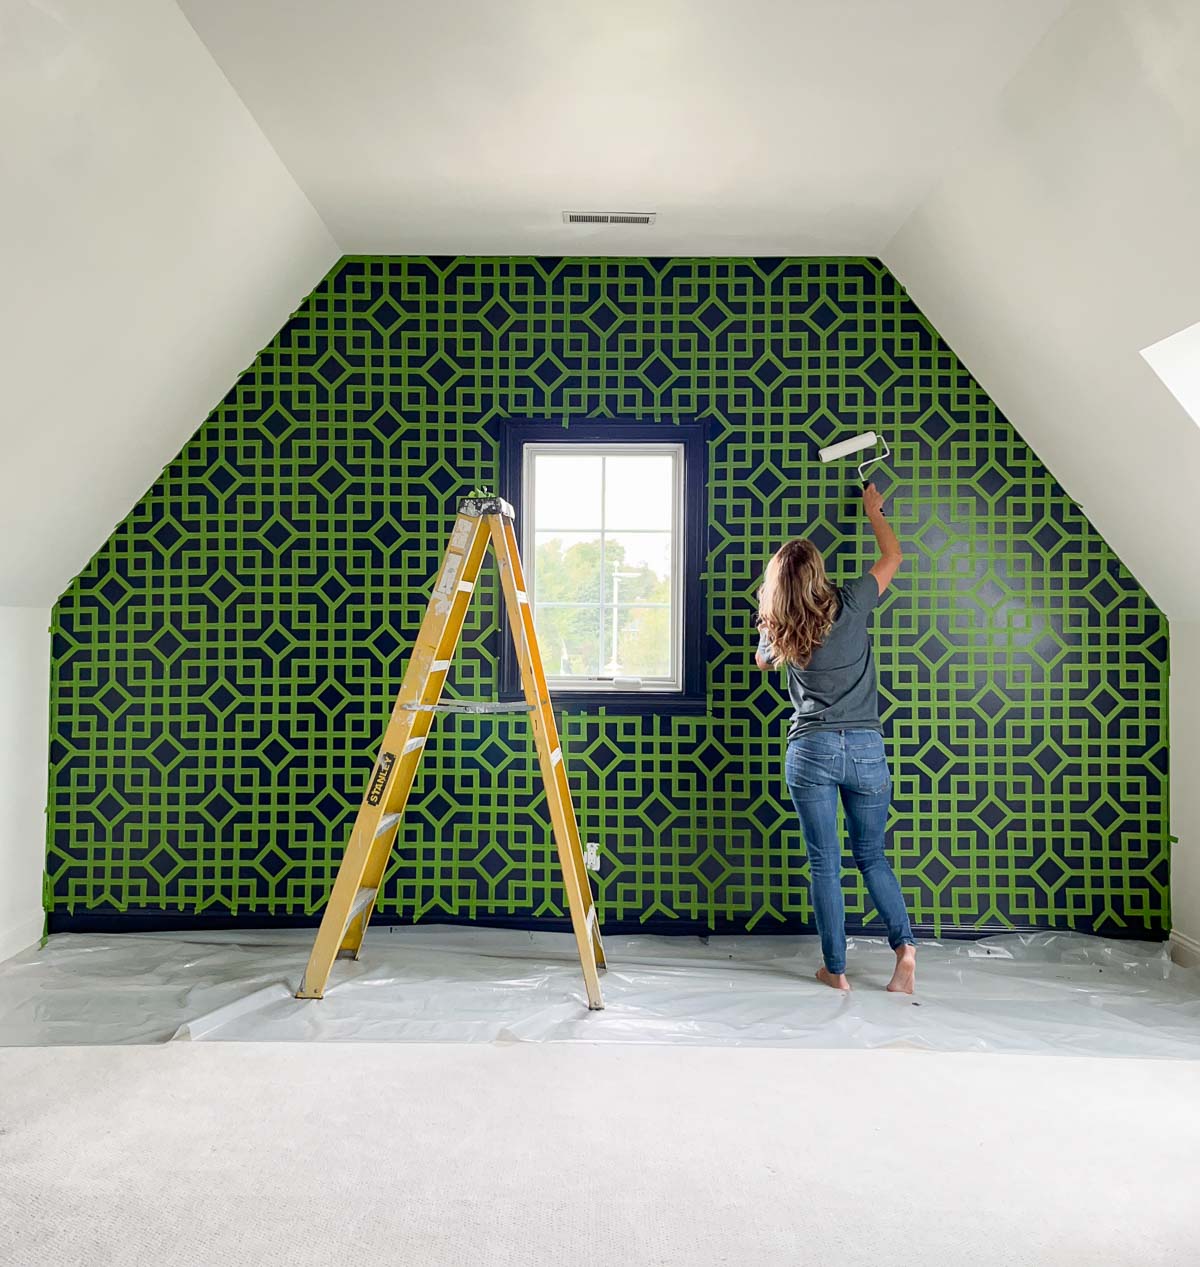
  • Finally, it is time to paint the matte finish paint.
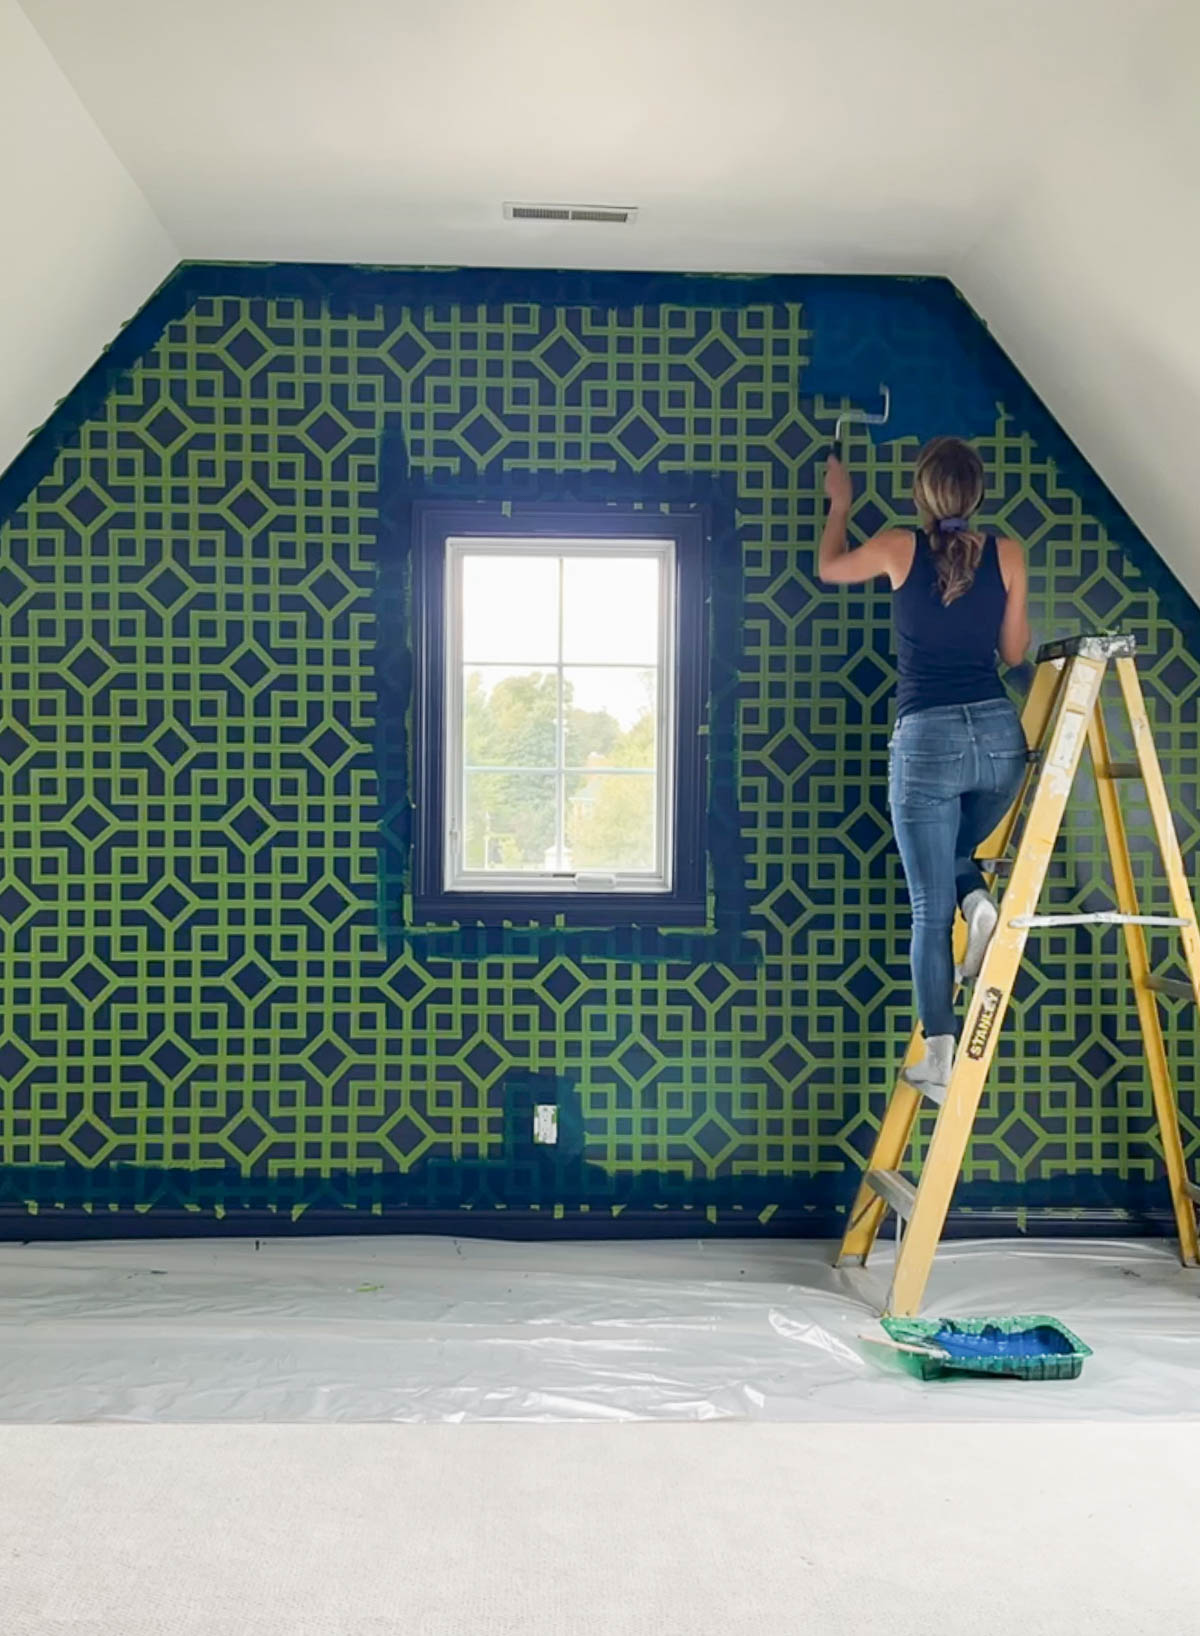
  • Once the paint is dry, carefully pull back the FrogTape.

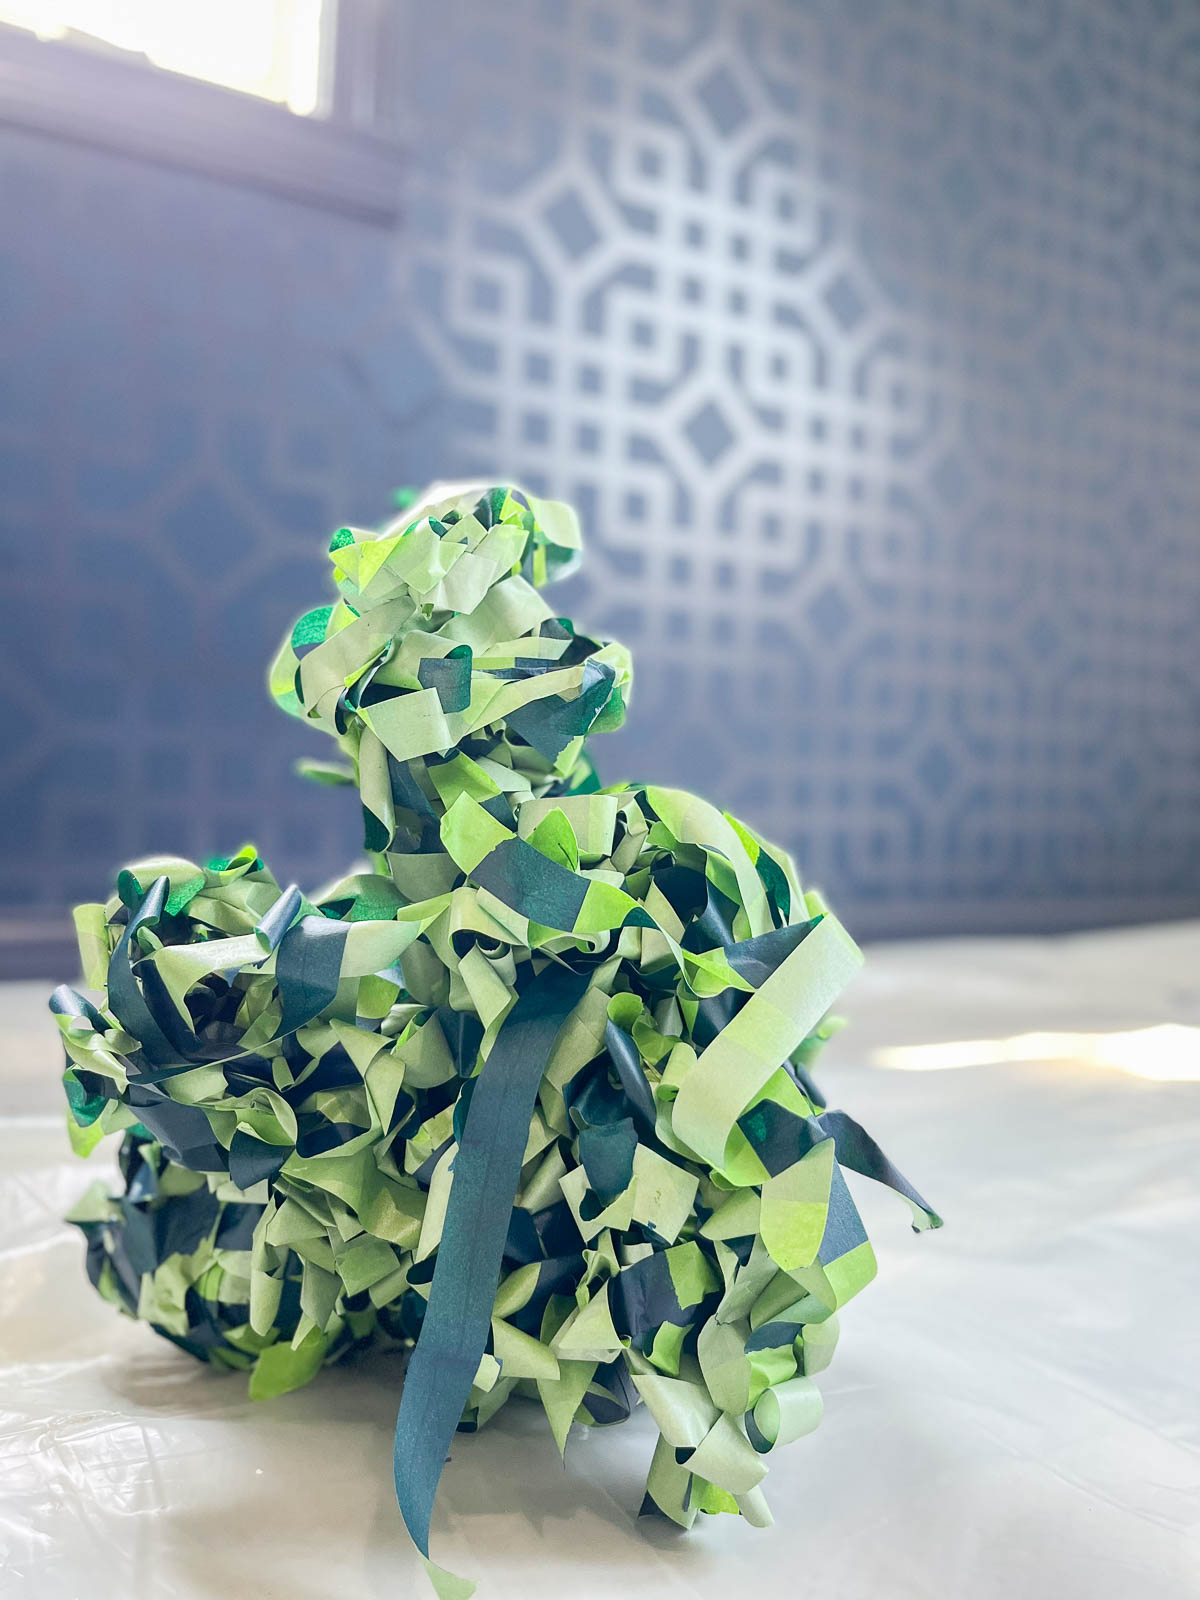
  • Enjoy your new accent wall!

Watch the entire process of creating the geometric wall mural here:

Are you new to my blog? Go HERE to see my home tour and HERE to shop for items I use in our home.

Find me on Facebook | Instagram | Twitter Pinterest

Home

Online Source for Wallpaper & Wall Murals

PhotoWall is a great online source for wallpaper & wall murals. They are custom made to fit your space, and their selection is huge!

This is a sponsored post written by me on behalf of PhotoWall. All opinions are 100% mine.

I recently installed a mural from PhotoWall. It is their Watercolour Grey, and they offer it in several different color options.

PhotoWall is offering my readers a discount! Save 25% on your order using code sincerelysarad2020.

Online Source for Wallpaper & Wall Murals

Photowall offers quick shipping, so this is a perfect project while so many of us are stuck at home.

The wallpaper and wall murals come with their own wallpaper paste. You simply have to mix the powder with water, wait a few minutes, and your paste is ready!

Photowall offers a wallpaper kit for some additional cost. I highly recommend it and think it’s a great value for the tools you received (and can be used over and over again)!

The mural comes in strips which are numbered and make it easy to know where each panel goes. They are printed to begin on the left side of the wall and work your way over to the right side.

I found installation to be fairly easy, but I have installed wallpaper several times. I will say, actual wallpaper is much easier to install that removable wallpaper. There’s much more give such you can move the paper around whereas removable wallpaper has an adhesive that sticks with no give.

I have a full wallpaper tutorial HERE if you need help hanging paper (but keep in mind this tutorial is for prepasted paper). For PhotoWall wallpaper and murals, you simply add the paste to the wall.

I never had a seam roller until I received the wallpaper kit, and it makes a huge difference!

Here is a before of the space:

And the after:

We’re prepping for new flooring, so the brown carpet will be replaced with something that has more of a gray undertone. I also painted the cherry banister to brighten the stairway since there is no natural lighting.

I also added PhotoWall’s wallpaper to our half bath, and I love it! It is called Oh the Tulips, and it adds fun, moody elegance to the space. This room is also a work-in-progress as we’re replacing the white tile with luxury vinyl, and I’m considering painting the wall treatment – any thoughts on colors?

Online Source for Wallpaper & Wall Murals

Besides being a fantastic source for online source for wallpaper & wall murals, Photowall also has product . They offer canvas prints, framed prints, and posters. You can even upload your own photo and create any thing from a wall mural to a framed print.

Go create something!

Are you new to my blog? Go HERE to see my home tour and HERE to shop for items I use in our home.

Find me on Facebook | Instagram | Twitter Pinterest

Decor

The Best Wall Murals

I have been obsessing over murals lately and scheming for the perfect space to add one. When I saw this landscape mural from Anewall, it was love at first site. Anewall has the best wall murals for your home!

The Best Wall Murals

The murals are installed like wallpaper (they come in rolls) and can be ordered pre-pasted (my strong preference), traditional (you add the paste yourself) and self-adhesive vinyl.

I have added a lot of wallpaper to our home lately, and I prefer the pre-pasted option. All you have to do is add water to activate the adhesive, and it is typically easier to remove than traditional paper. I have a steamer with a wallpaper attachment I use when I remove wallpaper. I share a wallpaper tutorial HERE, and it includes a video as well.

I installed the mural in an afternoon. My room is a little longer than the traditional size Anewall sells, so mine was custom made. Shipping was fast and installation was very easy.

If you have been following along on my decor adventures, you know that I have struggled with this space (which went from a home office to a home library). I always envisioned an timeless and elegant space, but it was a journey to get here. I added marble tile and the bookshelves. I also played around with various wall treatments, but thanks to Anewall, I finally achieved the look I wanted for the space. I absolutely love it!

Anewall offers so many different wall murals – perfect for any space or style. I used their Shaded Landscape Mural, and you can find it HERE.

Thank you Anewall for the partnership – I’m a huge fan and already looking for more spaces to add your gorgeous wall murals!

This is a sponsored post written by me on behalf of Anewall. All opinions are 100% mine.

Are you new to my blog? Go HERE to see my home tour and HERE to shop for items I use in our home.

Find me on Facebook | Instagram | Twitter Pinterest