DIY

Best DIY Projects

I often wonder why I didn’t become a food or fashion blogger because the amount of time one DIY post takes is SO long (however, I’ll be the first to admit you don’t want any of my recipes or fashion advice)!  I am in the middle of two fairly large DIY projects, and it will be awhile before I can post anything about either.  So in the mean time, I thought it would be fun to share what I consider my best (and more recent) DIY projects!  

  • DIY PANELED WALL TREATMENT

Best DIY Project - Elegant wall treatment

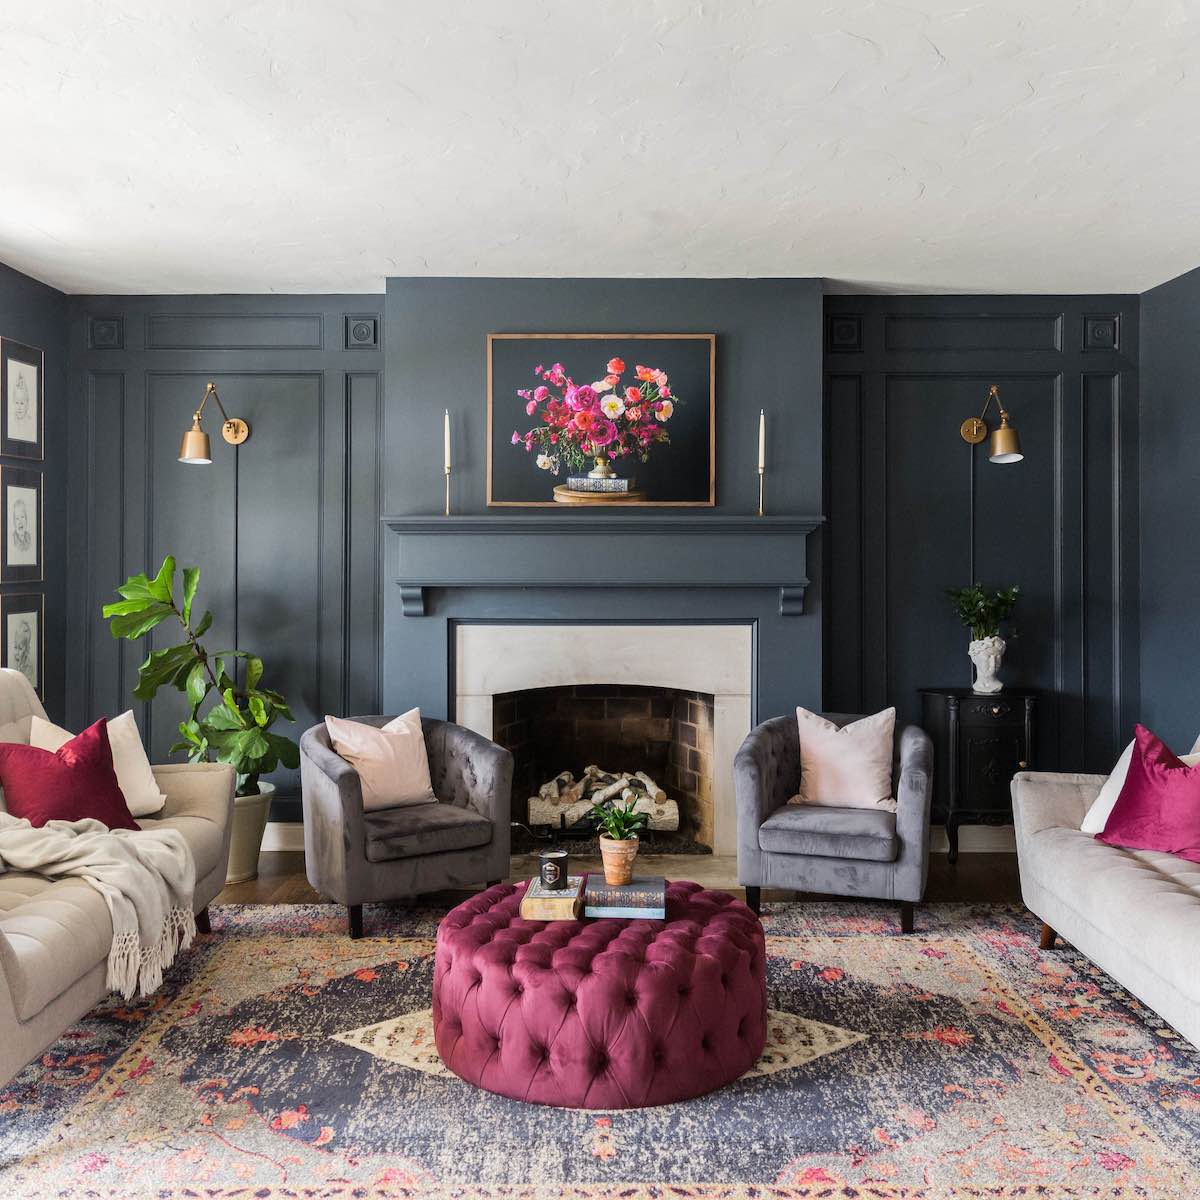
This project was a result of wanting to give my family room an entirely new look. The DIY paneled wall treatment makes such an elegant statement. I do not claim to be a woodworker, but I am pleased with the result and spent around $300. Go HERE for the full tutorial!  

  • DIY BOARD AND BATTEN TUTORIAL

DIY Project - Board & Batten

My boys’ room recently had a major makeover, and you can see all the furniture details by going here.  I wanted to add a statement wall in the space, so I created this board and batten wall.  It was built solo one afternoon, and (since I had everything other than the MDF board) this project cost me less than $100!  The full tutorial is here.  

  • DIY KITCHEN REMODEL

Best DIY Project - kitchen remodel

My husband and I tore out our old kitchen and completely remodeled the space in 9 weeks.  Read all about that DIY journey here!  It was definitely my craziest and biggest DIY to date.  I am so proud of what we accomplished, but I don’t think we will attempt a project of this size and scale anytime soon…  

  • DIY PAINTED TILE FLOOR

Best DIY Project - Painted Tile Floor

Our laundry room also serves as my crafting/DIY room, so it sees a lot of wear and tear (and lots and lots of paint).  There was already paint everywhere, so adding a little more paint wouldn’t be a big deal.  Here is the full tutorial on painting tile floors.  

  • DIY: INSTALLING A FARMHOUSE SINK

Best DIY Project - Installing a farmhouse sink

Installing a farmhouse sink proved to be one of our harder DIYs.  I really was clueless how much goes into installing on – including building a base for the sink.  All the details of this DIY can be seen here.

And stay tuned – I promise there are more great DIY project tutorials coming your way.  

Good things come to those who wait! 🙂

Go create something!

Are you new to my blog? Go HERE to see my home tour and HERE to shop for items I use in our home.  

DIY

Elegant Wall Paneling

I wanted to give my family room an entirely new look, and this Elegant Wall Paneling updated the space.


I do not claim to be a woodworker, but I am pleased with the result and spent around $300.

How to Install Elegant Wall Paneling:

Materials

Here’s what I used:

  • (4) 4.5″ corner blocks
  • (20) 1 3/8″ x 8 ft primed base cap molding
  • (15) 4.4″ x 8 ft primed corner blocked square edge
  • (8) tubes of caulk plus some wood filler
  • (1) gallon of Valspar Reserve Paint in Night View.

You’ll also need a basic miter saw, nail gun and compressor. This is what the primed base cap looks like.

DIY Elegant Paneled Wall

And this is the primed corner block square edge.

DIY Elegant Paneled Wall 2

Step-by-Step Installation Instructions

Elegant DIY Paneled Wall

I began on the top of the wall and worked my wall down.  I cut a piece of the corner block square edge to size and made sure the top piece was level while attempting to have it as close to the ceiling as possible. Elegant DIY Paneled Wall 2

This is where things get tricky pretty fast.  I cut pieces of the corner caps and created a frame around the corner blocks.  I then cut pieces of the corner block square edge to fit around the framed corner blocks.  I had bigger gaps than I would have liked, but I used caulk to fill those in (again, I am new to solo woodworking)!

Elegant DIY Paneled Wall 3

Once that top part is done, the rest is easy!  I added a piece of the corner block square edge to the bottom of the wall above the existing trim. I then cut more corner block square edge to frame in the lower portion of the wall.

Elegant DIY Paneled Wall 5

And then framed in the rest of the lower portion with the block square edge.  Then I framed inside that with the trim cap.

DIY Paneled Wall With Remodelaholic

After all the trim was hung, I went through and caulked everything.  This took forever, and I would suggest using a caulk gun over the individual tubes like I did. Once the caulk dried, I painted the entire paneled wall with two coats of paint.

DIY Elegant Wall Treatment 2 1

I added a couple hanging lamps to both paneled walls, and I was done!

DIY Elegant Wall Treatment 1

Wall treatments can make a high impact in a space for low cost.

Want to know how I hid the lamp cords?  Go here to see the easy tutorial!

Go create something!

Are you new to my blog? Go HERE to see my home tour and HERE to shop for items I use in our home.  


Shop the Post