
Painting bookshelves isn’t difficult if you have the right tools and paint. Today I am sharing tips and tricks for getting the job done.
This is a sponsored post written by me on behalf of Dutch Boy. All opinions are 100% mine.
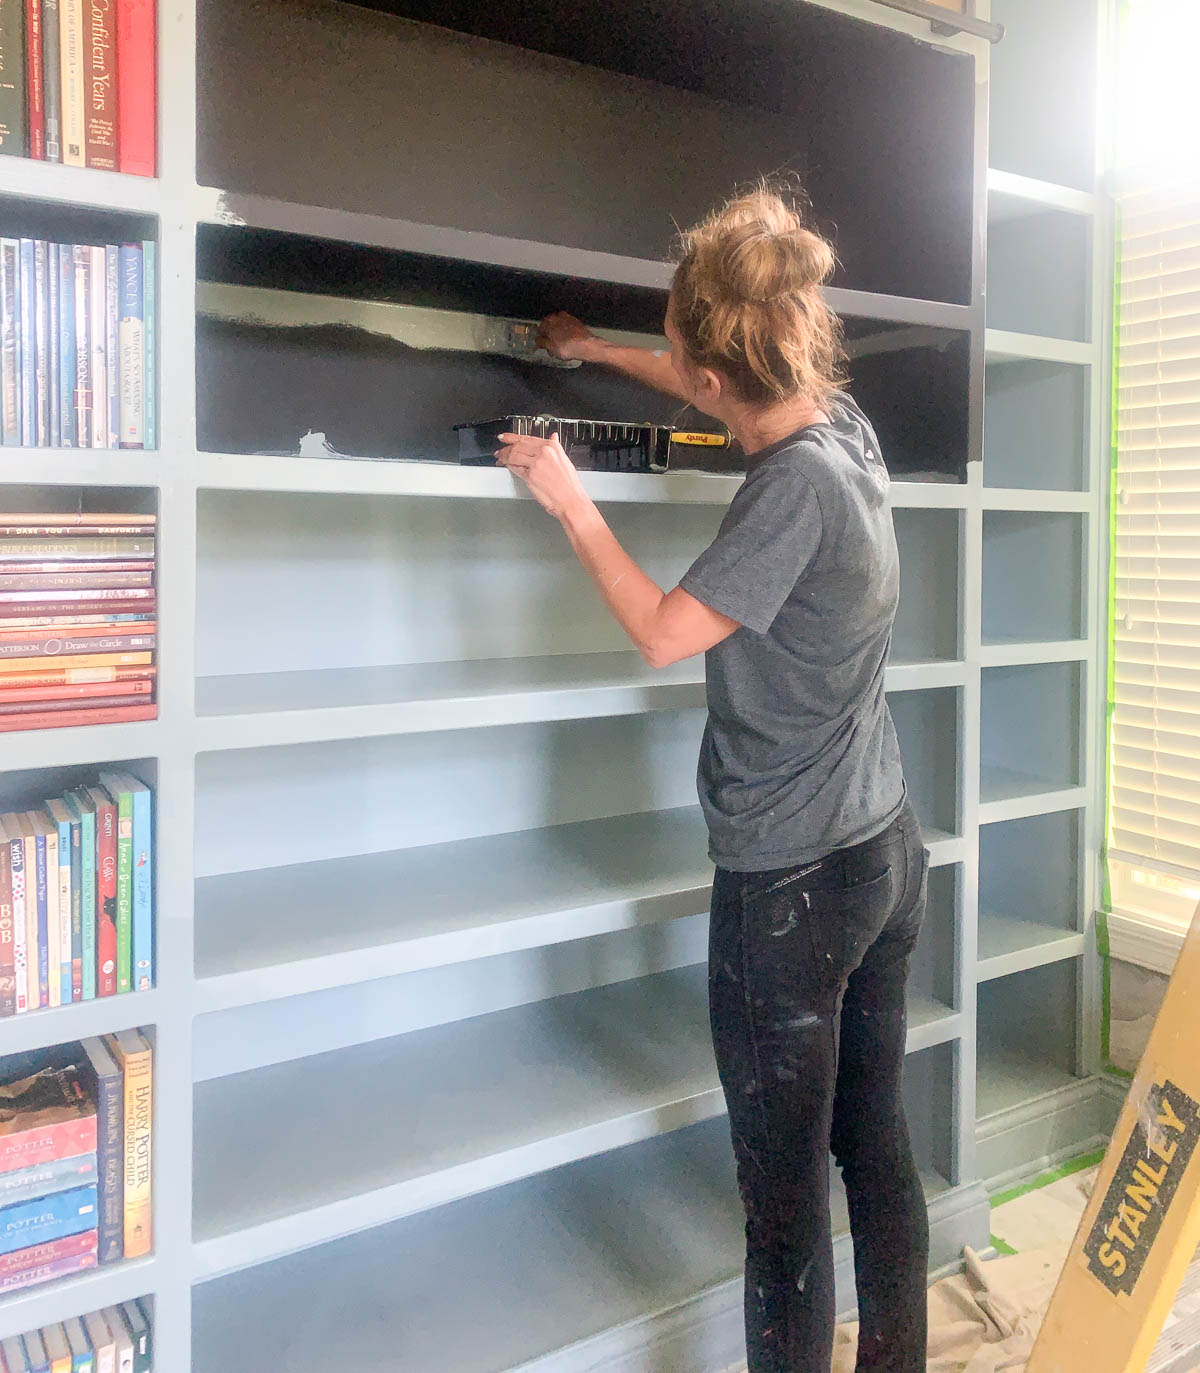
Several years ago, I painted our bookshelves black. The rest of the room is light, and although beautiful, the black always felt out of place.

The exterior of our home is “French Chateau” in style. I have slowly been trying to transform the interior to also reflect that style. Since many of the period homes used monochromatic color schemes, I wanted to paint the bookshelves blue.

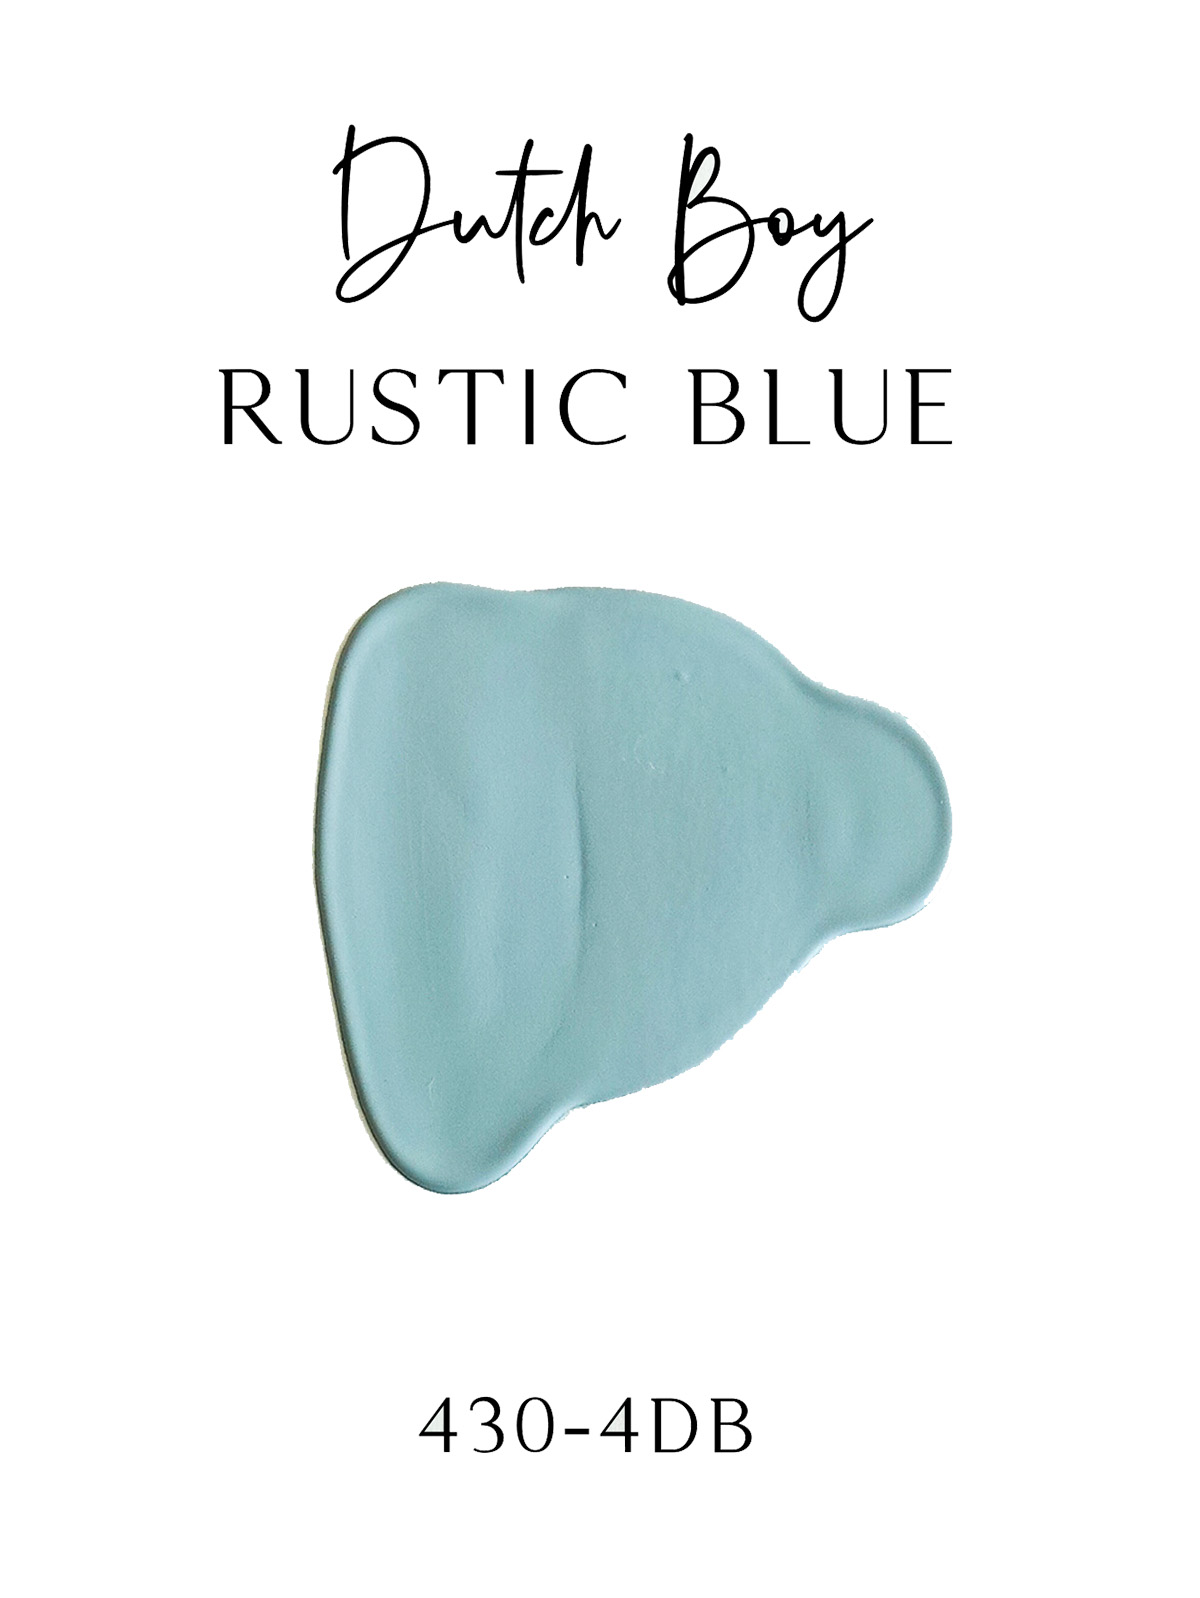
The blue used on our bookshelves is Rustic Blue by Dutch Boy.
When I painted the bookshelves black, I used a paint sprayer. It was possibly a user error, but the sprayer did not provide a smooth finish. I also made the mistake of painting them with a matte finish and found it collected lots of dust.
This time around I painted them by hand, and it was very manageable as I broke the bookshelves into sections.
Supplies for Painting Bookshelves:
- Platinum Plus Cabinet, Door & Trim Paint in Semi-Gloss
- Drop Cloth
- Painter’s Tape
- Purdy 2.5″ XL Blue-Jay Brush
- Purdy White Dove Mini Paint Roller and Frame
- Paint Tray

How to Paint Bookshelves
When painting the shelves, I worked in sections as I mentioned before. It is best to begin with the brush and paint all the corners, edges, and trim. Follow up with the roller for the larger surfaces. I allowed 24 hours of dry time before I returned the books to the shelves.

Platinum Plus Cabinet, Door & Trim Paint
This paint was fantastic to work with. I envisioned several coats since I was painting over black, but I was surprised that one coat covered most sections.
Platinum Plus Cabinet, Door & Trim Paint is a water-based alkly enamel that goes on silky smooth. The result is a luxurious, glass-like finish.

If you want to see more about how I selected the blue paint color for this room, you can go HERE.

The blue flows nicely with the rest of our home and is a beautiful welcome to anyone who enters our home.

I love the blue bookshelves and trim and how calm my office feels and looks.

Are you new to my blog? Go HERE to see my home tour and HERE to shop for items I use in our home.


 My husband comes from a long line of book hoarders, so we have a TON of books. When we moved into our home, there were no bookshelves. For three years, the books have been hidden in closets, cabinets, lockers – if you opened a door on anything you were greeted by a stack of books.
We originally planned on building the bookshelves ourselves but were a little overwhelmed and decided to hand them over to a professional. We hired the contractor who remodeled our bathroom to build the shelves.
My husband comes from a long line of book hoarders, so we have a TON of books. When we moved into our home, there were no bookshelves. For three years, the books have been hidden in closets, cabinets, lockers – if you opened a door on anything you were greeted by a stack of books.
We originally planned on building the bookshelves ourselves but were a little overwhelmed and decided to hand them over to a professional. We hired the contractor who remodeled our bathroom to build the shelves.
 I sketched a plan for the bookshelves for our contractor, and he built most of the pieces in his workshop. He installed them during one of my Home Show days. I came home later that night to a gorgeous (but much more gigantic than I realized) wall of bookshelves.
 I was slightly overwhelmed and quickly contacted
  This post contains some affiliate links for your convenience.
  I wanted the bookshelves to blend into the space rather than stand out more.
 I used Valspar’s Soulful Grey (formerly Valspar’s Woodlawn Colonial Gray). My favorite thing about this sprayer is that I didn’t have to water down the (latex) paint. It was WONDERFUL!
 The power cord and air hose are so long that I never had to use an extension cord (despite having to use a ladder to reach the top of the bookshelves).
 The only trouble I had was when I didn’t pay attention to the nozzle. I eventually realized that I need to wipe it down fairly consistently. Also, with the amount of paint I was spraying, I did end up need to rinse the nozzle a few times. If you don’t stay on top keeping a clean nozzle, you can end up with splatters.
 Luckily once I cleaned the nozzle I was able to quickly fix (spray over) and fix my splatters.
 When the bookshelf was done (I primed one afternoon and painted the next), I rinsed off everything and put them away in the power box. They are ready for my next project!
Here’s a little video to show you how quiet but powerful this sprayer is:
When the bookshelf was done (I primed one afternoon and painted the next), I rinsed off everything and put them away in the power box. They are ready for my next project!
Here’s a little video to show you how quiet but powerful this sprayer is:


 Thanks for letting me help with your barn wood fireplace makeover, Kate!
