Paint

Why I Repainted my Chalk Painted Cabinets

If you are considering using chalk paint on your cabinets, this is a must-read.  Don’t make my mistake!  Learn from why I repainted my chalk-painted cabinets.

Why I Repainted My Chalk Painted Cabinets

When we first moved into our home, I painted our kitchen cabinets with chalk paint.  This is what they looked like before (the first time I painted them):
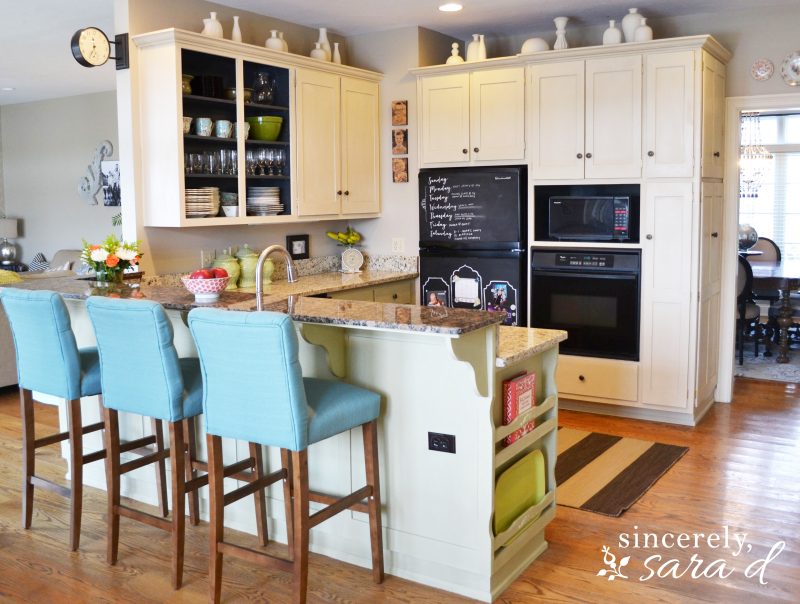
And here is a photo of how our kitchen cabinets originally looked when we first moved into our home:

Why I Repainted our Chalk Painted Cabinets

The chalk paint itself has held up really well. There was little to no chipping. Chalk paint is amazing for DIY projects because it requires no prep work and eliminates the need for priming.

However, I made one mistake.  Unfortunately, it was a big mistake – so big that I had to repaint the cabinets.

Cabinets Before

I used wax as my sealer.

Why not to use wax on cabinets

It is hard to see in photos, but the clear wax was next to impossible to clean in the kitchen.  Dirt, grease, dust, and grime were getting caught in the crevices, and the wax did not clean up easily.

Why I repainted my chalk painted cabinets

Don't use wax on cabinets

I had to repaint my cabinets.

Painting Cabinets with Amy Howard One Step Paint

I used chalk-type paint again, and I painted right over the previously painted cabinets sealed with wax.  I would recommend using sandpaper and/or a coat (or two) of primer if you paint over cured wax.  However, most likely you are not painting over the wax and will not need a primer. To apply the paint, I used a brush for the crevices and a roller for the flat areas.

Using a foam roller on cabinets

How to Correctly Seal Chalk-Painted Cabinets

I painted everything with two coats of paint (allowing the first coat to completely dry before I added the second coat) and finished with two coats of sealer. I applied the matte sealer the same way I applied the paint, but you can also use a water-based sealer like a polyacrylic (found at any hardware store).

I have already noticed such a difference between the sealer and the wax.  Now when my kids sit at the bar, I don’t have to worry as much. All the dirt they kick up can now be easily wiped away!

Painting Cabinets with Chalk Paint

Painted Kitchen Cabinets with One Step Paint

Chalk Painted Cabinets

If you are considering painting your cabinets with chalk paint, don’t make my mistake (which is why I repainted my chalk-painted cabinets).  

Use a top coat other than wax in the kitchen. 

I know people often love the look of dark wax to provide that more lived-in, distressed look. However, try antiquing your cabinet doors with a dark glaze so you don’t have to use wax as your sealant.


Here’s my supply list for this project: 

Gray Painted Cabinets


Did you know you can also apply chalk paint in a sprayer? I HIGHLY recommend this method when painting cabinetry to avoid brush marks and for a smooth finish.

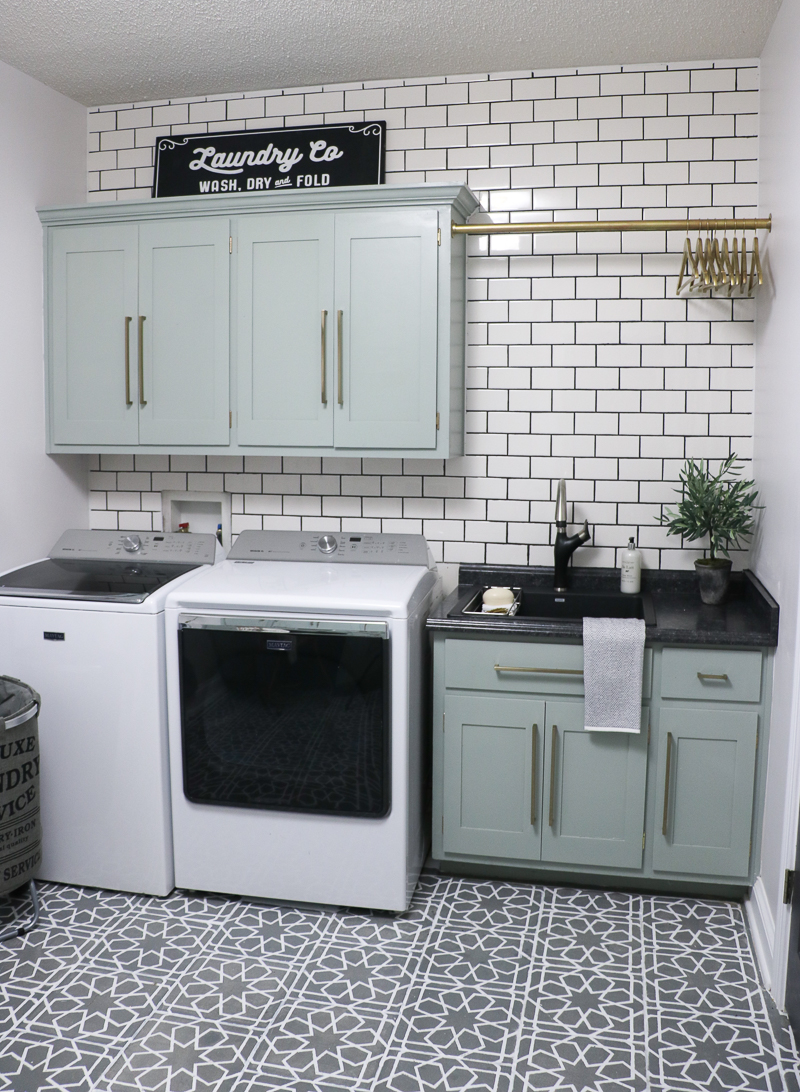
See how my laundry room cabinets turned out by going HERE and for the spraying chalk paint tutorial.

This post was originally published in April of 2016.

Painting our kitchen cabinets helped me love the space until we could remodel it:
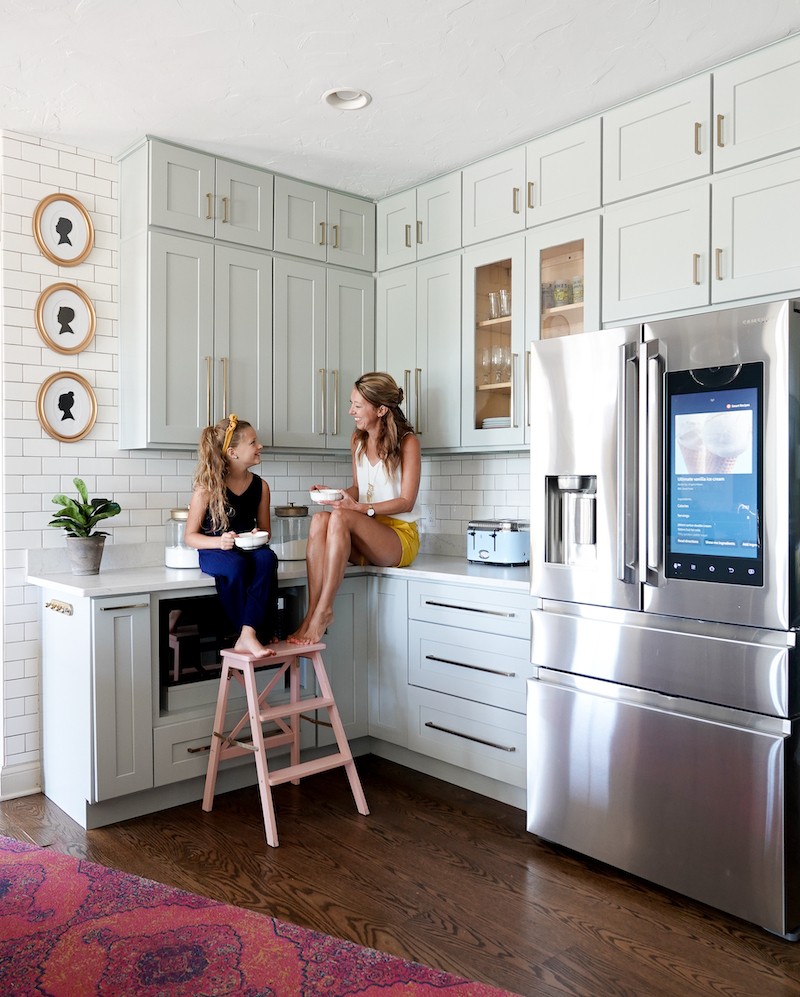
See the full DIY kitchen remodel reveal (and journey) HERE!


Go create something!

Are you new to my blog? Go HERE to see my home tour and HERE to shop for items I use in our home.

Find me on Facebook | Instagram | Twitter Pinterest

*This post contains affiliate links and is a sponsored post by Amy Howard at Home. I take pride in reviewing only products that fit my brand and will be beneficial to my readers. And while this post is sponsored, all the opinions are my own.

Why I repainted my chalk painted cabinets

Shop the Post
Home

Barn Wood Fireplace Makeover

If you’re a fan of primitive or rustic farmhouse decor, then you need to check out this barn wood fireplace makeover.

 Fireplace Makeover with Paint and Barnwood

A friend of mine recently moved into a new home, and she wasn’t in love with her fireplace and surrounding bookshelves.  We completely transformed the area with barn wood and some paint. Here is a photo of the before:

Fireplace BEFORE makeover

She wanted to update it without doing any major renovations.  With my limited Photoshop skills, I came up with a plan:

Print

My suggestion was to add a mantel, install wood paneling on the back of the fireplace, paint the bookshelves gray, and add new hardware to the cabinets.

Here’s our after:

Making over a Fireplace

Inspire, a local company that specializes in unique construction and remodeling added old barn wood to the fireplace and created a rustic mantel to complete the look.

Adding Barnwood to fireplace

After the barn wood was installed, I painted the bookshelves and cabinets with Amy Howard’s One Step Paint in Selznick Grey.

Amy Howard Selznick Grey

I used the Matte Sealer to complete the look.

Amy Howard Sealer

We ended up using the same hardware, and I painted it using Rust-Oleum’s Metallic Spray in Oil Rubbed Bronze (affiliate link):

Painting Bookshelves with Chalk Paint

I also spray painted the fireplace screen and surrounding brass with Rust-Oleum’s High Heat Enamel Spray in black (affiliate link):

My friend went to a local store called Open Gate Design and Decor and had a blast shopping for the mirror and all the accessories.

Barnwood on Fireplace and Painted Bookshelves

Accessories for Bookshelves

Barnwood on Fireplace

It was fun to help transform the fireplace and bookshelves into a centerpiece for my friend’s home.

Painted Bookshelves and Paneled Fireplace

Fireplace Makeover Thanks for letting me help with your barn wood fireplace makeover, Kate!

Go create something!

Are you new to my blog? Go HERE to see my home tour and HERE to shop for items I use in our home.

Find me on Facebook | Instagram | Twitter Pinterest

Fireplace Makeover with Paint & Barnwood

Paint

Painting Cabinets with Chalk Paint

Today I’m sharing all about painting cabinets with chalk paint.

Painting Cabinets with One Step Chalk-Type Paint

I recently shared my laundry room makeover (to see more, click here). My laundry room lacks natural light, and I painted the cabinets to brighten the space.

Here’s the before:

Laundry Room - BEFORE

And the after:

Laundry Room Makeover To paint my cabinets, I used a chalk-type paint from Amy Howard at Home.  I love this paint because it eliminates the need for sanding or priming.  There is no prep work!  Here’s what is needed:

To begin, remove the hardware from the cabinets.

Remove Hardware before Chalk Paint

 Next, wipe down the cabinets with Simple Green All-Purpose Cleaner.

Clean Cabinets Before Painting

Use painter’s tape to tape off areas where needed.

Taping off Cabinets Before Chalk Paint Now it is time to paint!

Amy Howard One Step Paint Linen Begin with a brush to get all the areas the foam roller will not reach.

Using a Brush with Chalk Paint After the hard-to-reach areas are done, add a coat of paint to everything with the foam roller.

Rolling Chalk Paint Amy Howard Once the first coat of paint is dry, give everything a second coat.

Amy Howard Paint on Cabinets

I painted the insides of my cabinets with Vintage Affliction.

Amy Howard at Home One Step Paint

I painted the inside of the cabinets similar to how I painted the cabinet doors.  I used a brush for the hard-to-reach areas and went back through with the foam roller.  I gave the insides of the cabinets two coats of paint.

Trimming cabinets with Brush

Amy Howard One Step Paint Cabinets

I also painted the shelves.

Painting Cabinets with One Step Paint

Once the paint is dry, finish with Amy Howard’s Matte Sealer.  Add two coats using the brush and foam roller.

Amy Howard Sealer

My laundry room cabinets were painted in one day, and what a difference it made!

Starched Fabric Walls in Laundry Room

Laundry Room Reveal

I’ve painted a lot of cabinets over the years.  Here are a couple of other tutorials you may be interested in:

Happy Painting, and let me know if you try painting cabinets with chalk paint!

Are you new to my blog? Go HERE to see my home tour and HERE to shop for items I use in our home.

Find me on Facebook | Instagram | Twitter Pinterest

*This post contains affiliate links and is a sponsored post through Amy Howard at Home. I received compensation in the form of product in exchange for my review. I take pride in reviewing only products that fit my brand and will be beneficial to my readers. And while this post is sponsored, all the opinions are my own.    
Paint

Painting Cabinets (and Using Shortcuts)

I have self-diagnosed myself as an “impatient perfectionist.”  I like things done right, but FAST.  I have done a lot of painting (if you hang out with me for just a little bit, you’ll discover paint is my solution for almost anything), and I’ve discovered several shortcuts along the way.  Today I’m going to share what shortcuts to use (and not use!) when painting cabinets. I recently transformed my boys’ bathroom using mainly paint for a contest involving colored light switches and outlets. To see more about the bathroom transformation, click HERE.

Painting Cabinets (and Using Shortcuts)

Below is a photo of my boys’ bathroom before.  Now, you may be wondering why in the world I didn’t keep the cabinets white.  Didn’t that crazy girl just paint all her kitchen cabinets white?

Boys Bathroom Before

Well, my heart was set on gray cabinets.  I even made an inspiration board for the bathroom:

Print

Step 1: Remove all hardware. (Don’t skip this step.  You do not want paint on your hinges.  It will look sloppy!)

Bathroom Cabinets  

Step 2: Layout all drawers and doors.

Painting Cabinets 12  

Step 3: Give them a quick cleaning.

Painting Cabinets 2

Step 4: Use an all-purpose paint prep. Here’s where I skipped a step.  I *skipped sanding and used this product.  It removed any extra icky residue that cleaning it with soapy water won’t fix.  AND, it does remove some of the finish.  In my case – a glossy finish. *Sanding is always recommended.  I’m a shortcut girl, so I went with heavy doses of primer in place of sanding.  When in doubt – sand!

Painting Cabinets 3

Update: Unfortunately I can’t seem to find this product anymore.  Simple Green is a great cleaner alternative, but it won’t remove any of the finish which is is what made this product work well when skipping sanding.

Step 5: Prime. Here’s how I cheated on this step – spray paint primer.  It went SO much faster!

Painting Cabinets 4

(My kids always want to help.  This “step” can slow you down.  Big time.)

Painting Cabinets 6

Now, I decided to spray prime the cabinets themselves.  This went super fast, but the prep work may have made up for the time I save spray painting.  I had to tape down EVERYTHING.

Painting Cabinets 9

AND, you must have proper ventilation.  Luckily I had a huge window right across from my cabinets.

Painting Cabinets 7

Step 6: Paint the cabinets, doors, and drawers with paint. I did about two coats on each.  Since my primer was tinted, this step went pretty quickly.  I did this with a paintbrush because I could not find the perfect gray in the spray paint can.  Otherwise, I definitely would have spray-painted them! I did go ahead and buy a “self-priming” paint – even though I still was using a primer.  I wanted as much adhesion as I could get – I didn’t want the paint peeling off. The spray paint primer I used is an enamel, so you’ll want to also use enamel paint over the enamel primer.  I bought my paint at Lowe’s and the color is “Dover Gray.”  Step 7: Finish coat. I attempted to spray paint a finish coat on my cabinets.  DO NOT DO THIS!  It looked streaky and bad.  This is not the step to take the shortcut and use spray paint.  After all that work, I went back through and covered everything with polyurethane – by hand.

Bathroom Cabinets After

The above picture is before I added the polyurethane.  I was trying to tell myself I could live with the streaks of the spray finish, but I couldn’t. I hope my shortcuts help save you time.  Painting cabinets can be tedious, but the reward is so worth the time and effort! I painted my kitchen cabinets, only this time I used chalk-type paint.

Painted Kitchen Cabinets Tutorial

If you want the absolute fastest way to paint cabinets and like the (rustic) charm and ease of chalk paint, click HERE to see more.

Go create something!

Are you new to my blog? Go HERE to see my home tour and HERE to shop for items I use in our home.

Find me on Facebook | Instagram | Twitter Pinterest

DIY

Painted Kitchen Cabinets

Painting kitchen cabinets with chalk paint is a great option because it eliminates the need to sand, strip or prime.  It does, however, have a more rustic look and brush lines are more visible with this type of paint.

When I first decided to take on my kitchen cabinets, I decided to take on the small section under the stove.  Then it turned into one wall of the uppers which led to the next wall of cabinets.  Well, this week I painted the lower cabinets too.  I blame all this on two friends who were painting (all) their cabinets.  I  didn’t want to be left behind, so I painted what I had left. But first, here is the kitchen before:

Painting Kitchen Cabinets with Chalk Paint

And the after:

kitchen.2
painting kitchen cabinets

kitchen.3

kitchen(1)

I painted all the cabinets in Annie Sloan’s Chalk Paint.  The Uppers are painted in Annie Sloan Old Ochre and the lowers are painted in Annie Sloan Versailles.  To see a more detailed look at how I did it, you can check out my (step by step!) tutorial on painting cabinets with chalk paint HERE or check out my DIY feature on About.com.

**IMPORTANT UPDATE** I hated the wax sealer on my kitchen cabinets and ended up repainting them all.  To see that process (and photos of why I hated the wax) click HERE.  Save yourself the time and trouble and don’t use wax as your sealer in the kitchen!

Go create something!

Are you new to my blog? Go HERE to see my home tour and HERE to shop for items I use in our home.

Find me on Facebook | Instagram | Twitter Pinterest

***UPDATE*** I had several of you ask where my stove was.  It’s on a separate wall – directly across from the wall my dishwasher is on.  To see more click HERE or on the pic below. BeforeANDafter

Four years after moving into this house, we remodeled the kitchen.  To see the newly updated space, click HERE!

Paint

Painting Cabinets with Chalk Paint

Last year, I painted my bathroom cabinets, and it was a REALLY long process.  See how I cut out a lot of time by painting my cabinets with chalk paint.

slider-cabinets

I did it the “traditional” way, and you can take a look at that post HERE. However, considering my kitchen has (what feels like) a thousand more doors, I knew that process may not be the best solution for my kitchen.  Or my sanity. kitchenBEFORE

So, I decided to give the chalk paint method a try.  Chalk paint doesn’t require prep work or sanding.  (Although I did clean my doors considering there are 15 years of kitchen grease layered on them.)

Here’s my (I don’t claim to be a chalk paint pro) 9 step chalk paint cabinet tutorial:

1) Remove the cabinet doors and all the hardware.

This is my second to the least favorite part of the process.  My least favorite part is putting the hardware back on.  There is always a cabinet door that ends up hanging funny.


 cabinets.before.11  

2) Clean the wood with a cleaner to remove any dirt/grime.

cabinets.before.5  

3) Tape off any areas where you don’t want to get paint.

cabinets.before.14  

3) Start Painting!   Forget about sanding and pull out the paint.  I used Annie Sloan’s “Old Ochre.”  I did two coats of paint on everything.

cabinets.before.12

cabinets.before.13 copy  

4) Wax. Once the two coats of paint are dry, you can begin to wax.  Since I was doing kitchen cabinets, I applied three coats of Annie Sloan’s clear wax on everything.  It’s much quicker than it sounds.

**March 2015 UPDATE**  

Although my wax has held up well, it isn’t the easiest to clean.  If you scrub too hard, the wax can be removed.  If I were to do this over again, I would use a polycrylic for a finish instead of the wax.  The reason I didn’t do this the first time around was because I was afraid of yellowing the paint.  However, the more I research, the more I find that there is polycrylic that really is clear and doesn’t yellow!

cabinets.before.17 cabinets.before.18

 5) Buff the wax. Use a lint free cloth to rub in the wax and remove any clumps. (I use old t-shirts for this.)  

6) Sand. If you want to distress the cabinets some, use sandpaper after you’re done waxing.  I lightly sanded the edges of the cabinets and doors.

cabinets.before.19  

7) (optional) Buff. 24 hours after the final wax, you can go back and buff the wood if you want more of a sheen.  

8) Put back the hardware and cabinet doors.  

9) Enjoy your “new” cabinets!

kitchen

Would you try painting cabinets with chalk paint?

I did my kitchen in stages to preserve my sanity.  I did a few groupings a week until I have what you see above.  

*Also, I’m keeping the lower cabinets wood – for now. 😉

*UPDATE (2/21/14): The unpainted lower cabinets didn’t last long.  They have been painted.  Check out how they look HERE.  

Also, if you still want to see more about painting cabinets, this tutorial was featured in the DIY section of About.com.

*UPDATE (7/24/16): I ended up repainted my cabinets because I did not love the wax as a sealer.  To see why click HERE.

Go create something!

Are you new to my blog? Go HERE to see my home tour and HERE to shop for items I use in our home.

Find me on Facebook | Instagram | Twitter Pinterest