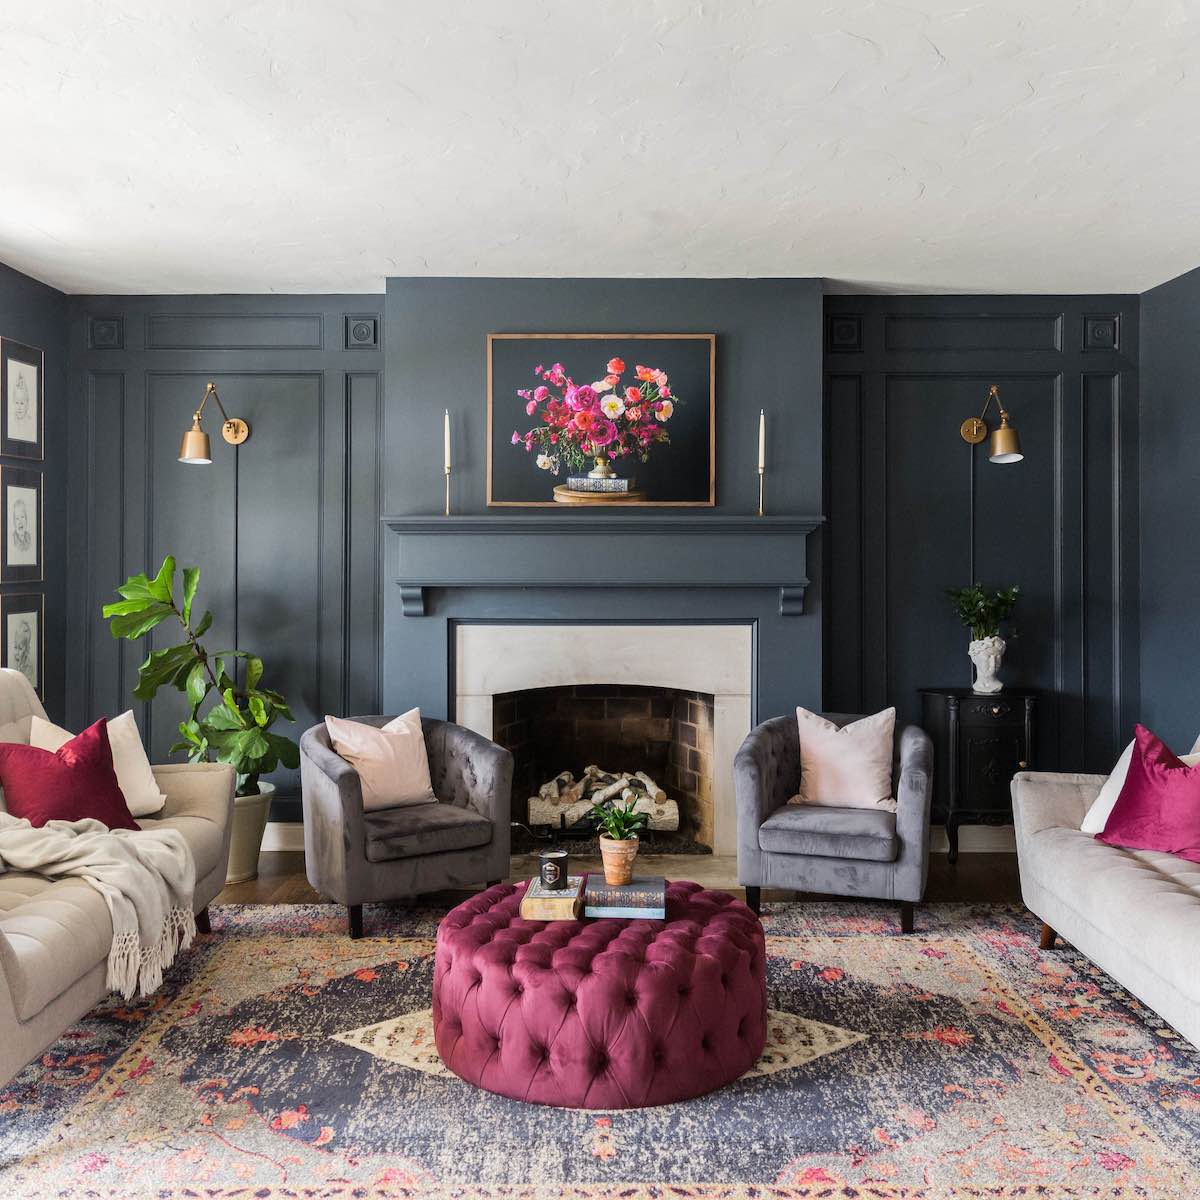
I wanted to give my family room an entirely new look, and this Elegant Wall Paneling updated the space.

I do not claim to be a woodworker, but I am pleased with the result and spent around $300.
How to Install Elegant Wall Paneling:
Materials
Here’s what I used:
- (4) 4.5″ corner blocks
- (20) 1 3/8″ x 8 ft primed base cap molding
- (15) 4.4″ x 8 ft primed corner blocked square edge
- (8) tubes of caulk plus some wood filler
- (1) gallon of Valspar Reserve Paint in Night View.
You’ll also need a basic miter saw, nail gun and compressor. This is what the primed base cap looks like.

And this is the primed corner block square edge.

Step-by-Step Installation Instructions

I began on the top of the wall and worked my wall down. I cut a piece of the corner block square edge to size and made sure the top piece was level while attempting to have it as close to the ceiling as possible. 
This is where things get tricky pretty fast. I cut pieces of the corner caps and created a frame around the corner blocks. I then cut pieces of the corner block square edge to fit around the framed corner blocks. I had bigger gaps than I would have liked, but I used caulk to fill those in (again, I am new to solo woodworking)!

Once that top part is done, the rest is easy! I added a piece of the corner block square edge to the bottom of the wall above the existing trim. I then cut more corner block square edge to frame in the lower portion of the wall.

And then framed in the rest of the lower portion with the block square edge. Then I framed inside that with the trim cap.

After all the trim was hung, I went through and caulked everything. This took forever, and I would suggest using a caulk gun over the individual tubes like I did. Once the caulk dried, I painted the entire paneled wall with two coats of paint.

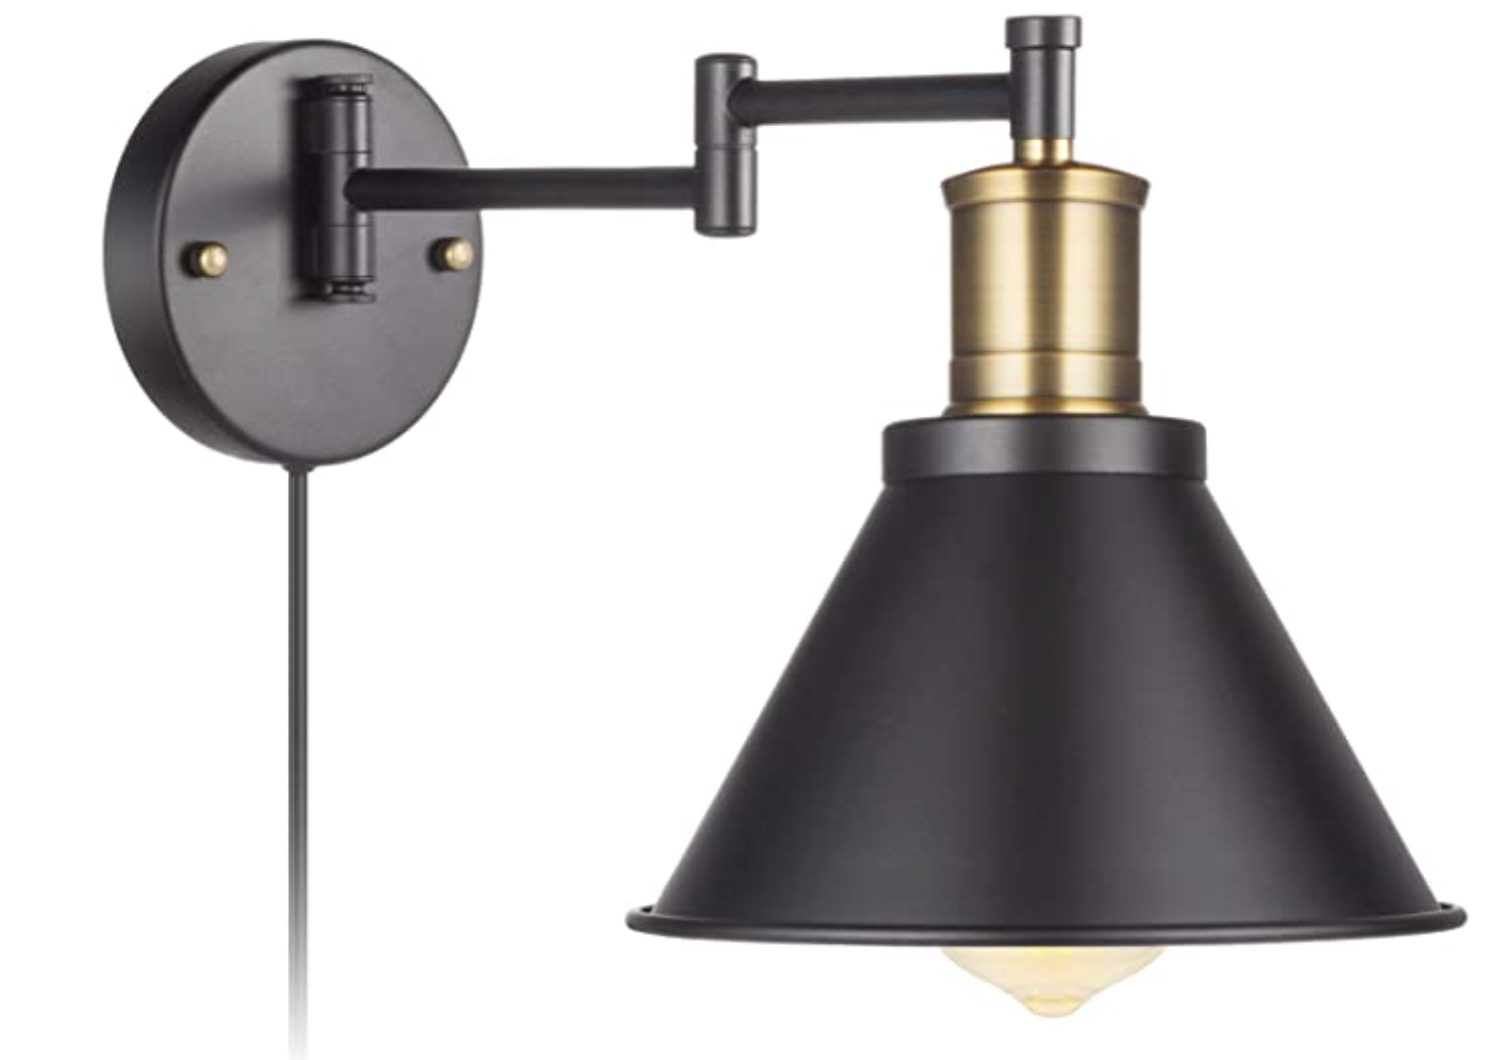
I added a couple hanging lamps to both paneled walls, and I was done!


Wall treatments can make a high impact in a space for low cost.
Want to know how I hid the lamp cords? Go here to see the easy tutorial!
Go create something!

Are you new to my blog? Go HERE to see my home tour and HERE to shop for items I use in our home.


Lovely and inspiring. Can you tell me what you used to cover the lamp cord so well?
Thanks Ellen! Here’s a post where I detail how to hide the cords: https://sincerelysarad.com/how-to-hang-wall-lamps-without-hiring-an-electrician/
Hi Sara, this looks amazing! You are so talented and the color looks great! How did you do the hanging lamps? What did you use to cover the cord? Did you just plug them in below?
Thanks Sarah! Yes, I just plugged them in below, and here’s a post detailing how easy it is to hide wall lamp cords: https://sincerelysarad.com/how-to-hang-wall-lamps-without-hiring-an-electrician/
Sara this is an amazing project. You make it look so easy I might just try it on a play room that has outgrown it’s use! I love that it adds so much class and elegance to the room.. Wow..
Thanks Marie! I hope it works out for you!
It looks like you painted right over your wallpaper. Is that correct? If so, aren’t you worried about it coming up in the future at the seams? Looks fantastic!
It was a stenciled wall – so no seams to worry about!
WOw, love the idea! Looks fantastic.
Such a great article! Really appreciate your time dedicated for this DIY guide with images. The result is very nice and adds an elegant touch to the room. Thanks a lot!
Thanks Vanessa!
It’s really elegant good job well done
Thank so much!
I love your family room rug. I have been looking for a rug and going back and forth for quite a while with indecision, but something like yours is exactly what I’m looking for. Will you share where you found it?
I share the sources for my rugs here: https://sincerelysarad.com/best-rugs-for-decorating/
I wrote you on the Hometalk page and I just signed up for your emails.
What absolute perfection, the new rug and picture over the painted mantle, well, what can I say, I want to move in.
Oh Vicki, thank you for the kind words! Come on over! 🙂
How sweet! I have fallen in love with it!!! I’m an avid DIYer and always try to be busy with some new projects. Was searching for a unique idea to start. The DIY elegant wall paneling made me stop and crazy to do it asap! In a hurry to start. Wish me good luck Sara! 🙂
Yay! Keep me posted on your progress – I’d love to see how it turns out!
I love the way you transformed this room and am especially a fan of navy. I have been looking for a picture to hang over our family room fireplace, and the floral you have might be perfect. could you tell me where you got that?
I loved the final result of your re-do of the living room. It went from okay to OUTRAGEOUS!
Your color choices were perfect, and using the architectural accents really add weight and drama to the room.
Thanks for the kind words and taking the time to comment, Kitty! Happy New Year!
I love the den remodel, especially the paint color and the painting over the fireplace. Will you share where I can find both to purchase? I’s love to use both in my master bedroom!!
The paint color is Night View by Valspar and the canvas is from TheArtBar by Lindsay Letters.
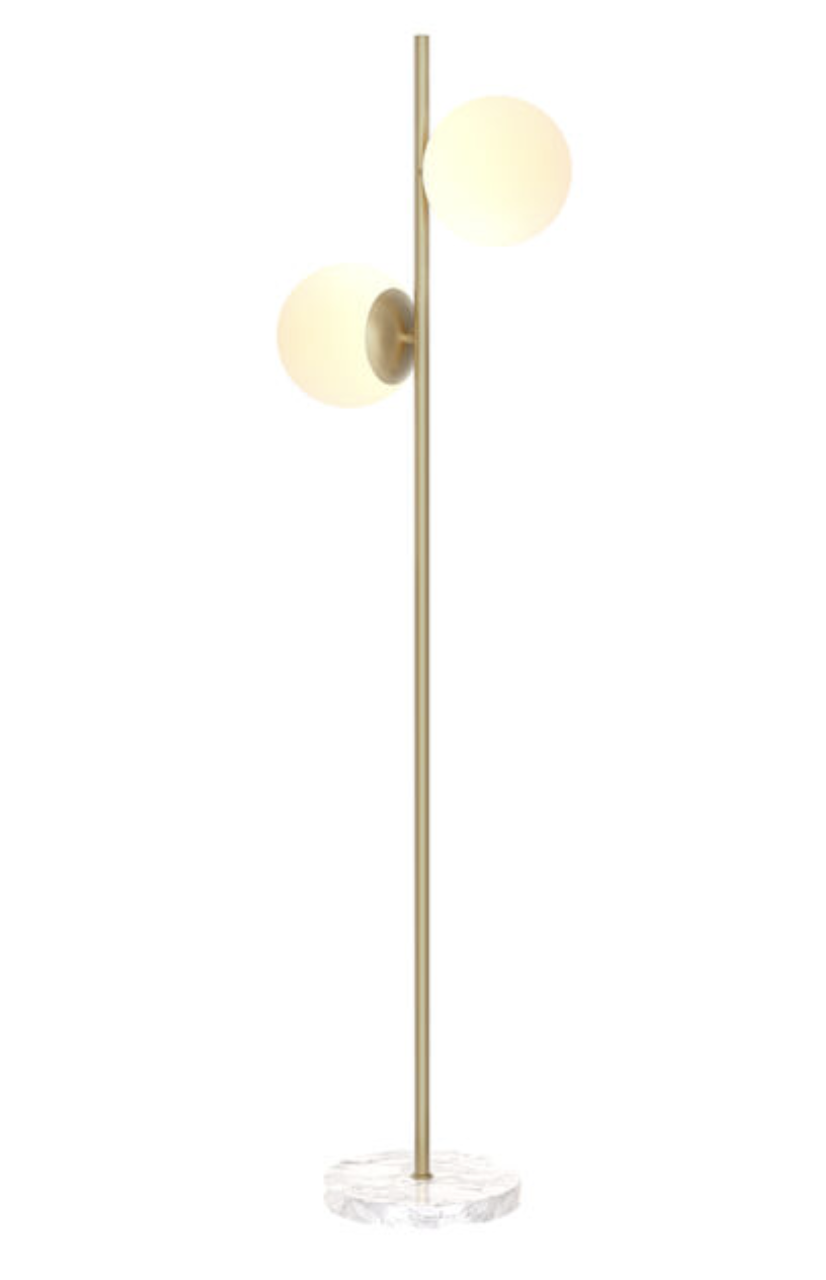
I love this look! Can you please tell me the blue wall paint color and where you bought the lamps?
The blue is Valspar’s Night View and you can find the lamps here: https://sincerelysarad.com/favorite-wall-lamps/
It looks so amazing! Well done! Could you tell me why you mitered the top part of the upper rectangle, rather than just using straight pieces?
I’ll be the first to admit I’m not a woodworker, but I was trying to frame make it look professional, so I mitered it!