I have officially finished my biggest painting project so far, and I am so glad I had the Wagner paint sprayer to make the project easier.
Since we moved into our home over three years ago, we have talked about building bookshelves in our office.
My husband comes from a long line of book hoarders, so we have a TON of books. When we moved into our home, there were no bookshelves. For three years, the books have been hidden in closets, cabinets, lockers – if you opened a door on anything you were greeted by a stack of books.
We originally planned on building the bookshelves ourselves but were a little overwhelmed and decided to hand them over to a professional. We hired the contractor who remodeled our bathroom to build the shelves.
I sketched a plan for the bookshelves for our contractor, and he built most of the pieces in his workshop. He installed them during one of my Home Show days. I came home later that night to a gorgeous (but much more gigantic than I realized) wall of bookshelves.
I was slightly overwhelmed and quickly contacted Wagner to see if they would partner with me on this project. I couldn’t imagine how I would get a massive piece painted without a heavy-duty paint sprayer.
This post contains some affiliate links for your convenience. Click here to read my full disclosure policy.
I used Wagner’s FLEXio 890 paint sprayer and was very impressed. I am all about storage, and I love how the sprayer all stores away inside the power box.
I wanted the bookshelves to blend into the space rather than stand out more.
I used Valspar’s Soulful Grey (formerly Valspar’s Woodlawn Colonial Gray). My favorite thing about this sprayer is that I didn’t have to water down the (latex) paint. It was WONDERFUL!
The power cord and air hose are so long that I never had to use an extension cord (despite having to use a ladder to reach the top of the bookshelves).
The only trouble I had was when I didn’t pay attention to the nozzle. I eventually realized that I need to wipe it down fairly consistently. Also, with the amount of paint I was spraying, I did end up need to rinse the nozzle a few times. If you don’t stay on top keeping a clean nozzle, you can end up with splatters.
Luckily once I cleaned the nozzle I was able to quickly fix (spray over) and fix my splatters.
When the bookshelf was done (I primed one afternoon and painted the next), I rinsed off everything and put them away in the power box. They are ready for my next project!
Here’s a little video to show you how quiet but powerful this sprayer is:
I’ll be sharing the bookshelves reveal very soon (and I’m excited to have room in our coat closet for coats)!
Are you new to my blog? Go HERE to see my home tour and HERE to shop for items I use in our home.
Find me on Facebook | Instagram | Twitter | Pinterest*This post contains affiliate links and is a sponsored post by Wagner. I take pride in reviewing only products that fit my brand and will be beneficial to my readers. And while this post is sponsored, all the opinions are my own.
After years of planning and scheming, the master bathroom remodel is (finally) complete!
I partnered with Moen on this remodel, and their faucets are definitely the centerpiece of the room.
Although I love updated brass, I decided to stay safe and go with either brushed nickel or an oil-rubbed bronze finish. I turned to you all for advice, and brushed nickel was the winner!
I wanted faucets that were sophisticated and timeless, and the Weymouth Brushed Nickel Two-Handle High Arc Bathroom Faucet was love at first sight for me.
The faucet’s Victorian details include porcelain inlays with the antiqued decorative script and a refined shepherd’s spout and just scream luxury.
When I dreamed up our bathroom remodel design board, the first thing I searched for was a tub filler.
The Weymouth Brushed Nickel Two-Handel Tub Filler is what dreams are made of. It is absolutely stunning.
The faucet includes a removable hand shower.
Keeping with the sophisticated timeless look, we also used the Weymouth Brushed Nickel Posi-Temp in the shower.
The lever on the showerhead makes it easy to adjust the water, and it is equipped with the PosiTemp® pressure-balancing control valve to help maintain water temperature in the shower.
The showerhead is generously sized (9″ diameter) and has three times more spray power than most rainshowers for a more thorough rinse.
Moen also makes gorgeous accessories including towel holders and toilet paper holders. I found the Weymouth Brushed Nickel Posi-Tempat Home Depot, and have never loved a toilet paper holder more! It pivots to change out the paper, so I will no longer have flying springs escaping my hold.
My goal for this bathroom remodel was timeless sophistication, and I think Moen helped me achieve that goal with their gorgeous pieces.
A special thanks to Moen for partnering with me on my dream bathroom!
Go create something!
Are you new to my blog? Go HERE to see my home tour and HERE to shop for items I use in our home.
Find me on Facebook | Instagram | Twitter | Pinterest*This post contains affiliate links and is a sponsored post by Moen. I take pride in reviewing only products that fit my brand and will be beneficial to my readers. And while this post is sponsored, all the opinions are my own.
I’m sharing my not-so-perfect home today.
For some time now, I have felt convicted with the perfect photos of my “perfect” home.
And then last week happened. It was a tough week, and it revealed how human we all are. How much we need Jesus (and His grace) and how imperfect we all are.
Social media allows us to create a seemingly perfect world. Facebook is full of perfect families, Instagram is full of perfect people, and Pinterest is filled with perfect homes.
As a blogger, I want to tell you that the perfection you see is not real. My home decor blog is a full-time job. I spend crazy hours creating these “perfect” spaces. It begins with DIY projects and lots of painting. I run all over town (and the next town) looking for accessories and flowers. I take too many photos and spend too many hours editing them. The normal person cannot expect to achieve what many of us bloggers share because it just isn’t real.
I am never the mom greeting my kids at the door after school with fresh baked cookies (I’m the mom covered in paint telling them I’m almost finished and will be done in a minute). I’m not the wife who prepares an amazing gourmet dinner (unless Prego sauce and spaghetti count) for my husband.
I know I was created to create. I want to use my gifts to glorify Him. I wanted to inspire others and show how you can create a pretty space on a budget. However, lately, I have been so overwhelmed by amazing opportunities and big projects. These projects are so fun but so time-consuming. I haven’t had time in a while to do my little inexpensive DIYs. Those little DIYs that started Sincerely, Sara D. I want to inspire you to create – not discourage you because your house isn’t photoshopped like mine.
So next time you see my perfect home, I want you to realize it’s not perfect. I’m juggling the balls of life just like you, and I just keep the pretty home ball in the mix. I’m dropping lots of other balls in the process.
Are you new to my blog? Go HERE to see my home tour and HERE to shop for items I use in our home.
Find me on Facebook | Instagram | Twitter | Pinterest
I’m sharing all the details on our bathroom remodel tile today.
I shared our master bath reveal earlier this week, and I have gotten so many questions about our tile. I partnered with South Cypress, and I have had the best experience with them.
I knew I wanted a subway-tiled shower along with a black and white shower floor. I also knew that wood floor tiles would be perfect for the space. I began searching the South Cypress website and found so many options.
I ordered samples of each of the tiles and was immediately in love.
I placed my order online, and the sales associates were really helpful with questions and helping me determine how many tiles I needed.
Shipping was fast, and the tile was delivered straight to my door (actually garage).
I only had a few tiles in one box that were damaged in delivery, and South Cypress quickly sent me the replacements.
The Segato Riverwood is so gorgeous. It has dynamic grain patterns and cross-cut texturing exquisitely mimicking the intricacies of vintage faded hardwood. The tile is Italian-made and provides the timeworn look of aged hardwood without the upkeep headaches. It was a perfect match for my gray vanities.
The Overton has a clean and classic look of subway tile but is extra special because of its handcrafted look. It adds gorgeous textures with its shine reminiscent of traditional glazed ceramic tiles.
The Manhattan provides a clean, classic look. It makes a distinctive statement in our bathroom and allowed us to create our own design.
A special thanks to South Cypress for helping me make our dream bathroom a reality!
Are you new to my blog? Go HERE to see my home tour and HERE to shop for items I use in our home.
*This post contains affiliate links and is a sponsored post by South Cypress. I take pride in reviewing only products that fit my brand and will be beneficial to my readers. And while this post is sponsored, all the opinions are my own.
Our master bathroom is DONE, and I’m excited to share our bathroom remodel reveal.
This renovation was supposed to happen three years ago when we first purchased our home. There was a major leak under the shower, and we meant to have it fixed right away…
…but life (roof repairs, pool heater, water heat, air conditioner, furnace, and lots of other 20-year-old home problems) kept happening.
Over the past three years, I have shared several design board ideas for this bathroom remodel as I dreamed and schemed. You can see the details of the design board that inspired this remodel here.
This past fall several things fell into place, and we were able to go for it. We hired a contractor and the day after Thanksgiving we demolished the bathroom (you can read more about the demo process here).
I share the bigger bathroom sources in separate posts (go here to learn all the details about the tile and here for all the faucet details). The majority of the supplies were bought online and shipped straight to my front door (which was so convenient).
Since this bathroom was sitting on such a large problem, I knew this was far beyond my scope of DIY. Honestly, it was nice to hand it over to an expert.
I still did a lot of the grunt work and painted all the walls, ceilings, and trim.
The freestanding tub is from Signature Hardware. I looked everywhere for the perfect shape, and I found it with this tub.
The vanities are from Bellacor. I was nervous about buying the vanities online, but they are absolutely perfect. The color is gorgeous, and they are quality pieces. My only complaint is that one arrived with a discolored spot, but I should be receiving paint (from the manufacturer) to fix the problem sometime soon.
One of the hardest pieces for me to find was the perfect light fixture. I wanted this light fixture from Bellacor.
The sconces are from Home Depot. I used the Fontane Brushed Nickel Wall Fixture and replaced the shade that came with it with the Clear Glass Open Teardrop Shade.
The outlets and light switches are RENU by Leviton.
The majority of the decor and accessories are from HomeGoods.
I can not tell you all how thrilled we are to have a bathroom that functions and looks beautiful. I may never leave my tub (and you can find all the details of the tub filler here)…
We are so thankful to have a beautiful and functioning bathroom!
Want to see all the details on the floor and shower tile? Go here to find the sources!
Go create something!
Are you new to my blog? Go HERE to see my home tour and HERE to shop for items I use in our home.
Find me on Facebook | Instagram | Twitter | Pinterest
The Indianapolis Home Show is done!
Last week stretched me more than I could have ever imagined.
Besides decorating a dining room for the Indianapolis Home Show (you can see all the details of that space HERE), I spoke at four different sessions. I talked about the power of paint and how you can use it to (inexpensively) update your space.
Before my presentations, I made two live TV appearances.
Let me tell you, I was FREAKED out (and didn’t sleep much the night before). However, I survived and was so grateful my friend Jenny came along to calm my nerves.
You can watch my Indy Style segment here:
I went from Indy Style over to the noon news at WTHR.
You can see that segment here:
From the noon news, I rushed over to the fairgrounds for my first speaking session.
My audience was sweet and gracious.
I went home that evening completely relieved and exhausted!
The next day, I spoke at two more sessions and had the weekend to take it easy.
Then on Monday, my friend Angela (from Unexpected Elegance) and I rented a Uhaul. Both our husbands were out of town, and of course, my daughter was sick that day. I’m so thankful to my mother-in-law who watched her so I could tear down my dining room at the home show. Angela and I moved both her living room and my room (which included a couch and dining room table).
At the end of the day, Angela and I were giving each other lots of high fives. 🙂
I woke up the next morning with a smile on my face (I was DONE) and a sore back.
Go create something!
Are you new to my blog? Go HERE to see my home tour and HERE to shop for items I use in our home.
Find me on Facebook | Instagram | Twitter | Pinterest
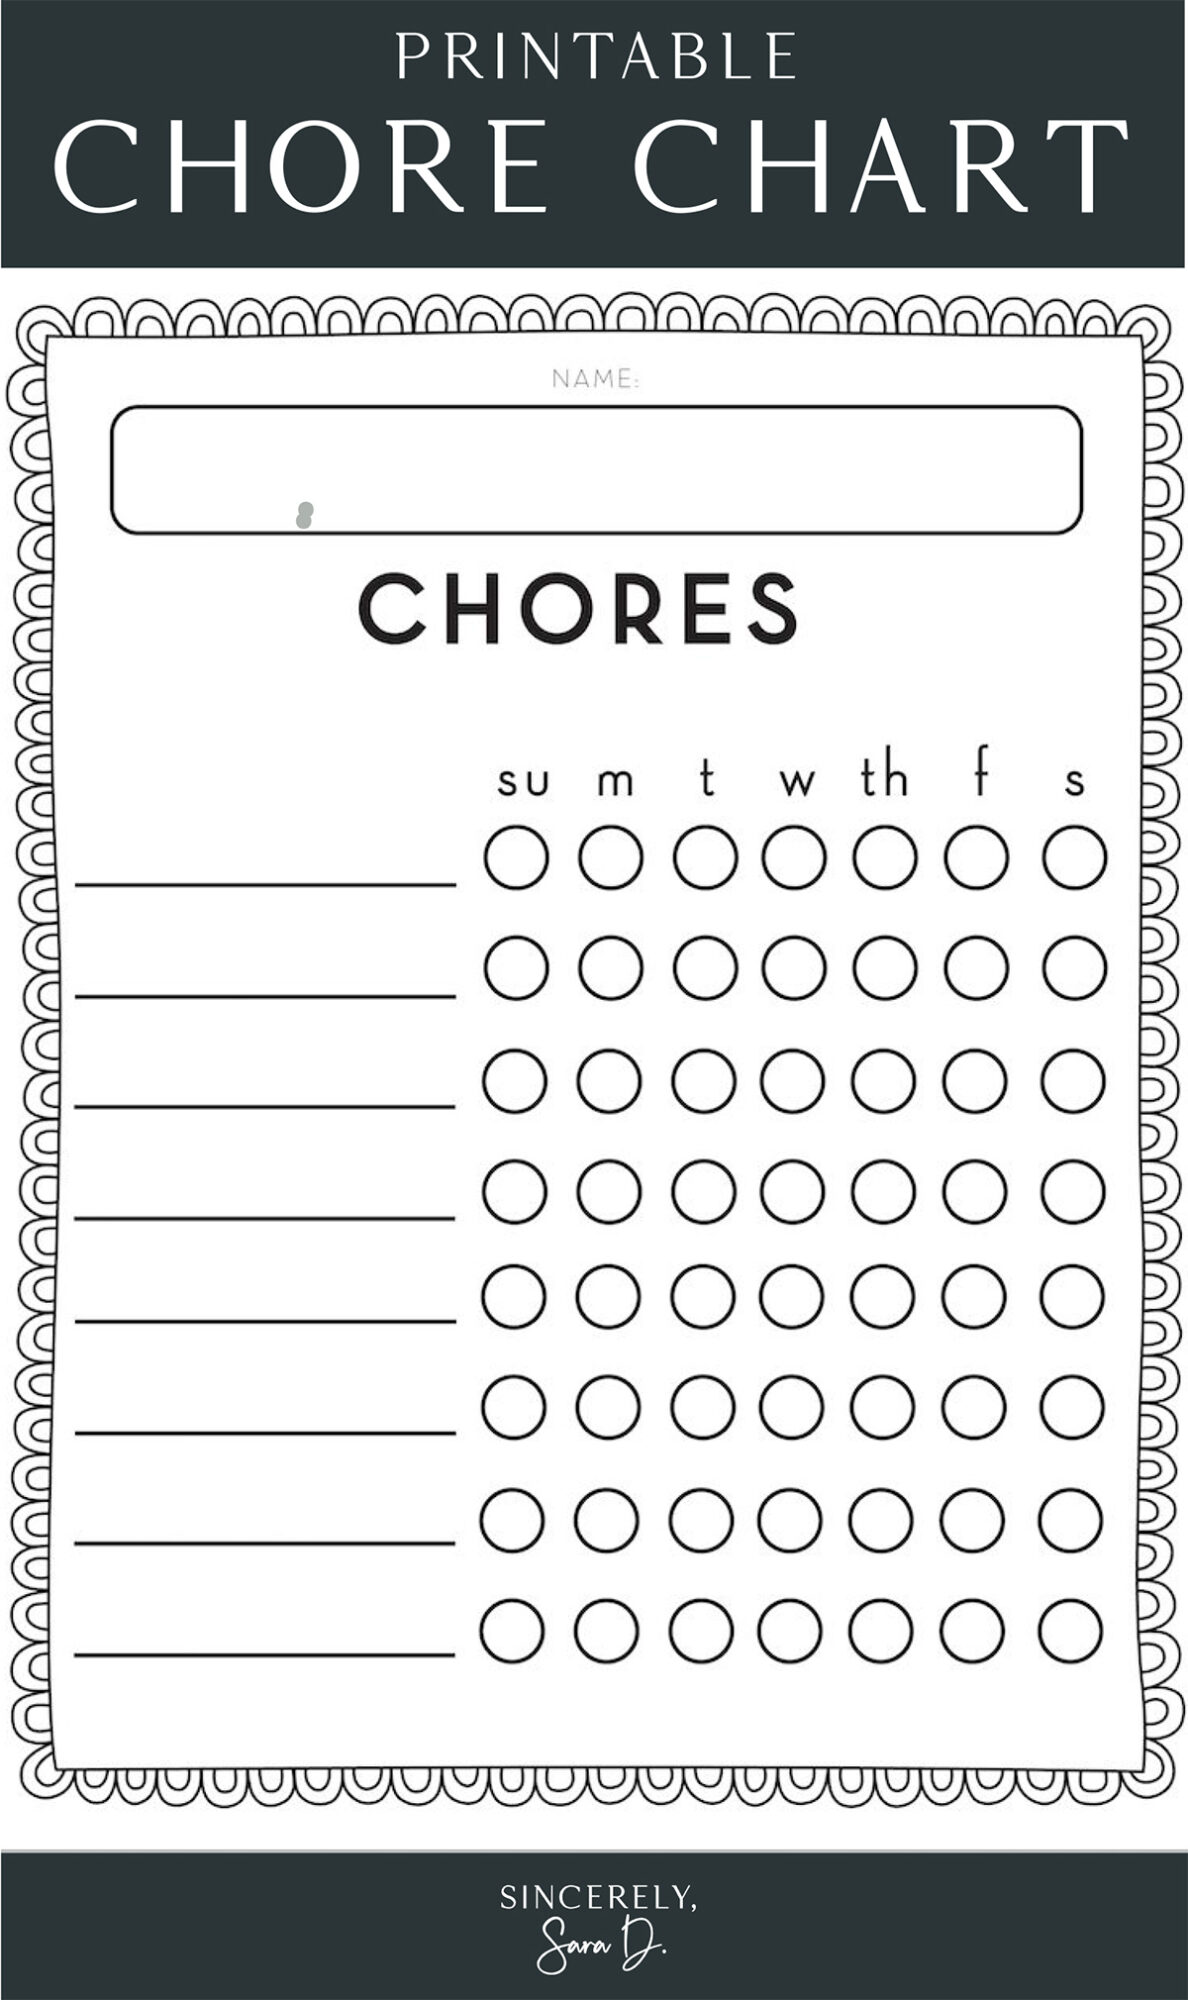
Now that my kids are getting older, one of my resolutions is to have my kids help out around the house more. I have tried various chore charts through the years, but I always manage to not follow through with their chore routine. It takes effort to make chores (and chore charts) happen, and I am determined to make it work this time! So, I created a printable chore chart for kids, and I’m excited to share it with you today.
In the past, I’ve made the process too complicated, so I am simplifying it as much as possible. Each of my kids will have certain chores they are expected to complete every day. I also decided to put their chore charts in the bathroom so there is no avoiding them. They will see them several times during the day and hopefully we can maintain these chore charts!
I created a simple chore cart for my kids, and I am sharing the free printable with you:
(To download the JPG file, simply click and save the image below.)
You can save the PDF file of the chore chart here:
I found frames from the dollar store and spray-painted them to match their bathroom (Lena has a fancy gold frame in her bathroom). I wrote their daily chores on their charts and framed them. The kids mark off their chores using a dry erase marker on the glass which doesn’t require a new printout until the chores change.
My boys are 9 and 11 and share their own bathroom. One of their daily chores is to make sure their bathroom is clean.
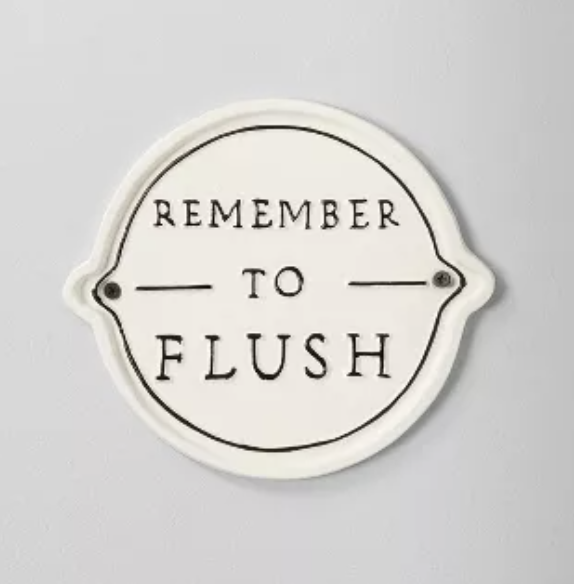
I’m teaching the boys to clean up any bathroom “misses.” Say goodbye to the pee-smelling toilet area.
I had the amazing opportunity of designing a dining room at the Indianapolis Home Show.
Oh my goodness.
I never dreamed how much time and energy designing a little (temporary) 10 x 10-foot space would require!
I am speaking at the Indianapolis Home Show and was also asked to design a room for their Designer Showcase.
Just two nights ago, I really didn’t know if it would all come together. However, I left the Home Show today with the space finished.
I started the room early Tuesday morning.
I was given a space with three walls made of plywood. I began painting the two side walls in Benjamin Moore’s Hale Navy.
Look at me! I’m so happy and unaware of the upcoming design obstacles…
This first obstacle came that evening when I went back to the space (with my family) to drop off the table. We took the table on a truck and it wasn’t supposed to rain. But it rained our entire drive.
Luckily the table looks gorgeous (despite the rain) and my husband (with Lena’s watchful eyes) assembled it beautifully.
The room absolutely came together thanks to my talented sponsors.
The table was designed and built by Jeremy Carpenter of J Carp Design. His work is gorgeous, and I LOVE this table!
Carmel Design donated the gorgeous wallpaper. They are on the north side of Indianapolis and have the most amazing selection of wallpaper along with home decor items.
Another design obstacle came with hanging the wallpaper. Since I had plywood walls (and wanted to avoid the stress of hanging wallpaper at the show), I pre-hung my paper on panels. Unfortunately, the dimensions I had were not the same as the actual space dimensions. My paper doesn’t span the entire back wall. Which is fine, but it was a bummer.
All my gorgeous greenery, candles, mirror, and table are from Open Gate. If you’re looking for unique home decor (in abundance), check out Open Gate in Anderson, Indiana.
I created a faux light fixture that Eric Scott of Open Gate added greenery to. Unfortunately, it was impossible to balance. After several adjustments and guide wires, it is close to being centered and leveled.
Sarah McGee of Studio No Four helped out with the stunning tablescape. She has an amazing design eye, and you need to contact her if you’re in the Indianapolis area and need design help.
Cara of Word for Word Chalk Art made the space with her stunning Chalk Art. She hand-lettered my round artwork along with all the name cards on the chairs.
ProSource provided the flooring for my room. It’s laminate but really looks like wood.
There were several more design issues that came up, but they were worked through with new design solutions. At the end of the day (actually the end of three days), the space was complete! It was a fun project, and I am so grateful for all my partners!
If you’re local, come see the space in person! The show runs at the Indianapolis Fairgrounds from January 20th – 29th. I speak on January 26th and 27th and 2 pm and 5 pm.
Designing a dining room at the Indianapolis Home show was an honor and thanks to all who supported me!
Go create something!
Are you new to my blog? Go HERE to see my home tour and HERE to shop for items I use in our home.
Find me on Facebook | Instagram | Twitter | Pinterest
Join me at the Indianapolis Home Show!
If you are local, I would love for you to join me at the Indianapolis Home Show.
It runs from January 20-29 at the Indiana State Fairgrounds. I will be speaking about transforming a space with paint on Thursday, January 26th, and Friday, January 27th at 2 pm and 5 pm (both days).
Besides speaking, this year I also designed a dining room which will be on display along with three other design/blogger rooms. Let me tell you, this space really took a village to come together.
Here are a few sneak peeks. The wallpaper is from Carmel Design in Indianapolis. Carmel Design offers a large selection of gorgeous wall coverings along with home decor items.
The chalkboard art is from Cara of Word for Word Chalk Art. She is absolutely amazing at what she does!
Eric Scott of Open Gate Design & Decor helped me with a fun DIY project and provided the dining room with gorgeous greenery and decor. Open Gate Design & Decor is in Anderson, and you will be in awe of the HUGE selection of pretty merchandise they have in stock!
My friend Sarah McGee is helping me design the tablescape. She is crazy talented with interior design and always has fresh and unique ideas. The greenery is all from Open Gate Design & Decor
And I have to give a shoutout to my amazing parents who donated their time to help me with various projects for the Home Show.
I also have several other sponsors that helped with space, and I’ll be sharing more about them soon.
You can see more about my experience last year and read about it here.
Go create something!
Are you new to my blog? Go HERE to see my home tour and HERE to shop for items I use in our home.
Find me on Facebook | Instagram | Twitter | Pinterest
Thank you. It’s because of you that I’m celebrating 3 years.
Thank you for the past three years.
I was created to create, and you all have allowed my passion to become my job.
I don’t get personal on the blog very often, but I want to share a little bit of my heart (And if I bore you, you can just scroll through all the before and after photos of my home).
Blogging is not perfect. It has been a roller coaster ride with highs and lows.
The comparison game with blogging is tough (just scroll through Pinterest or Instagram for a few minutes), and it’s easy to start feeling like you aren’t good enough.
But more than the comparison game, the internet trolls are who have brought me the most discouragement and pain. I know I put myself out there by sharing my projects and home through the blog. I realize we don’t all have the same style, but why do people enjoy bringing people down?
Here’s my most recent troll comment:
“No offense. But perhaps your decor sucks…It’s your lack of well-rounded style.”
Let’s focus on the positive rather than giving mean people any more time and attention. Thank you to my family, friends, and readers who like my shares on social media and take the time to read my blog posts. Thank you for the encouragement and for being an encourager.
Have you ever considered the value of an encourager? To encourage means “to inspire with courage, spirit, or hope.” Encourage means “to fill with courage or strength of purpose.”
Let’s all be encouragers and help each other dream big.
I feel I was created to create. I want to share my love of creating with others, and I love the relationships I’m forming with readers through my blog.
What were you created to do – what’s your gift? A gift is something that you’re not only good at, but it’s something that you have a desire to do. When you’re using that gift you’re filled with joy and power and you often find that you’ve found your passion.
Embrace your gift and find your passion. This will take courage, but the most unnatural path to take is to not do what you were made to do. Singers want to sing. Painters want to paint. Teachers want to teach. -Amy Howard
As a thank you, I’ll be running several giveaways throughout the next few weeks. If you notice my befores and afters, many of the makeovers involve paint. I am in love with this small spray shelter from HomeRight:
This post contains some affiliate links for your convenience. Click here to read my full disclosure policy.HomeRight Small Paint ShelterThis lightweight (and portable) spray shelter design makes it easy to position on a table top, floor or workbench. It’s great for lamps and other home decor accessories and limits the overspray drift on other items in your project area.
I’ve partnered with HomeRight and we’re giving away one of these spray shelters to TWO lucky readers! To enter, simply leave me a comment below. US Residents only and winner will be announced on January 14, 2017. Good luck! **GIVEAWAY HAS ENDED. CONGRATS TO BONNIE & GIL!
Thank you for all your support and encouragement,
Go create something!
Are you new to my blog? Go HERE to see my home tour and HERE to shop for items I use in our home.
Find me on Facebook | Instagram | Twitter | Pinterest
Want to read more on using your gifts and finding your passion? Go HERE.
Nationwide provided me with information regarding its Nationwide Learning Center article.
As you probably already know (I have been shouting it from the rooftop), we are currently in the process of remodeling our master bath due to a significant leak under the shower. We bought the house knowing about the leak (that is a long story in itself) and thought it would be fixed soon after we moved in. Life happened since we moved in three years ago, and we had to fix and replace part of the roof, replace an air conditioner unit, replace a furnace, replace a house water heater and a pool water heater. It was one home project after another, and we haven’t been able to use our shower since we bought the house. Our inspector warned us that the leak was so significant that unless we were okay with falling into our crawl space, we probably shouldn’t use the shower. Obviously, we didn’t go near the shower and are a little more than excited to get this bathroom remodeled!
Our master bath was demoed the day after Thanksgiving, and it was just as our inspector had warned us – a rotted subfloor AND a rotted support beam. The remodel was definitely necessary (and we were looking forward to a shower after three years)!
After our bathroom was completely demolished, we were ready to begin construction. However, our contractor (due to circumstances beyond his control) was not able to come for several weeks. We covered up the holes with plywood and blocked off the bathroom to keep everyone out and safe.
Keeping my family safe during the remodel is important to me – especially with three kids running around. Nationwide has a great article on how to stay on top of safety while your house is under construction. Keeping your family safe while your home is being remodeled involves two tactics:
Choosing a contractor with a strong record of safety and accountability.
We were extremely particular about the selection of our contractor and looked beyond the lowest bid. We wanted someone who was not only reliable but would look out for the needs of our family.
Working closely with that contractor to ensure proper safety precautions are taken during the project.
Our contractor will do what is best for our family in regards to drawing a safety zone around our bathroom remodel project. Having three kids, proper safety precautions are a must for our family. We are lucky that our bathroom is not in any of our normal traffic patterns. The master bathroom sits off of the master bedroom, so there is no reason for our kids to be in the construction zone.
As exciting as remodeling is, it is just as stressful. Validating credentials when deciding on a contractor, and once selected, collaborating on safety can make the project run much more smoothly (and safely) for all.
We have taught our kids to respect the construction zone to help ensure our contractor can make our bathroom design a reality.
I always love looking back at my most popular posts for the year (and try to understand what my readers are interested in). Here are the 5 Best DIY Projects of 2016:
4. Guest Room Makeover and DIY Paneled Wall I shared this post last month when I made over our guest room. This DIY paneled wall took me one afternoon and only cost around $100.
3. DIY Large Wooden Sign I love large wooden signs and decided to create my own using the coordinates and cities my husband and I have lived in. I share the full DIY tutorial.
2. All You Need to Know About Shiplap This post was more of a research post for me when I was deciding how to create my own shiplap wall in our kitchen.
1. Why I Repainted My Chalk Painted Cabinets My top post of 2016 involved painting – of course! I repainted my kitchen cabinets for the second time (something I never wish on anyone), and I share why I repainted them and how to avoid my mistake. Thanks so much for the support over the past year, and I look forward to a project-filled 2017!
Go create something!
Are you new to my blog? Go HERE to see my home tour and HERE to shop for items I use in our home.
One outdoor kitchen and suddenly we’re hosting every weekend. ☀️🍉 We recently added @blueskyoutdoorliving_brand White Shaker 3-Piece Outdoor Kitchen Combo to our pool patio, and it’s completely changed how we entertain. From graduation parties to Memorial Day cookouts, it’s become the gathering spot all summer long.
The weather-resistant cabinets feature a patented folding design that assembles surprisingly fast. 💨 Use code SARAD10 for 10% off!
#DutchBoyPartner This bathroom leaned a little cool, so I warmed it up with Sandstone Tint by @dutchboypaints and it completely changed the look of the space.
No major reno. No new cabinets. Just paint.
Save this if you’ve been wanting to try a DIY project
#DutchBoyPartner This bathroom leaned a little cool, so I warmed it up with Sandstone Tint by @dutchboypaints and it completely changed the look of the space.
No major reno. No new cabinets. Just paint.
Save this if you’ve been wanting to try a DIY project...
57
32
I created this reel two years ago, but since the fields behind our house rotate between corn and beans… it’s a corn summer again. 🌽
The older I get, the more I appreciate these ordinary little rhythms of life. Watching the field change through the seasons has quietly become one of my favorite parts of home.
I created this reel two years ago, but since the fields behind our house rotate between corn and beans… it’s a corn summer again. 🌽
The older I get, the more I appreciate these ordinary little rhythms of life. Watching the field change through the seasons has quietly become one of my favorite parts of home....
53
8
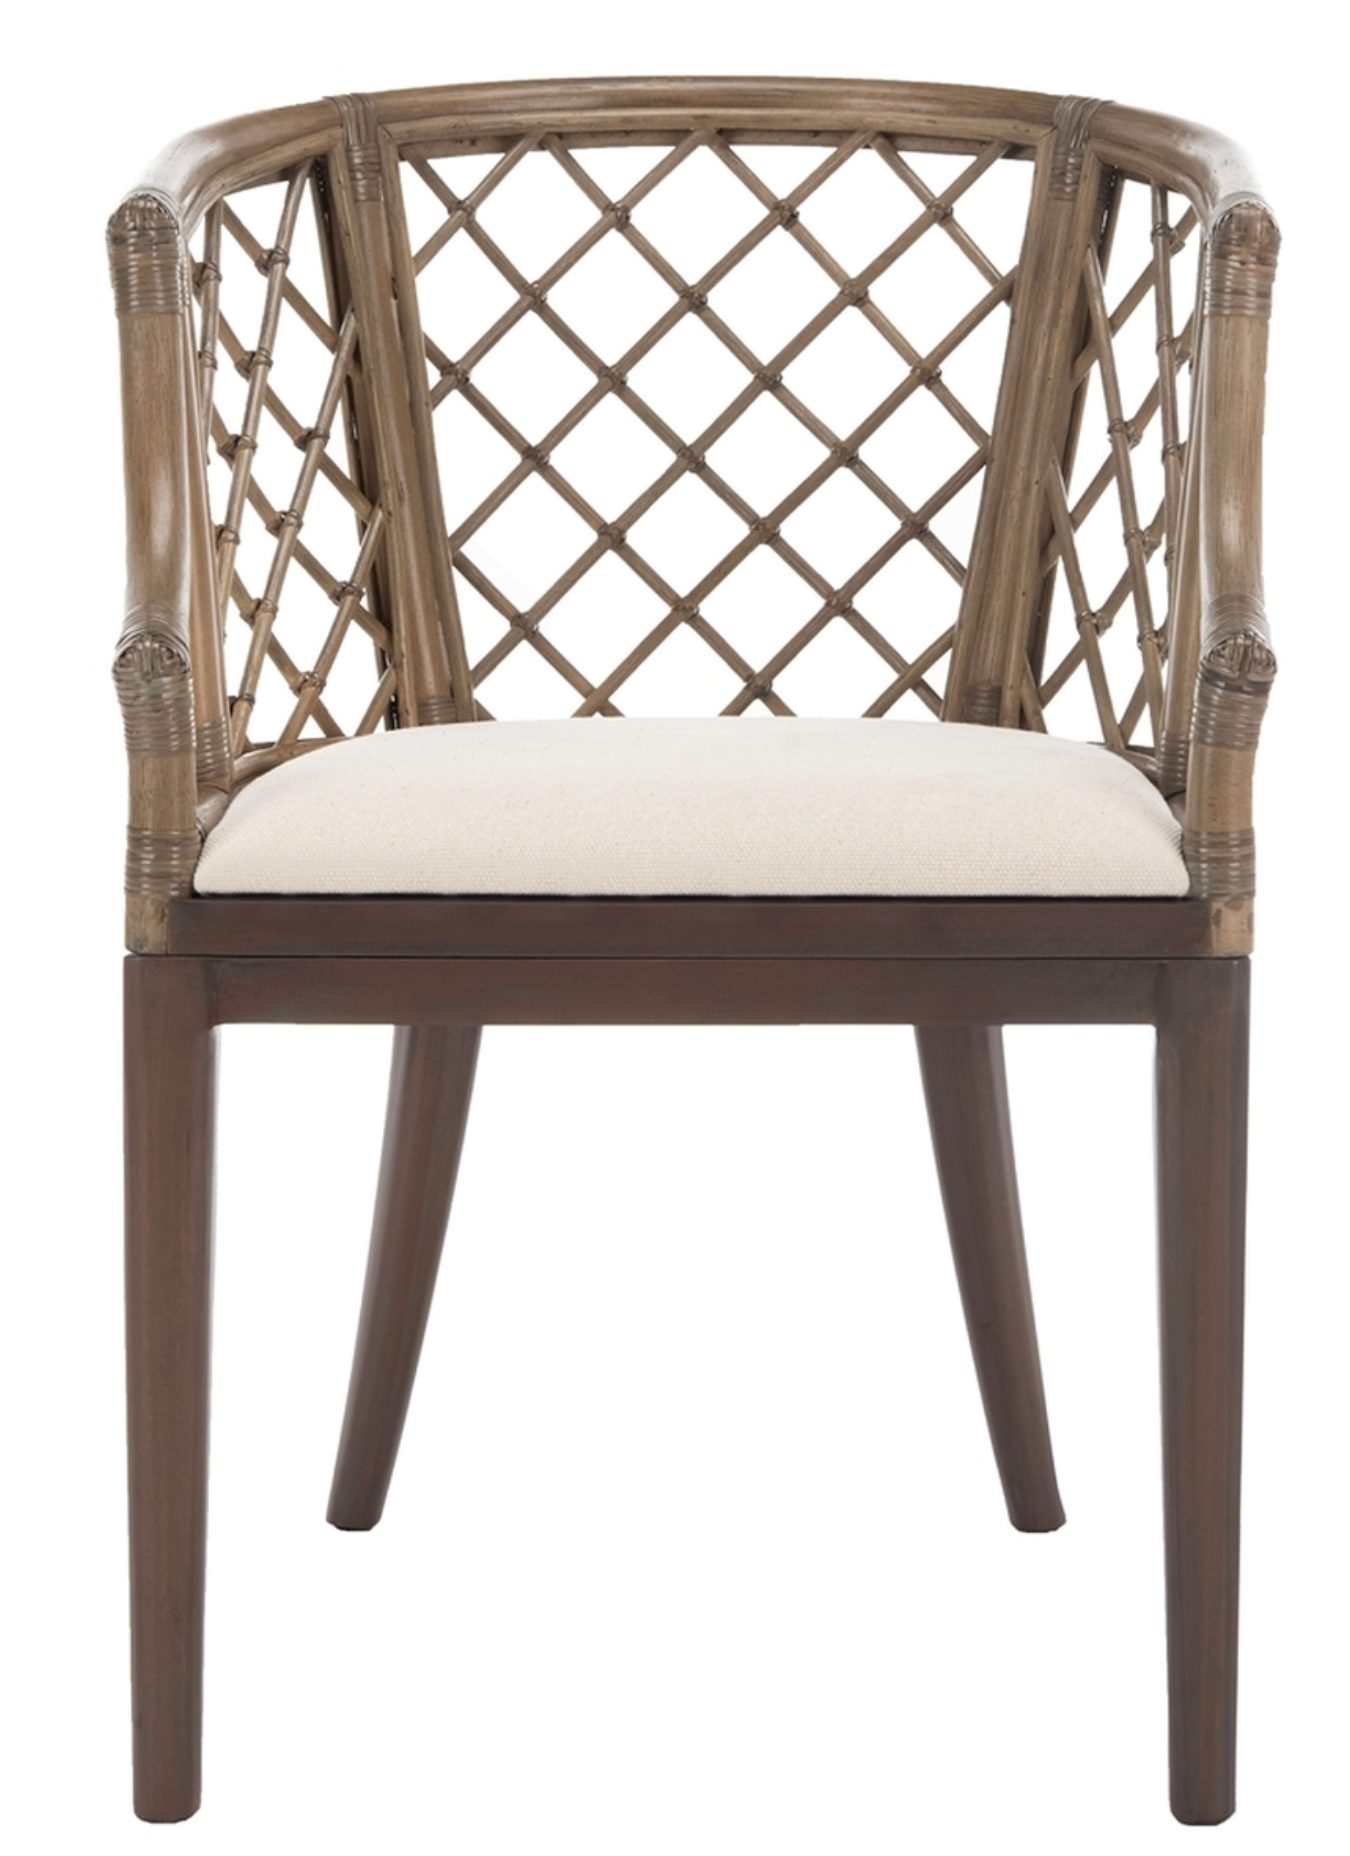
I love this chair and side table from @zgallerie that I decided to try it in my office/library. I’m not sure where I love it more - here or my bedroom! It adds so much elegance and charm to the spaces. Use my code SY5 at checkout for 5% off your entire purchase. Shop My Favorites by commenting LINKS or through the link in my bio #ZGallerie #MyZgallerie #Zgallerie #ModernLuxury #LuxuryInterior
I love this chair and side table from @zgallerie that I decided to try it in my office/library. I’m not sure where I love it more - here or my bedroom! It adds so much elegance and charm to the spaces. Use my code SY5 at checkout for 5% off your entire purchase. Shop My Favorites by commenting LINKS or through the link in my bio #ZGallerie #MyZgallerie #Zgallerie #ModernLuxury #LuxuryInterior...
39
11
We waited 13 years for this - and our house looks happier with her glow-up!
We went from a drafty single door (with a 90s glass inlay I poorly covered up) to double doors that allows in more light and feel right for our home.
My patio is all ready for warmer weather thanks to the new launch with @livabliss + @galeyalix! I’m LOVING the checkerboard outdoor rug. Comment “PATIO” and I’ll send you the links! #Livabliss #LivablissHome #GaleyALixxLivabliss #HomeDecor #Rugs
My patio is all ready for warmer weather thanks to the new launch with @livabliss + @galeyalix! I’m LOVING the checkerboard outdoor rug. Comment “PATIO” and I’ll send you the links! #Livabliss #LivablissHome #GaleyALixxLivabliss #HomeDecor #Rugs...
44
16
I’ve been slowly refreshing our bedroom and recently added this beautiful swivel chair and side table from @zgallerie! They add the perfect elegant modern touch to the space. Use my code SY5 at checkout for 5% off your entire purchase. Shop My Favorites by commenting “LINKS” or through the link in my bio. #gifted #ZGallerie #MyZgallerie #Zgallerie #ModernLuxury
I’ve been slowly refreshing our bedroom and recently added this beautiful swivel chair and side table from @zgallerie! They add the perfect elegant modern touch to the space. Use my code SY5 at checkout for 5% off your entire purchase. Shop My Favorites by commenting “LINKS” or through the link in my bio. #gifted #ZGallerie #MyZgallerie #Zgallerie #ModernLuxury...
23
16
Bathroom Reveal. 💫 Last spring, our upstairs shower leaked into our living room below. We were put on our contractor’s list - and the wait was worth it! We now have a gorgeous bathroom with checkerboard floors - a dream of mine since I first saw my husband’s granny’s farmhouse bathroom with checkerboard floors (years and years ago)! The shower glass is coming soon. Comment LINKS, and I’ll send you the blog post and bathroom product links.
Bathroom Reveal. 💫 Last spring, our upstairs shower leaked into our living room below. We were put on our contractor’s list - and the wait was worth it! We now have a gorgeous bathroom with checkerboard floors - a dream of mine since I first saw my husband’s granny’s farmhouse bathroom with checkerboard floors (years and years ago)! The shower glass is coming soon. Comment LINKS, and I’ll send you the blog post and bathroom product links....
120
26
What started as a leak turned into my dream bathroom ✨ I partnered with @wayfair and found everything - from checkerboard tile to the vanities, mirrors, and faucets. Comment “LINK” and I’ll send you all my favorite finds! *Shower glass coming soon! #ad #wayfaircreator #homereno
What started as a leak turned into my dream bathroom ✨ I partnered with @wayfair and found everything - from checkerboard tile to the vanities, mirrors, and faucets. Comment “LINK” and I’ll send you all my favorite finds! *Shower glass coming soon! #ad #wayfaircreator #homereno...
74
34
@wayfair is helping us turn a disaster into something beautiful ✨A leak from our upstairs shower led to a full remodel, and I can’t wait to show you the AFTER! Bathroom remodel reveal coming soon. Comment “LINKS” and I’ll send all my Wayfair favorites! #ad #wayfaircreator #wayfair #homereno
@wayfair is helping us turn a disaster into something beautiful ✨A leak from our upstairs shower led to a full remodel, and I can’t wait to show you the AFTER! Bathroom remodel reveal coming soon. Comment “LINKS” and I’ll send all my Wayfair favorites! #ad #wayfaircreator #wayfair #homereno...
50
15
I used to paint everything. I literally taught chalk paint classes and wrote an ebook about it.
So I don’t blame whoever painted these, but every room needs a little natural wood.
This error message is only visible to WordPress admins
There has been a problem with your Instagram Feed.
We're On Instagram
One outdoor kitchen and suddenly we’re hosting every weekend. ☀️🍉 We recently added @blueskyoutdoorliving_brand White Shaker 3-Piece Outdoor Kitchen Combo to our pool patio, and it’s completely changed how we entertain. From graduation parties to Memorial Day cookouts, it’s become the gathering spot all summer long.
The weather-resistant cabinets feature a patented folding design that assembles surprisingly fast. 💨 Use code SARAD10 for 10% off!
#DutchBoyPartner This bathroom leaned a little cool, so I warmed it up with Sandstone Tint by @dutchboypaints and it completely changed the look of the space.
No major reno. No new cabinets. Just paint.
Save this if you’ve been wanting to try a DIY project
#DutchBoyPartner This bathroom leaned a little cool, so I warmed it up with Sandstone Tint by @dutchboypaints and it completely changed the look of the space.
No major reno. No new cabinets. Just paint.
Save this if you’ve been wanting to try a DIY project...
57
32
I created this reel two years ago, but since the fields behind our house rotate between corn and beans… it’s a corn summer again. 🌽
The older I get, the more I appreciate these ordinary little rhythms of life. Watching the field change through the seasons has quietly become one of my favorite parts of home.
I created this reel two years ago, but since the fields behind our house rotate between corn and beans… it’s a corn summer again. 🌽
The older I get, the more I appreciate these ordinary little rhythms of life. Watching the field change through the seasons has quietly become one of my favorite parts of home....
53
8
I love this chair and side table from @zgallerie that I decided to try it in my office/library. I’m not sure where I love it more - here or my bedroom! It adds so much elegance and charm to the spaces. Use my code SY5 at checkout for 5% off your entire purchase. Shop My Favorites by commenting LINKS or through the link in my bio #ZGallerie #MyZgallerie #Zgallerie #ModernLuxury #LuxuryInterior
I love this chair and side table from @zgallerie that I decided to try it in my office/library. I’m not sure where I love it more - here or my bedroom! It adds so much elegance and charm to the spaces. Use my code SY5 at checkout for 5% off your entire purchase. Shop My Favorites by commenting LINKS or through the link in my bio #ZGallerie #MyZgallerie #Zgallerie #ModernLuxury #LuxuryInterior...
39
11
We waited 13 years for this - and our house looks happier with her glow-up!
We went from a drafty single door (with a 90s glass inlay I poorly covered up) to double doors that allows in more light and feel right for our home.
My patio is all ready for warmer weather thanks to the new launch with @livabliss + @galeyalix! I’m LOVING the checkerboard outdoor rug. Comment “PATIO” and I’ll send you the links! #Livabliss #LivablissHome #GaleyALixxLivabliss #HomeDecor #Rugs
My patio is all ready for warmer weather thanks to the new launch with @livabliss + @galeyalix! I’m LOVING the checkerboard outdoor rug. Comment “PATIO” and I’ll send you the links! #Livabliss #LivablissHome #GaleyALixxLivabliss #HomeDecor #Rugs...
44
16
I’ve been slowly refreshing our bedroom and recently added this beautiful swivel chair and side table from @zgallerie! They add the perfect elegant modern touch to the space. Use my code SY5 at checkout for 5% off your entire purchase. Shop My Favorites by commenting “LINKS” or through the link in my bio. #gifted #ZGallerie #MyZgallerie #Zgallerie #ModernLuxury
I’ve been slowly refreshing our bedroom and recently added this beautiful swivel chair and side table from @zgallerie! They add the perfect elegant modern touch to the space. Use my code SY5 at checkout for 5% off your entire purchase. Shop My Favorites by commenting “LINKS” or through the link in my bio. #gifted #ZGallerie #MyZgallerie #Zgallerie #ModernLuxury...
23
16
Bathroom Reveal. 💫 Last spring, our upstairs shower leaked into our living room below. We were put on our contractor’s list - and the wait was worth it! We now have a gorgeous bathroom with checkerboard floors - a dream of mine since I first saw my husband’s granny’s farmhouse bathroom with checkerboard floors (years and years ago)! The shower glass is coming soon. Comment LINKS, and I’ll send you the blog post and bathroom product links.
Bathroom Reveal. 💫 Last spring, our upstairs shower leaked into our living room below. We were put on our contractor’s list - and the wait was worth it! We now have a gorgeous bathroom with checkerboard floors - a dream of mine since I first saw my husband’s granny’s farmhouse bathroom with checkerboard floors (years and years ago)! The shower glass is coming soon. Comment LINKS, and I’ll send you the blog post and bathroom product links....
120
26
What started as a leak turned into my dream bathroom ✨ I partnered with @wayfair and found everything - from checkerboard tile to the vanities, mirrors, and faucets. Comment “LINK” and I’ll send you all my favorite finds! *Shower glass coming soon! #ad #wayfaircreator #homereno
What started as a leak turned into my dream bathroom ✨ I partnered with @wayfair and found everything - from checkerboard tile to the vanities, mirrors, and faucets. Comment “LINK” and I’ll send you all my favorite finds! *Shower glass coming soon! #ad #wayfaircreator #homereno...
74
34
@wayfair is helping us turn a disaster into something beautiful ✨A leak from our upstairs shower led to a full remodel, and I can’t wait to show you the AFTER! Bathroom remodel reveal coming soon. Comment “LINKS” and I’ll send all my Wayfair favorites! #ad #wayfaircreator #wayfair #homereno
@wayfair is helping us turn a disaster into something beautiful ✨A leak from our upstairs shower led to a full remodel, and I can’t wait to show you the AFTER! Bathroom remodel reveal coming soon. Comment “LINKS” and I’ll send all my Wayfair favorites! #ad #wayfaircreator #wayfair #homereno...
50
15
I used to paint everything. I literally taught chalk paint classes and wrote an ebook about it.
So I don’t blame whoever painted these, but every room needs a little natural wood.
 My husband comes from a long line of book hoarders, so we have a TON of books. When we moved into our home, there were no bookshelves. For three years, the books have been hidden in closets, cabinets, lockers – if you opened a door on anything you were greeted by a stack of books.
We originally planned on building the bookshelves ourselves but were a little overwhelmed and decided to hand them over to a professional. We hired the contractor who remodeled our bathroom to build the shelves.
My husband comes from a long line of book hoarders, so we have a TON of books. When we moved into our home, there were no bookshelves. For three years, the books have been hidden in closets, cabinets, lockers – if you opened a door on anything you were greeted by a stack of books.
We originally planned on building the bookshelves ourselves but were a little overwhelmed and decided to hand them over to a professional. We hired the contractor who remodeled our bathroom to build the shelves.
 I sketched a plan for the bookshelves for our contractor, and he built most of the pieces in his workshop. He installed them during one of my Home Show days. I came home later that night to a gorgeous (but much more gigantic than I realized) wall of bookshelves.
 I was slightly overwhelmed and quickly contacted Wagner to see if they would partner with me on this project. I couldn’t imagine how I would get a massive piece painted without a heavy-duty paint sprayer.
 This post contains some affiliate links for your convenience. Click here to read my full disclosure policy.
I used Wagner’s FLEXio 890 paint sprayer and was very impressed. I am all about storage, and I love how the sprayer all stores away inside the power box.
This post contains some affiliate links for your convenience. Click here to read my full disclosure policy.
I used Wagner’s FLEXio 890 paint sprayer and was very impressed. I am all about storage, and I love how the sprayer all stores away inside the power box.
 I wanted the bookshelves to blend into the space rather than stand out more.
 I used Valspar’s Soulful Grey (formerly Valspar’s Woodlawn Colonial Gray). My favorite thing about this sprayer is that I didn’t have to water down the (latex) paint. It was WONDERFUL!
 The power cord and air hose are so long that I never had to use an extension cord (despite having to use a ladder to reach the top of the bookshelves).
 The only trouble I had was when I didn’t pay attention to the nozzle. I eventually realized that I need to wipe it down fairly consistently. Also, with the amount of paint I was spraying, I did end up need to rinse the nozzle a few times. If you don’t stay on top keeping a clean nozzle, you can end up with splatters.
 Luckily once I cleaned the nozzle I was able to quickly fix (spray over) and fix my splatters.
 When the bookshelf was done (I primed one afternoon and painted the next), I rinsed off everything and put them away in the power box. They are ready for my next project!
Here’s a little video to show you how quiet but powerful this sprayer is:
I’ll be sharing the bookshelves reveal very soon (and I’m excited to have room in our coat closet for coats)!
When the bookshelf was done (I primed one afternoon and painted the next), I rinsed off everything and put them away in the power box. They are ready for my next project!
Here’s a little video to show you how quiet but powerful this sprayer is:
I’ll be sharing the bookshelves reveal very soon (and I’m excited to have room in our coat closet for coats)!
 Are you new to my blog? Go HERE to see my home tour and HERE to shop for items I use in our home.
Find me on Facebook | Instagram | Twitter | Pinterest
*This post contains affiliate links and is a sponsored post by Wagner. I take pride in reviewing only products that fit my brand and will be beneficial to my readers. And while this post is sponsored, all the opinions are my own.
Are you new to my blog? Go HERE to see my home tour and HERE to shop for items I use in our home.
Find me on Facebook | Instagram | Twitter | Pinterest
*This post contains affiliate links and is a sponsored post by Wagner. I take pride in reviewing only products that fit my brand and will be beneficial to my readers. And while this post is sponsored, all the opinions are my own.
 I
I  I wanted faucets that were sophisticated and timeless, and the
  The faucet’s Victorian details include porcelain inlays with the antiqued decorative script and a refined shepherd’s spout and just scream luxury.
 When I dreamed up our bathroom remodel design board, the first thing I searched for was a tub filler.

 The faucet includes a removable hand shower.
 Keeping with the sophisticated timeless look, we also used the
  The lever on the showerhead makes it easy to adjust the water, and it is equipped with the PosiTemp® pressure-balancing control valve to help maintain water temperature in the shower.
 The showerhead is generously sized (9″ diameter) and has three times more spray power than most rainshowers for a more thorough rinse.
 Moen also makes gorgeous accessories including towel holders and toilet paper holders. I found the
  My goal for this bathroom remodel was timeless sophistication, and I think Moen helped me achieve that goal with their gorgeous pieces.
 A special thanks to Moen for partnering with me on my dream bathroom!
Go create something!
A special thanks to Moen for partnering with me on my dream bathroom!
Go create something!
 For some time now, I have felt convicted with the perfect photos of my “perfect” home.
And then last week happened. It was a tough week, and it revealed how human we all are. How much we need Jesus (and His grace) and how imperfect we all are.
Social media allows us to create a seemingly perfect world. Facebook is full of perfect families, Instagram is full of perfect people, and Pinterest is filled with perfect homes.
As a blogger, I want to tell you that the perfection you see is not real. My home decor blog is a full-time job. I spend crazy hours creating these “perfect” spaces. It begins with DIY projects and lots of painting. I run all over town (and the next town) looking for accessories and flowers. I take too many photos and spend too many hours editing them. The normal person cannot expect to achieve what many of us bloggers share because it just isn’t real.
I am never the mom greeting my kids at the door after school with fresh baked cookies (I’m the mom covered in paint telling them I’m almost finished and will be done in a minute). I’m not the wife who prepares an amazing gourmet dinner (unless Prego sauce and spaghetti count) for my husband.
I know I was created to create. I want to use my gifts to glorify Him. I wanted to inspire others and show how you can create a pretty space on a budget. However, lately, I have been so overwhelmed by amazing opportunities and big projects. These projects are so fun but so time-consuming. I haven’t had time in a while to do my little inexpensive DIYs. Those little DIYs that started Sincerely, Sara D. I want to inspire you to create – not discourage you because your house isn’t photoshopped like mine.
So next time you see my perfect home, I want you to realize it’s not perfect. I’m juggling the balls of life just like you, and I just keep the pretty home ball in the mix. I’m dropping lots of other balls in the process.
For some time now, I have felt convicted with the perfect photos of my “perfect” home.
And then last week happened. It was a tough week, and it revealed how human we all are. How much we need Jesus (and His grace) and how imperfect we all are.
Social media allows us to create a seemingly perfect world. Facebook is full of perfect families, Instagram is full of perfect people, and Pinterest is filled with perfect homes.
As a blogger, I want to tell you that the perfection you see is not real. My home decor blog is a full-time job. I spend crazy hours creating these “perfect” spaces. It begins with DIY projects and lots of painting. I run all over town (and the next town) looking for accessories and flowers. I take too many photos and spend too many hours editing them. The normal person cannot expect to achieve what many of us bloggers share because it just isn’t real.
I am never the mom greeting my kids at the door after school with fresh baked cookies (I’m the mom covered in paint telling them I’m almost finished and will be done in a minute). I’m not the wife who prepares an amazing gourmet dinner (unless Prego sauce and spaghetti count) for my husband.
I know I was created to create. I want to use my gifts to glorify Him. I wanted to inspire others and show how you can create a pretty space on a budget. However, lately, I have been so overwhelmed by amazing opportunities and big projects. These projects are so fun but so time-consuming. I haven’t had time in a while to do my little inexpensive DIYs. Those little DIYs that started Sincerely, Sara D. I want to inspire you to create – not discourage you because your house isn’t photoshopped like mine.
So next time you see my perfect home, I want you to realize it’s not perfect. I’m juggling the balls of life just like you, and I just keep the pretty home ball in the mix. I’m dropping lots of other balls in the process.


 …but life (roof repairs, pool heater, water heat, air conditioner, furnace, and lots of other 20-year-old home problems) kept happening.
Over the past three years, I have shared several design board ideas for this bathroom remodel as I dreamed and schemed. You can
…but life (roof repairs, pool heater, water heat, air conditioner, furnace, and lots of other 20-year-old home problems) kept happening.
Over the past three years, I have shared several design board ideas for this bathroom remodel as I dreamed and schemed. You can 
 This past fall several things fell into place, and we were able to go for it. We hired a contractor and the day after Thanksgiving we demolished the bathroom (
 I share the bigger bathroom sources in separate posts (
 Since this bathroom was sitting on such a large problem, I knew this was far beyond my scope of DIY. Honestly, it was nice to hand it over to an expert.

 I still did a lot of the grunt work and painted all the walls, ceilings, and trim.

 The
The  One of the hardest pieces for me to find was the perfect light fixture. I wanted this
  The sconces are from Home Depot. I used the
  The outlets and light switches are
  The majority of the decor and accessories are from HomeGoods.
 I can not tell you all how thrilled we are to have a bathroom that functions and looks beautiful. I may never leave my tub (and you can
 We are so thankful to have a beautiful and functioning bathroom!
Want to
We are so thankful to have a beautiful and functioning bathroom!
Want to 


 Last week stretched me more than I could have ever imagined.
Besides decorating a dining room for the Indianapolis Home Show (you can see all the details of that space
Last week stretched me more than I could have ever imagined.
Besides decorating a dining room for the Indianapolis Home Show (you can see all the details of that space  Before my presentations, I made two live TV appearances.
 Let me tell you, I was FREAKED out (and didn’t sleep much the night before). However, I survived and was so grateful my friend Jenny came along to calm my nerves.
You can watch my Indy Style segment here:
I went from Indy Style over to the noon news at WTHR.
Let me tell you, I was FREAKED out (and didn’t sleep much the night before). However, I survived and was so grateful my friend Jenny came along to calm my nerves.
You can watch my Indy Style segment here:
I went from Indy Style over to the noon news at WTHR.
 You can see that segment here:
From the noon news, I rushed over to the fairgrounds for my first speaking session.
You can see that segment here:
From the noon news, I rushed over to the fairgrounds for my first speaking session.
 My audience was sweet and gracious.
 I went home that evening completely relieved and exhausted!
The next day, I spoke at two more sessions and had the weekend to take it easy.
Then on Monday, my friend Angela (
I went home that evening completely relieved and exhausted!
The next day, I spoke at two more sessions and had the weekend to take it easy.
Then on Monday, my friend Angela ( At the end of the day, Angela and I were giving each other lots of high fives. 🙂
I woke up the next morning with a smile on my face (I was DONE) and a sore back.
Go create something!
At the end of the day, Angela and I were giving each other lots of high fives. 🙂
I woke up the next morning with a smile on my face (I was DONE) and a sore back.
Go create something!


 Just two nights ago, I really didn’t know if it would all come together. However, I left the Home Show today with the space finished.
I started the room early Tuesday morning.
Just two nights ago, I really didn’t know if it would all come together. However, I left the Home Show today with the space finished.
I started the room early Tuesday morning.
 I was given a space with three walls made of plywood. I began painting the two side walls in Benjamin Moore’s Hale Navy.
 Look at me! I’m so happy and unaware of the upcoming design obstacles…
This first obstacle came that evening when I went back to the space (with my family) to drop off the table. We took the table on a truck and it wasn’t supposed to rain. But it rained our entire drive.
Look at me! I’m so happy and unaware of the upcoming design obstacles…
This first obstacle came that evening when I went back to the space (with my family) to drop off the table. We took the table on a truck and it wasn’t supposed to rain. But it rained our entire drive.
 Luckily the table looks gorgeous (despite the rain) and my husband (with Lena’s watchful eyes) assembled it beautifully.
 The room absolutely came together thanks to my talented sponsors.
 The table was designed and built by
 All my gorgeous greenery, candles, mirror, and table are from

 I created a faux light fixture that Eric Scott of Open Gate added greenery to. Unfortunately, it was impossible to balance. After several adjustments and guide wires, it is close to being centered and leveled.


 There were several more design issues that came up, but they were worked through with new design solutions. At the end of the day (actually the end of three days), the space was complete! It was a fun project, and I am so grateful for all my partners!
 If you’re local, come see the space in person! The show runs at the Indianapolis Fairgrounds from January 20th – 29th. I speak on January 26th and 27th and 2 pm and 5 pm.
Designing a dining room at the Indianapolis Home show was an honor and thanks to all who supported me!
Go create something!
If you’re local, come see the space in person! The show runs at the Indianapolis Fairgrounds from January 20th – 29th. I speak on January 26th and 27th and 2 pm and 5 pm.
Designing a dining room at the Indianapolis Home show was an honor and thanks to all who supported me!
Go create something!
 If you are local, I would love for you to join me at the Indianapolis Home Show.
 It runs from January 20-29 at the Indiana State Fairgrounds. I will be speaking about transforming a space with paint on Thursday, January 26th, and Friday, January 27th at 2 pm and 5 pm (both days).
Besides speaking, this year I also designed a dining room which will be on display along with three other design/blogger rooms. Let me tell you, this space really took a village to come together.
It runs from January 20-29 at the Indiana State Fairgrounds. I will be speaking about transforming a space with paint on Thursday, January 26th, and Friday, January 27th at 2 pm and 5 pm (both days).
Besides speaking, this year I also designed a dining room which will be on display along with three other design/blogger rooms. Let me tell you, this space really took a village to come together.
 Here are a few sneak peeks. The wallpaper is from
  The chalkboard art is from Cara of Word for Word Chalk Art. She is absolutely amazing at what she does!
 Eric Scott of
  My friend Sarah McGee is helping me design the tablescape. She is crazy talented with interior design and always has fresh and unique ideas. The greenery is all from Open Gate Design & Decor

 And I have to give a shoutout to my amazing parents who donated their time to help me with various projects for the Home Show.
I also have several other sponsors that helped with space, and I’ll be sharing more about them soon.
And I have to give a shoutout to my amazing parents who donated their time to help me with various projects for the Home Show.
I also have several other sponsors that helped with space, and I’ll be sharing more about them soon.
 You can see more about my experience last year and
  Thank you for the past three years.
I was created to create, and you all have allowed my passion to become my job.
I don’t get personal on the blog very often, but I want to share a little bit of my heart (And if I bore you, you can just scroll through all the before and after photos of my home).
Thank you for the past three years.
I was created to create, and you all have allowed my passion to become my job.
I don’t get personal on the blog very often, but I want to share a little bit of my heart (And if I bore you, you can just scroll through all the before and after photos of my home).
 Blogging is not perfect. It has been a roller coaster ride with highs and lows.
The comparison game with blogging is tough (just scroll through Pinterest or Instagram for a few minutes), and it’s easy to start feeling like you aren’t good enough.
Blogging is not perfect. It has been a roller coaster ride with highs and lows.
The comparison game with blogging is tough (just scroll through Pinterest or Instagram for a few minutes), and it’s easy to start feeling like you aren’t good enough.
 But more than the comparison game, the internet trolls are who have brought me the most discouragement and pain. I know I put myself out there by sharing my projects and home through the blog. I realize we don’t all have the same style, but why do people enjoy bringing people down?
Here’s my most recent troll comment:
“No offense. But perhaps your decor sucks…It’s your lack of well-rounded style.”
But more than the comparison game, the internet trolls are who have brought me the most discouragement and pain. I know I put myself out there by sharing my projects and home through the blog. I realize we don’t all have the same style, but why do people enjoy bringing people down?
Here’s my most recent troll comment:
“No offense. But perhaps your decor sucks…It’s your lack of well-rounded style.”
 Let’s focus on the positive rather than giving mean people any more time and attention. Thank you to my family, friends, and readers who like my shares on social media and take the time to read my blog posts. Thank you for the encouragement and for being an encourager.
 Have you ever considered the value of an encourager? To encourage means “to inspire with courage, spirit, or hope.” Encourage means “to fill with courage or strength of purpose.”
 Let’s all be encouragers and help each other dream big.
 I feel I was created to create. I want to share my love of creating with others, and I love the relationships I’m forming with readers through my blog.
What were you created to do – what’s your gift? A gift is something that you’re not only good at, but it’s something that you have a desire to do. When you’re using that gift you’re filled with joy and power and you often find that you’ve found your passion.
I feel I was created to create. I want to share my love of creating with others, and I love the relationships I’m forming with readers through my blog.
What were you created to do – what’s your gift? A gift is something that you’re not only good at, but it’s something that you have a desire to do. When you’re using that gift you’re filled with joy and power and you often find that you’ve found your passion.
 Embrace your gift and find your passion. This will take courage, but the most unnatural path to take is to not do what you were made to do. Singers want to sing. Painters want to paint. Teachers want to teach. -Amy Howard
As a thank you, I’ll be running several giveaways throughout the next few weeks. If you notice my befores and afters, many of the makeovers involve paint. I am in love with this small spray shelter from
Embrace your gift and find your passion. This will take courage, but the most unnatural path to take is to not do what you were made to do. Singers want to sing. Painters want to paint. Teachers want to teach. -Amy Howard
As a thank you, I’ll be running several giveaways throughout the next few weeks. If you notice my befores and afters, many of the makeovers involve paint. I am in love with this small spray shelter from  This lightweight (and portable) spray shelter design makes it easy to position on a table top, floor or workbench. It’s great for lamps and other home decor accessories and limits the overspray drift on other items in your project area.
I’ve partnered with HomeRight and we’re giving away one of these spray shelters to TWO lucky readers! To enter, simply leave me a comment below. US Residents only and winner will be announced on January 14, 2017. Good luck! **GIVEAWAY HAS ENDED. CONGRATS TO BONNIE & GIL!
Thank you for all your support and encouragement,
Go create something!
This lightweight (and portable) spray shelter design makes it easy to position on a table top, floor or workbench. It’s great for lamps and other home decor accessories and limits the overspray drift on other items in your project area.
I’ve partnered with HomeRight and we’re giving away one of these spray shelters to TWO lucky readers! To enter, simply leave me a comment below. US Residents only and winner will be announced on January 14, 2017. Good luck! **GIVEAWAY HAS ENDED. CONGRATS TO BONNIE & GIL!
Thank you for all your support and encouragement,
Go create something!


 Happy New Year!


