DIY

Wallpaper on Ceilings

Wallpaper on Ceilings

Wallpaper on ceilings is beautiful, and an unexpected way to add color, texture, and pattern to your space.

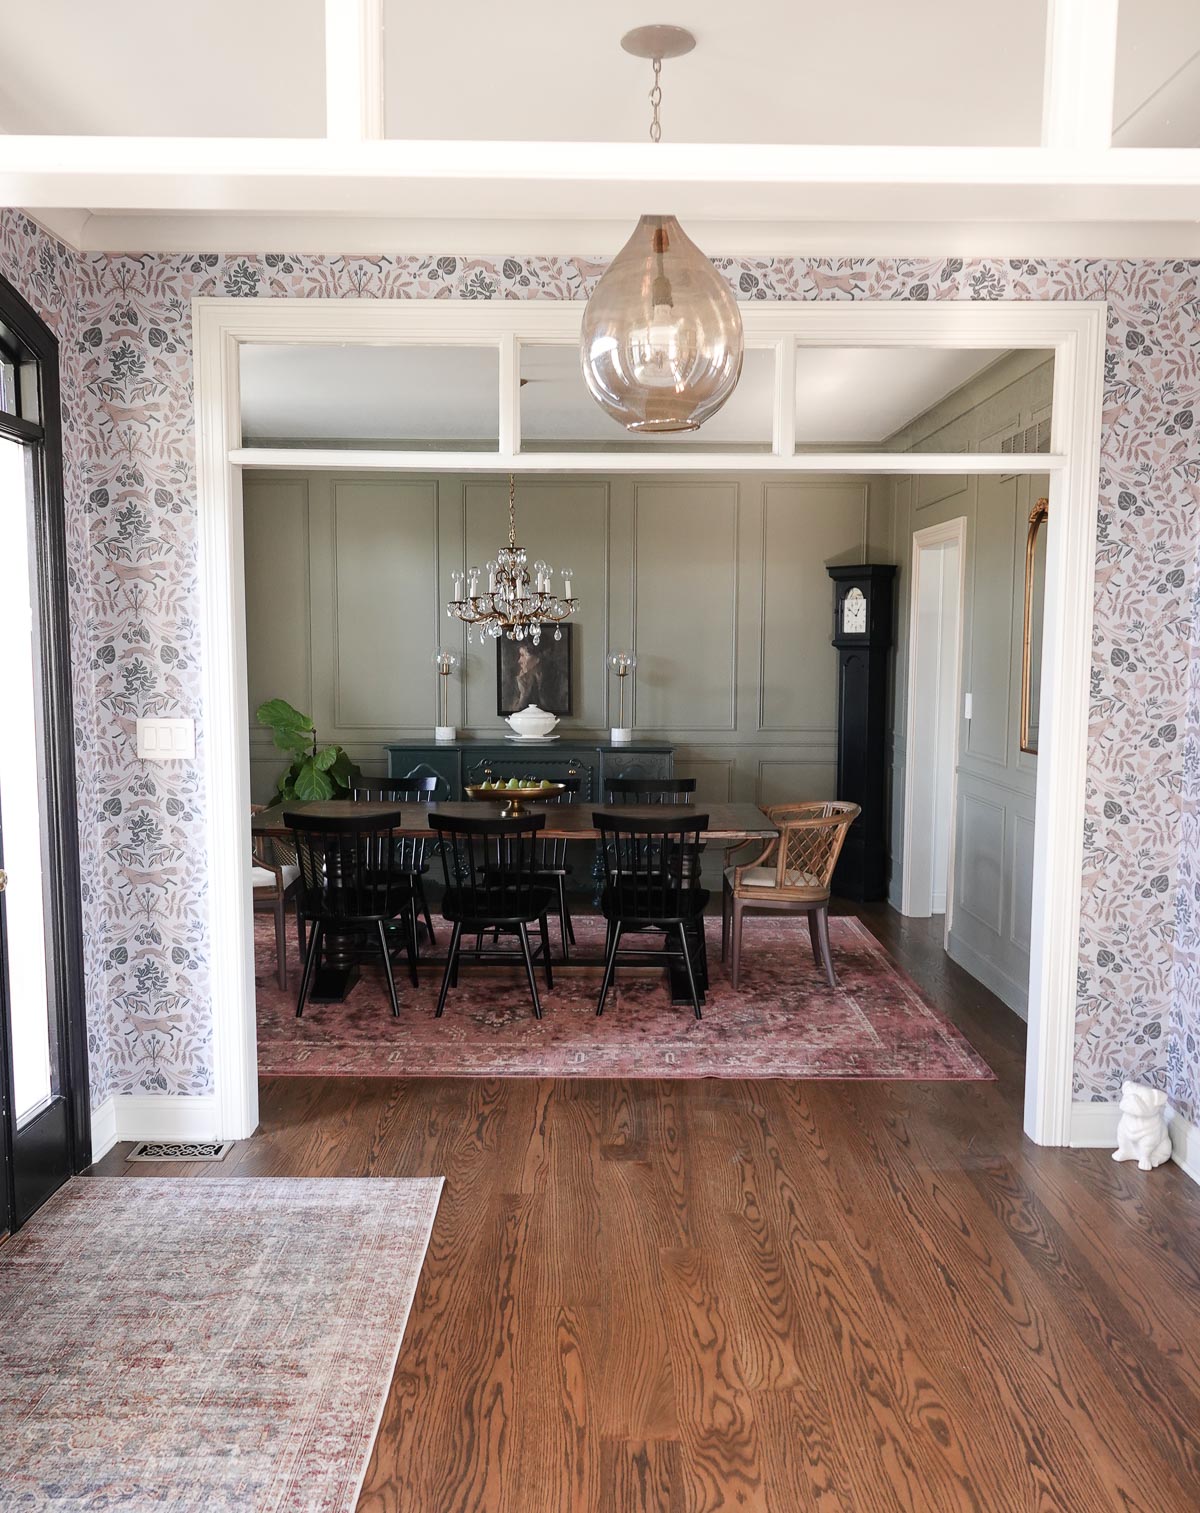
Recently, we added paneled molding to our dining room and repainted it in a very neutral color. I have a lot of color in our home and craved a lighter and brighter dining room, but then realized it was too bland for my taste.

Knowing a bold paper would contrast nicely with the neutral walls, I debated adding wallpaper to the ceiling.

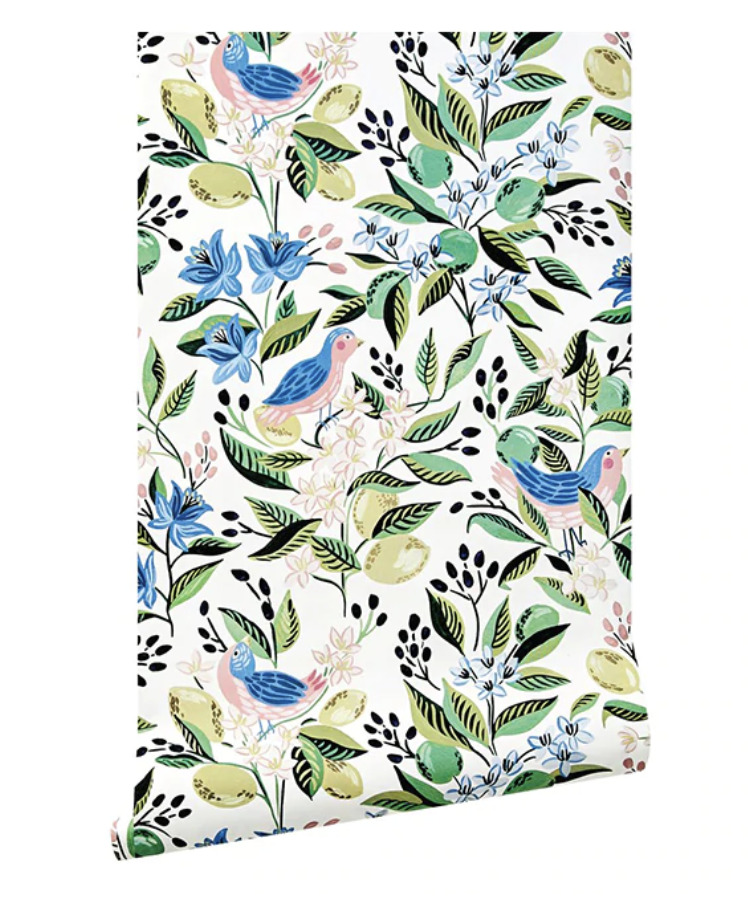
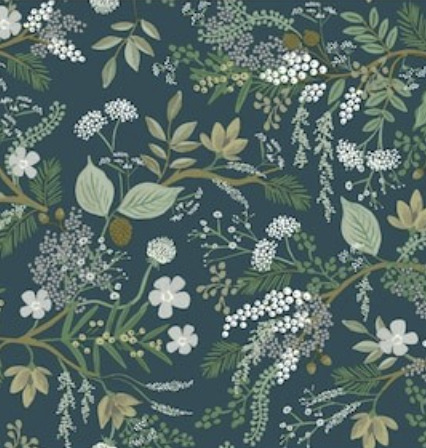
After a long search, I found the perfect wallpaper for the space: a bold floral pattern with the perfect color palette for the space:

Having commitment issues, I did not want to go with traditional wallpaper for my ceiling. I’ve removed a lot of wallpaper over the years, and the last thing I wanted to do was mess up my recently painted ceiling.

Removable Wallpaper

Peel-and-stick paper is a great solution for so many reasons. You can read more about removable wallpaper here. It is so simple to remove and shouldn’t damage your walls (or ceilings).

It is pricier and less forgiving when installing, but I’ve had plenty of experience with installing wallpaper so I felt confident in my abilities to go for it.

Wallpaper Installation

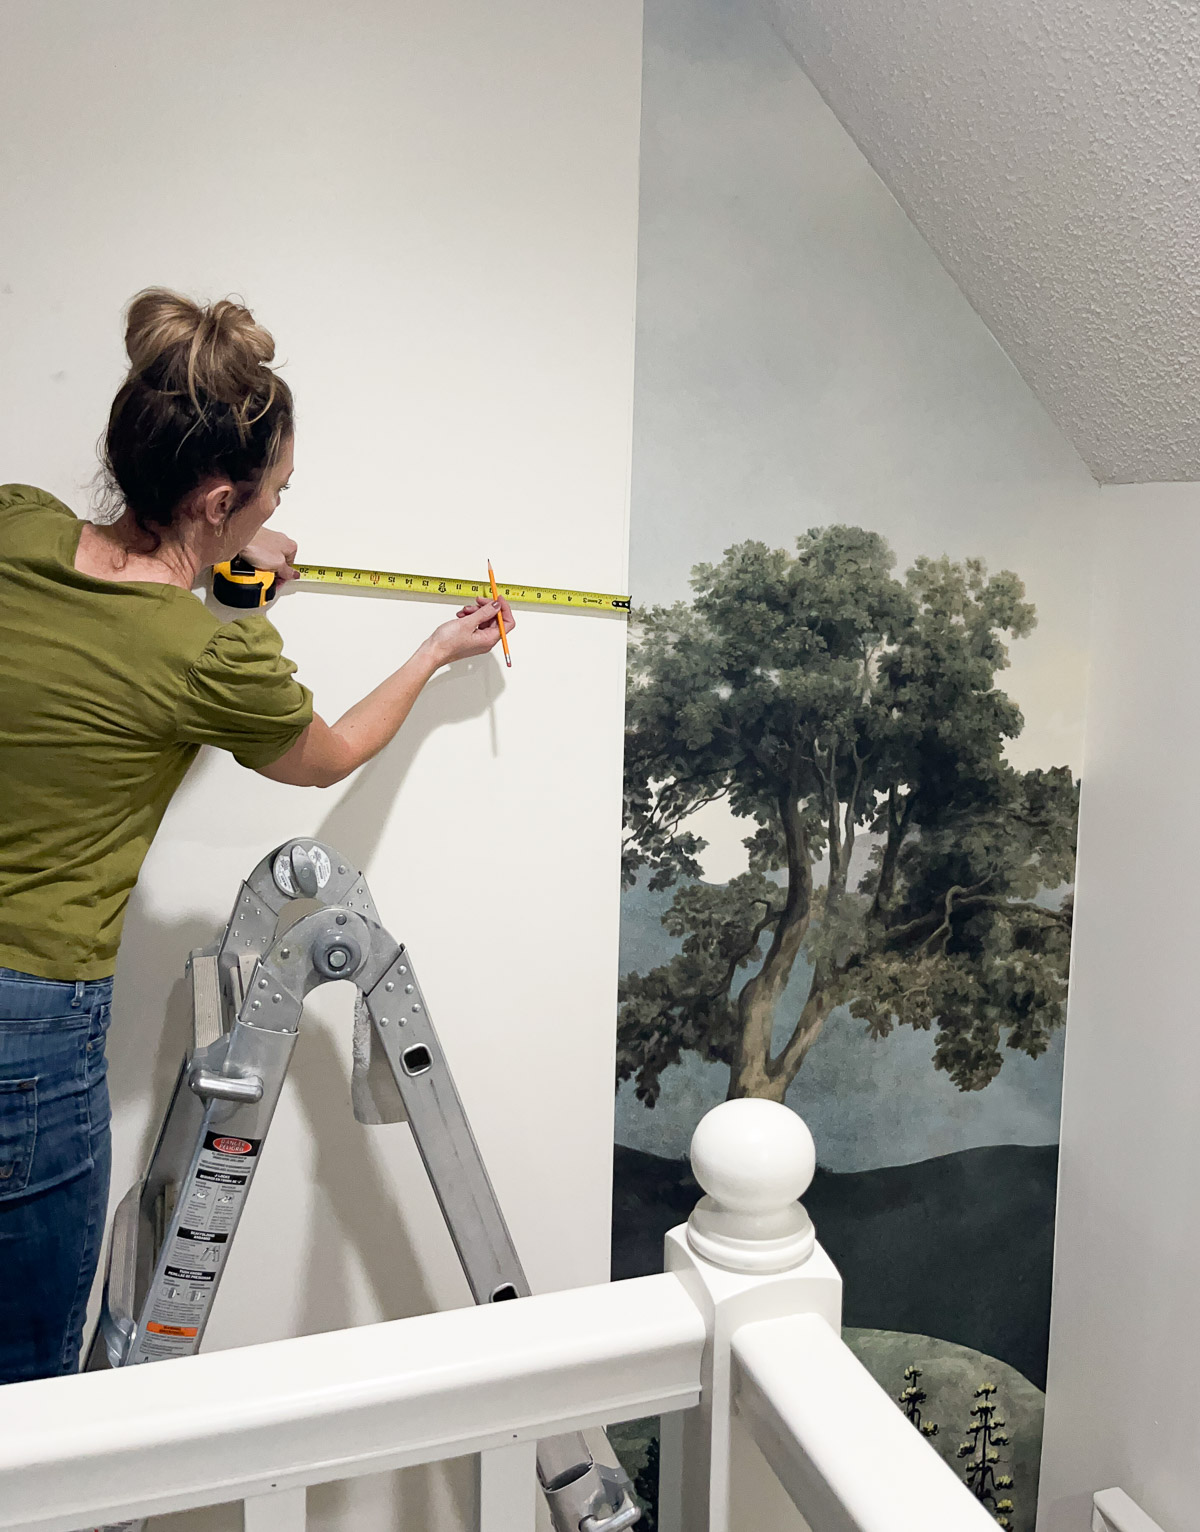
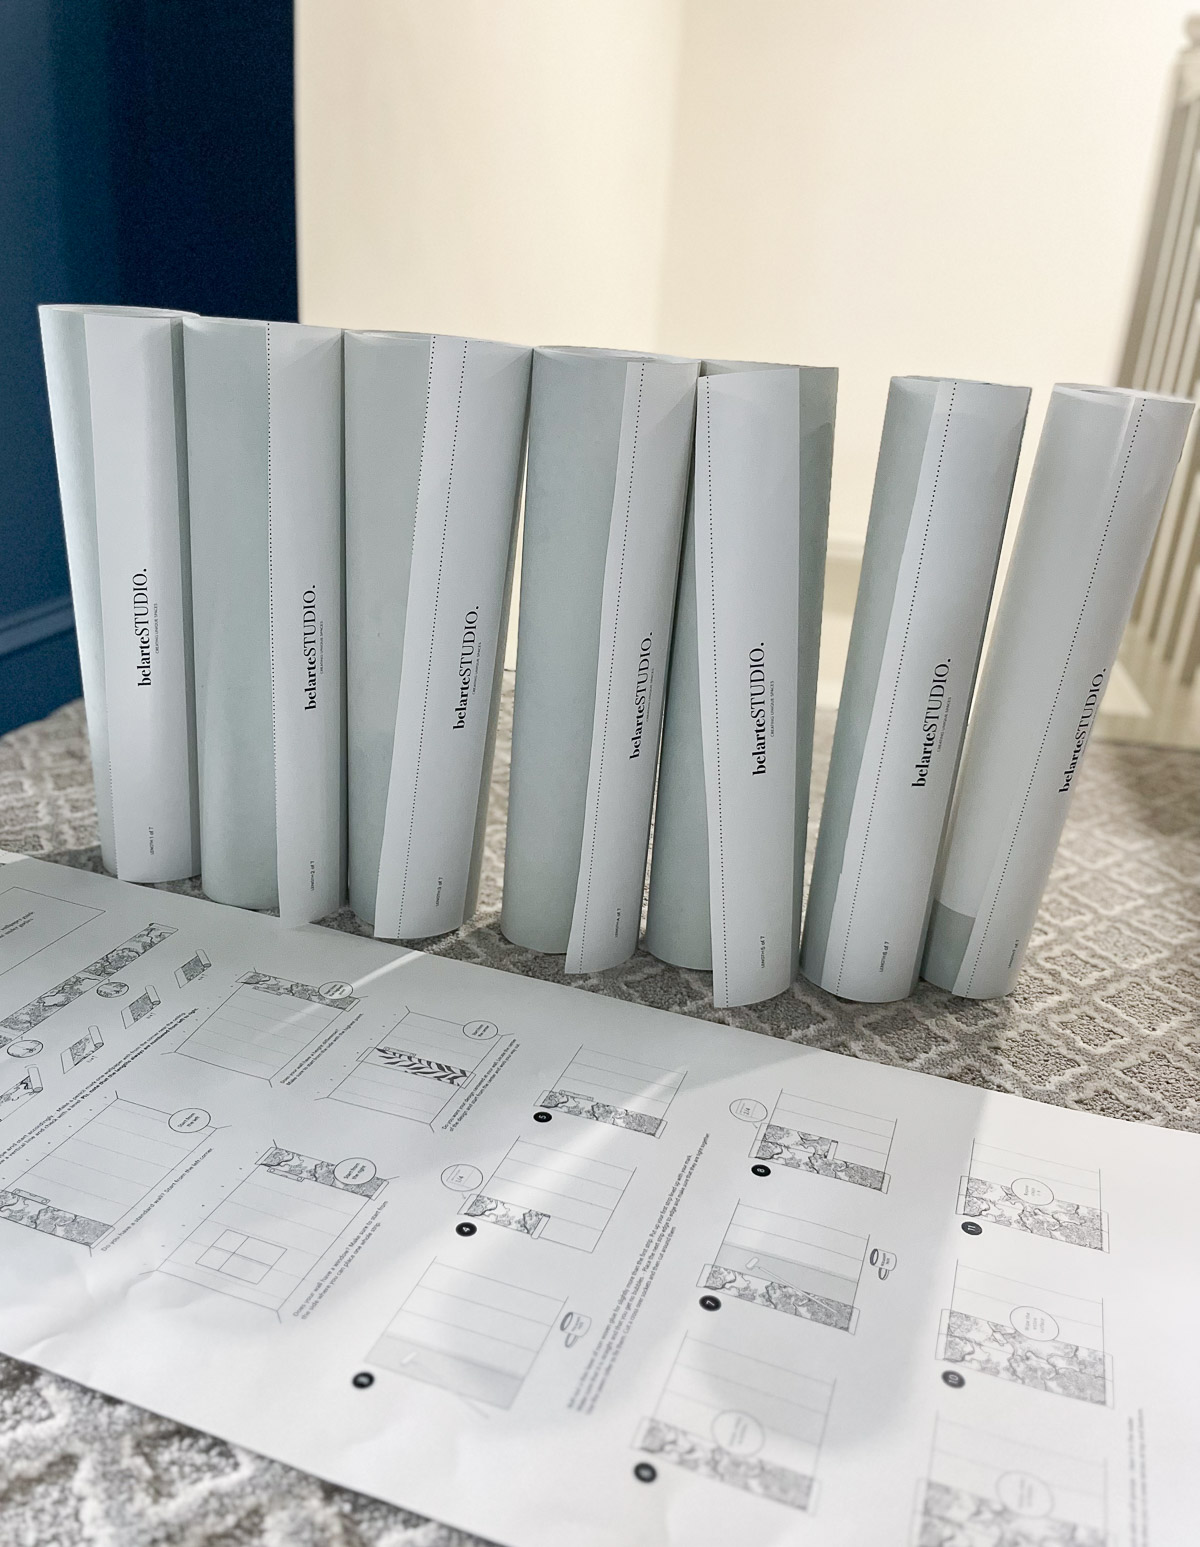
First, I cut the panels to size. I also consider pattern repeat and extra just to be safe.

Beginning on one end of the dining room, I worked across the room. I used the trim to help guide me. That first panel is the hardest, and your neck and arms will ache after.

Installation was far easier than I expected, but I have had years of experience hanging wallpaper.

Patience is key when installing wallpaper on the ceiling. I took my time with installation and installed the wallpaper over several days.

Luckily my seams lined up so they went right through the chandelier medallion – I was able to simply cut half circles out of each panel to go around it.

The wallpaper livens up the space which allows me to have a neutral room that isn’t boring.

Now the pattern looks like it has always been here – it is right at home.

Well, what do you think? Are you a fan of wallpaper on ceilings?

Are you new to my blog? Go HERE to see my home tour and HERE to shop for items I use in our home.

Find me on Facebook | Instagram | Twitter Pinterest

DIY

How to Hang a Mural

How to Hang a Mural

I recently installed the most beautiful landscape mural from Belarte Studio and wanted to share How to Hang a Mural.

Belarte Studio brings life to unique art expressions through designed wall murals. They are based in Sweden and production is made on-demand (which means zero waste).

Belarte is the Italian word for beautiful art – which is exactly what this vintage landscape mural is.

This post is a sponsored post by Belarte Studio I take pride in reviewing only products that fit my brand and will be beneficial to my readers. And while this post is sponsored, all the opinions are my own.

How to Hang a Mural

Installation isn’t hard, but it does take some time and patience. Belarte Studio includes fantastic instructions for hanging with your mural.

Supplies

Before you begin, make sure you have the right tools for installation:

  • Belarte Studio Wallpaper (and included instructions)
  • Seam Roller
  • Smoothing Brush or Tool
  • Level
  • Sponge & Water
  • Razor Blade or Knife
  • Straight Edge
  • Pencil
  • Scissors
  • Brush/Roller for Paste
  • Wallpaper Paste

*For easier removal, I would recommend sizing the wall and using a wallpaper paste that is easily strippable.

  • Make sure the walls are clean and smooth. If you’ve done some repair work to the walls, be sure to have painted the patches.
  • Cut the mural into individual strips and place them in order.
  • Depending on the wall, you will need to decide where to start. Since my focal point was the top of the stairs (the left side), I began with my last panel.
  • Using a ruler, mark off the first panel so you know where to *add the wallpaper paste (and it helps you hang the first strip straight.
  • You will begin at the top of the strip and work down, removing any air bubbles along the way.
  • Since my pattern was in the middle of my strips, from the second panel on, I matched the middle. It was tricky but luckily the wallpaper paste gives (but you do have to work fast since dry time is quick).
  • Reat the process until the wall is complete and make sure to push out excess glue at the seams and use a seam roller to try and hide the seams.

*I use as little wallpaper paste as possible. I first applied with a paste brush and evenly smoothed the paste out with a roller.

And after an afternoon of installation, we now have a beautiful piece of art at the top of our stairway.

Need more wallpaper inspiration? Check out these posts:

Are you new to my blog? Go HERE to see my home tour and HERE to shop for items I use in our home.

Find me on Facebook | Instagram | Twitter Pinterest 

Shop the Post
DIY

How to Hang Removable Wallpaper

I have installed removable wallpaper many times in our home, and today I’m going to share how to hang removable wallpaper.

Entryway wallpaper

Removable (also known as peel-and-stick) wallpaper is a fantastic solution for renters, those with commitment issues, or for people like me who live with someone who thinks wallpaper is a nightmare.

Steve spent one summer while in law school removing wallpaper from an apartment complex. Luckily removable wallpaper is THE EASIEST thing to remove, so even he’s on board with peel-and-stick wallpaper.

I recently removed removable wallpaper from our kitchen nook, and it was all down in under 10 minutes with NO damage to the walls. Now, hanging it is a different story, but with some time and patience, you too can have beautifully papered walls (without the commitment)!

Hygge & West gifted me with this gorgeous wallpaper. All opinions are 100% mine.

I added Hygge & West’s Piedmont in Mist to our entryway. Entryways (or foyers), hallways, and bathrooms are my favorite spots to add wallpaper.

Here’s a before of our entryway:

And the beautiful after:

How to Hang Removable Wallpaper

Supplies:

  • Tape Measure
  • Level
  • Razor Knife
  • Scissors
  • Pencil
  • Smoother (I would recommend a plastic smoother)
  • Removeable/Peel-and-Stick Wallpaper

Hanging the Wallpaper

Recruit a Friend

You may want to recruit a friend to help because removable wallpaper can be tricky. It doesn’t give like traditional, pasted wallpaper. Think of it as a giant sticker – it doesn’t shift. You will find that you will have to apply and remove it over and over until you get it in the correct spot.

Strategize Where to Begin

You want to be strategic about where you begin installing the wallpaper. I began on the wall at the front door and then worked on the opposite wall. I left the sidewalls for last so I could hide where the wallpaper didn’t match above the doorway.

Pre-Cut the Wallpaper

You will have to do this one at a time – don’t try to pre-cut the wallpaper at once. I allow several inches at the top and bottom and check measurements twice.

Begin at the Top

Start from the and move down and take your time. It is important to get that first-panel level because otherwise, you’ll see a slow slope as you move around the room.

I like to work in 2 – 3 foot sections. I remove the first 2-3 feet of backing, and once I’m confident where it is and have it smooth, I move on to the next section.

Use the smoothing tool to remove bubbles. You can push bubbles down or out to the sides.

Trim Excess Paper

Trim excess paper at the ceiling and baseboard with a straight edge (I used my smoother)and sharp X-ACTO (I switched out my blade fairly often).

Repeat

Repeat the process. Pay attention to the repeat and line up as closely as possible – you shouldn’t need to overlap.

Tips & Tricks

  • Don’t get discouraged. Like with everything, practice will make you better. Allow yourself plenty of time so you don’t feel rushed.

  • Cut the paper in the corners. I know this is added work and more room for mistakes, but I found the paper bubbles in the corners if you don’t cut the paper.

  • If you’re hanging paper on an edge without trim, fold the paper around the wall so you can have and easy line to cut using scissors. Be sure to not allow even a small amount to hang over or you will risk the wallpaper getting snagged/pulled.
  • Get creative when you are hanging the last pieces and the pattern doesn’t meet. I ended up with a rabbit/quail hybrid, but luckily I had planned ahead and it’s hidden in a spot most people won’t see. I cut out some leaves and berries to hide the seam.
  • Small projects always lead to bigger projects. After I hung the paper, I didn’t love the color of the trim or ceiling, so I ended up repainting both!

Do you have any additional tips for how to hang removable wallpaper? Share them in the comment section!

See the reel I share over on Instagram HERE.

Love wallpaper? Check out some of my favorites HERE.

Go create something!

Are you new to my blog? Go HERE to see my home tour and HERE to shop for items I use in our home.

Shop the Post
Home

Online Source for Wallpaper & Wall Murals

PhotoWall is a great online source for wallpaper & wall murals. They are custom made to fit your space, and their selection is huge!

This is a sponsored post written by me on behalf of PhotoWall. All opinions are 100% mine.

I recently installed a mural from PhotoWall. It is their Watercolour Grey, and they offer it in several different color options.

PhotoWall is offering my readers a discount! Save 25% on your order using code sincerelysarad2020.

Online Source for Wallpaper & Wall Murals

Photowall offers quick shipping, so this is a perfect project while so many of us are stuck at home.

The wallpaper and wall murals come with their own wallpaper paste. You simply have to mix the powder with water, wait a few minutes, and your paste is ready!

Photowall offers a wallpaper kit for some additional cost. I highly recommend it and think it’s a great value for the tools you received (and can be used over and over again)!

The mural comes in strips which are numbered and make it easy to know where each panel goes. They are printed to begin on the left side of the wall and work your way over to the right side.

I found installation to be fairly easy, but I have installed wallpaper several times. I will say, actual wallpaper is much easier to install that removable wallpaper. There’s much more give such you can move the paper around whereas removable wallpaper has an adhesive that sticks with no give.

I have a full wallpaper tutorial HERE if you need help hanging paper (but keep in mind this tutorial is for prepasted paper). For PhotoWall wallpaper and murals, you simply add the paste to the wall.

I never had a seam roller until I received the wallpaper kit, and it makes a huge difference!

Here is a before of the space:

And the after:

We’re prepping for new flooring, so the brown carpet will be replaced with something that has more of a gray undertone. I also painted the cherry banister to brighten the stairway since there is no natural lighting.

I also added PhotoWall’s wallpaper to our half bath, and I love it! It is called Oh the Tulips, and it adds fun, moody elegance to the space. This room is also a work-in-progress as we’re replacing the white tile with luxury vinyl, and I’m considering painting the wall treatment – any thoughts on colors?

Online Source for Wallpaper & Wall Murals

Besides being a fantastic source for online source for wallpaper & wall murals, Photowall also has product . They offer canvas prints, framed prints, and posters. You can even upload your own photo and create any thing from a wall mural to a framed print.

Go create something!

Are you new to my blog? Go HERE to see my home tour and HERE to shop for items I use in our home.

Find me on Facebook | Instagram | Twitter Pinterest

Decor

Wallpaper Inspiration

I am a fan of wallpaper, and I rounded up all the spaces in our home where I have used it in hopes of providing you with wallpaper inspiration.

I remodeled my daughter’s bathroom (you can see more on that DIY project HERE), and I added this wallpaper to the space. It is fairly expensive, and luckily I got away with one roll (during a sale). I love the fun color it brings to the space.

Wallpaper Inspiration

Our home office is one of our more recent remodels, and I managed to talk my husband into this unique wallpaper. I love the whimsy it brings to the space and the navy and blues help ground it.

I added wallpaper to our back entry. It added some pattern to an otherwise plain space. It draws your eye to the back of the space. Unfortunately this particular wallpaper is no longer available.

Wallpaper to my kids’ rooms is where you can have a little extra fun, and this floral paper brightens my daughter’s room. It feels like springtime year-round.

Whereas I could be more dramatic in my daughter’s room, I had to be a little less so in my boys’ room. This gray and white buffalo check is the perfect amount of subtle and fun.

I added wallpaper to our boring dark hallway. GO HERE to see the full transformation!

My most recent wallpaper obsession are wall murals. I added a landscape mural to our home library, and it is my absolute favorite.

I added another landscape mural to our guest room, and it adds so much sophistication to the space.

Are you need to wallpaper? I have a wallpaper tutorial that could be helpful, and you can see more on that HERE.

Are you new to my blog? Go HERE to see my home tour and HERE to shop for items I use in our home.

Find me on Facebook | Instagram | Twitter Pinterest

Decor

The Best Wall Murals

I have been obsessing over murals lately and scheming for the perfect space to add one. When I saw this landscape mural from Anewall, it was love at first site. Anewall has the best wall murals for your home!

The Best Wall Murals

The murals are installed like wallpaper (they come in rolls) and can be ordered pre-pasted (my strong preference), traditional (you add the paste yourself) and self-adhesive vinyl.

I have added a lot of wallpaper to our home lately, and I prefer the pre-pasted option. All you have to do is add water to activate the adhesive, and it is typically easier to remove than traditional paper. I have a steamer with a wallpaper attachment I use when I remove wallpaper. I share a wallpaper tutorial HERE, and it includes a video as well.

I installed the mural in an afternoon. My room is a little longer than the traditional size Anewall sells, so mine was custom made. Shipping was fast and installation was very easy.

If you have been following along on my decor adventures, you know that I have struggled with this space (which went from a home office to a home library). I always envisioned an timeless and elegant space, but it was a journey to get here. I added marble tile and the bookshelves. I also played around with various wall treatments, but thanks to Anewall, I finally achieved the look I wanted for the space. I absolutely love it!

Anewall offers so many different wall murals – perfect for any space or style. I used their Shaded Landscape Mural, and you can find it HERE.

Thank you Anewall for the partnership – I’m a huge fan and already looking for more spaces to add your gorgeous wall murals!

This is a sponsored post written by me on behalf of Anewall. All opinions are 100% mine.

Are you new to my blog? Go HERE to see my home tour and HERE to shop for items I use in our home.

Find me on Facebook | Instagram | Twitter Pinterest

DIY

Wallpaper Tutorial

See how I hung wallpaper for the first time with this wallpaper tutorial.

Toy Room Wallpaper

Art Cart and wallpaper

I have always loved wallpaper, but I have major commitment issues.  So, I’ve always found other ways to get the look without actually using wallpaper. Like using starched fabric as wallpaper:

Rolling Starch on Wall

However, I bought what I thought was temporary wallpaper (peel, stick, and easily removable) for my kid’s playroom.  However, I bought the wrong stuff.  It was actual wallpaper.  The kind you have to add the paste to.  I LOVED this wallpaper (“Funky Frames” from Graham & Brown).  So I decided to go for it…

Wallpaper with Frames

In preparation, I watched a wallpaper tutorial on YouTube that you can see by clicking HERE.  It looked so easy. I started rounding up my wallpaper supplies:

  • Wallpaper
  • Wallpaper paste (if you don’t have pre-pasted wallpaper)
  • Scissors
  • Razor (I ended up not using it – the scissors worked best.)
  • Level (I used this for the first strip to make sure it was hung level.)
  • Roller
  • Paintbrush (I ended up preferring the roller.)
  • Tape measure
  • Tag / Bucket with water
  • Table (That you don’t mind getting paste all over.)

Wallpaper Supplies

Measure the wall.  (Before buying your wallpaper, there are all kinds of wallpaper calculators you can find online.)

Measuring before wallpaper

When you’re actually ready to begin, measure the height of the wall.  I measure twice and added about 2-3 inches.  I didn’t want to take any risks. Then, measure your wallpaper.  Measure twice and cut once!

Measure Twice, Cut Once

Once I had my first-panel cut, I layer it out on a table.  I used a plastic portable table because you will get past everywhere.

Wallpaper Paste

I also found that I preferred the foam roller over the brush when adding the paste.

Using Wallpaper Paste*

My paste dried pretty quickly, so I had to work fast.  I added the first panel to the center of my wall.  I left about an inch and the top and had leftover at the bottom.  I used a level along the side of the panel to make sure I was hanging the wallpaper straight.  (Don’t trust your ceiling line.) The first panel was pretty tough for me.  I was almost ready to throw in the towel.  However, I kept at it.  The following panels were so much easier to hang.

Adding Wallpaper

Start at the top of your panel and move down.  I used a wet rag to rub down my panel.  You will have to work out a lot of air bubbles. How to wallpaper

To cut the excess, I just rang my scissors along the ceiling line or trim line.  Then, I pulled back the wallpaper a little and cut off the extra.

Wallpaper Trimming

Playroom Wall Before

Finished Wallpaper


Art Cart with Frame Wallpaper


 Graham & Brown Frame Wallpaper

Please let me know if you have any wallpaper secrets or tips you’d like to share.  I’d love to hear them!  

Go create something!

Are you new to my blog? Go HERE to see my home tour and HERE to shop for items I use in our home.

Find me on Facebook | Instagram | Twitter Pinterest