I have always loved the manicured look of old estate gardens, so I am excited to be partnering with Balsam Hill on their outdoor topiaries. Their topiaries easily provide me with the look I want, and they are versatile, long-lasting, and maintenance-free!
Versatile
These topiaries look amazing day or night. They have battery-operated lights which allow you to light them up at night.
The timer comes on at the same time each evening and runs for six hours. Our backyard is instantly transformed into a magical place in the evenings with the little LED lights.
Long Lasting
The outdoor topiaries come in several options – a single ball, double ball, finial, and spiral topiaries, this collection is crafted with Balsam Hill’s highly realistic True Foliage™ boxwood tips, which are UV-protected to resist fading from sunlight.
I have a few of Balsam Hill’s topiaries from several years ago, and they still look amazing (and all the lights work)!
Maintenance-Free
These topiaries are maintenance-free. I love that I don’t have to worry about watering them. They look perfect and green year-round!
The topiaries come potted in small pots, but I put mine in larger pots. I filled the pots with mulch, so the topiaries look realistic. The pots are light, and I can easily move them around my home.
In the summer, the topiaries look beautiful lining the pool. But since they are easy to move around, they also work well outside our back doors.
The contest ends this Friday, and I have a long way to go to help win money for Second Harvest. Yesterday morning, I received a call from our local tv station, WTHR. They requested an interview, and you can watch the mini version here:
I appreciate your support, and you have until Friday to vote.
UPDATE: I did not win this competition, but I appreciate your support SO much! It was an honor to participate, and I hope I helped I spread the word on what a great organization Second Harvest Food Bank of East Central Indiana is!
This is a sponsored post written by me on behalf of FrogTape. All opinions are 100% mine.
Go create something!
Are you new to my blog? Go HERE to see my home tour and HERE to shop for items I use in our home.
The past few years, I have been obsessing over navy, but I recently began loving the moody greens. I recently discovered the perfect moody green paint color – Pine Grove by Clark + Kensington.
Clark + Kensington paint can be found at your local Ace Hardware Store (there are over 5,000 stores around the world). I love the small-store feel and personal shopping experience.
Ace have everything you need to tackle that DIY paint project.
The color choices are endless, and I like to go online to The Paint Studio before I step into the store. Here you can discover a color visualizer where you can upload a photo of your project (or room) and see how different colors will look!
I love to go in the store because the sales associates are incredibly knowledgeable and helpful.
I narrowed my paint choices online to four greens.
From left to right:
Pine Grove
Stuffed Olive
Garland Green
Olive Tree
After some debate, I decided to go with the green with more blue undertones (this will compliment all the navy in my home): Pine Grove. I bought a quart of the Clark + Kensington Paint + Primer in One. I went with a semi-gloss, and the finish is super smooth, and I love that the paint is stain resistant and washable. It is also exclusive to Ace Hardware.
Now that I had my paint, it was time to tackle my furniture project. I have been debating adding color to my dining room, and I decided my buffet was the perfect spot to add a little color without committing to painting walls (however, I love the color so much I wonder if I shouldn’t have painted the walls instead)?!
I painted this buffet over five years ago when I was into a more rustic look. My style has evolved over the years, and it no longer fit with my design aesthetic.
We carried the buffet out to the garage and covered the floor with a large drop cloth.
I lightly sand the piece and followed with a primer.
I used a sprayer for both the primer and the paint.
I used a brush to reach any spots the sprayer wouldn’t.
And the result was a buffet that better fits my decor style while adding a fun splash of color to the room!
I am guessing Pine Grove by Clark + Kensington will be making its way into our spaces in our home…
What do you think? Is this the perfect green moody paint color?
Want more paint color advice? GO HERE to see my favorite paint colors for your home!
This is a sponsored post written by me on behalf of Ace Hardware. All opinions are 100% mine.
Go create something!
Are you new to my blog? Go HERE to see my home tour and HERE to shop for items I use in our home.
I am so excited to be sharing my library makeover reveal with FrogTape! When FrogTape contacted me about participating in the Paintover Challenge, I was thrilled and honored. I have closely watched this challenge every year and am a huge fan of FrogTape.
However, what really motivated me was that FrogTape will gift the winner’s charity with $10,000. I know I was created to create, but sometimes sharing pretty photos of my home feels trivial. However, when I am able to use my gifts and passion for a greater cause is when it all comes full circle. If I win, my charity Second Harvest Food Bank will be able to feed 40 families for AN ENTIRE YEAR! You have the chance to help feed the needy – CLICK HERE to vote for my library!
For this space, I was given the Luxe Modern design Trend. The overall style is “modern glam and minimalist with a bold statement”. I was encouraged to mix metals and create striking and unique juxtaposition while making a bold statement.
I painted the walls an off-white and painted a gold metallic diamond pattern complete with medallions. I painted the bookshelves a moody black and added my kids silhouettes to complete the look.
Here’s a breakdown of the project supply costs:
Project Supplies totaled $207.26
Wood medallions $34.79
Gold paint $28.21
Off-white wall paint $49
Paint brushes from hardware store $19.97
Dropcloths from hardware store $20.56
Ribbon for hanging silhouettes from craft store $3.99
Bookshelf paint $50.74
My vision for the space was centered around painting the Modern Lux wall pattern and painting the bookshelves a deep black.
FrogTape’s PaintBlock technology is amazing! It keeps paint out and keeps line sharp.
Using a quality tape like FrogTape was necessary for my black bookshelves – the last thing I wanted was paint on my white ceilings and/or marble tile!
For decor, I spent most of my budget on the curtains. The elegant space was screaming for velvet curtains, and I felt they added softness to the modern wall pattern.
I also added a few busts (every library needs a bust or two), plants, curtain rods and a rug.
Here’s a breakdown of my decor costs:
Decor supplies totaled $737.07
Curtain rods $132.11
Velvet curtains $272.69
Rug $159.86
Bust planters $65.26
Plants $69.44
Mozart bust $37.71
And I am happy to report that I came in under budget with my total:
GRAND TOTAL $944.33
From now until June 14th, I would love your help! CLICK HERE to vote for my library makeover. If I win, FrogTape will donate $10,000 to one of my favorite charities, Second Harvest Food Bank. $10,000 will provide meals to 40,000 people – how amazing is that?!
Second Harvest Food Bank distributed 7.2 million pounds of food to 8 counties in central Indiana last year. Their goal is to put themselves out of business by ending hunger. You can see more about Second Harvest Food Bank by going HERE.
Want to see the tutorial for the wall treatment? GO HERE!
UPDATE: Unfortunately I didn’t win the competition, but it was an honor to participate. I was interviewed by our local tv station, and you can watch that interview HERE.
This is a sponsored post written by me on behalf of FrogTape. All opinions are 100% mine.
Go create something!
Are you new to my blog? Go HERE to see my home tour and HERE to shop for items I use in our home.
We moved into our home over five years ago, and we have worked hard to update the interior of our home. Unfortunately the exterior was neglected – until now! I partnered with The Home Depot to share how to add curb appeal to your home.
Our landscaping was over 20 years old – like our home. We lived with it for awhile, and I even painted some of the bushes (I’m serious). Eventually the bushes were beyond the paint repair, and we slowly started removing them. We were left with a very boring front yard…
But thanks to The Home Depot, here is what it looks like now!
Here is another before…
…and after!
I have one more before and after. We have a large tree that sits by the road that looks neglected and is not the best first impression.
And the gorgeous after!
Our home was crying out for curb appeal, and we updated our exterior using the following three guidelines:
Go Green
Embrace Symmetry
Add Details
Go Green
Add fresh plants or flowers to your yard. Our front was looking sad because we were slowly removing old landscaping only to be left with bare, ugly mulch beds
I began by removing any of the remaining 20-year-old landscaping. When removing old landscaping, I clip down as much as I can to make digging the roots as easy as possible.
However, there are times you will have to use something more powerful than hand clippers.
Since we live in Indiana, it becomes very brown during the winter months. I am determined to have color year-round, so I planted greenery that will last year-round.
Along our walk, I added new mulch beds and lined them with boxwoods which will stay green all year long. The Home Depot offers both a variety of species and sizes.
As the boxwoods grow, I will have the ability to shape them.
Around our house, I added several Arborvitae. It is a fast-growing and an easy-to-care evergreen that typically come in the rounded bush or the trees. I love both variety, so I planted them around our home.
EMBRACE SYMMETRY
Symmetry is pleasing to the eye and instantly adds curb appeal. It looks organized and makes your home look put together.
I added symmetry to our wall with the boxwoods and balanced plants around our home. Our two entryways are also symmetrical with potted plants.
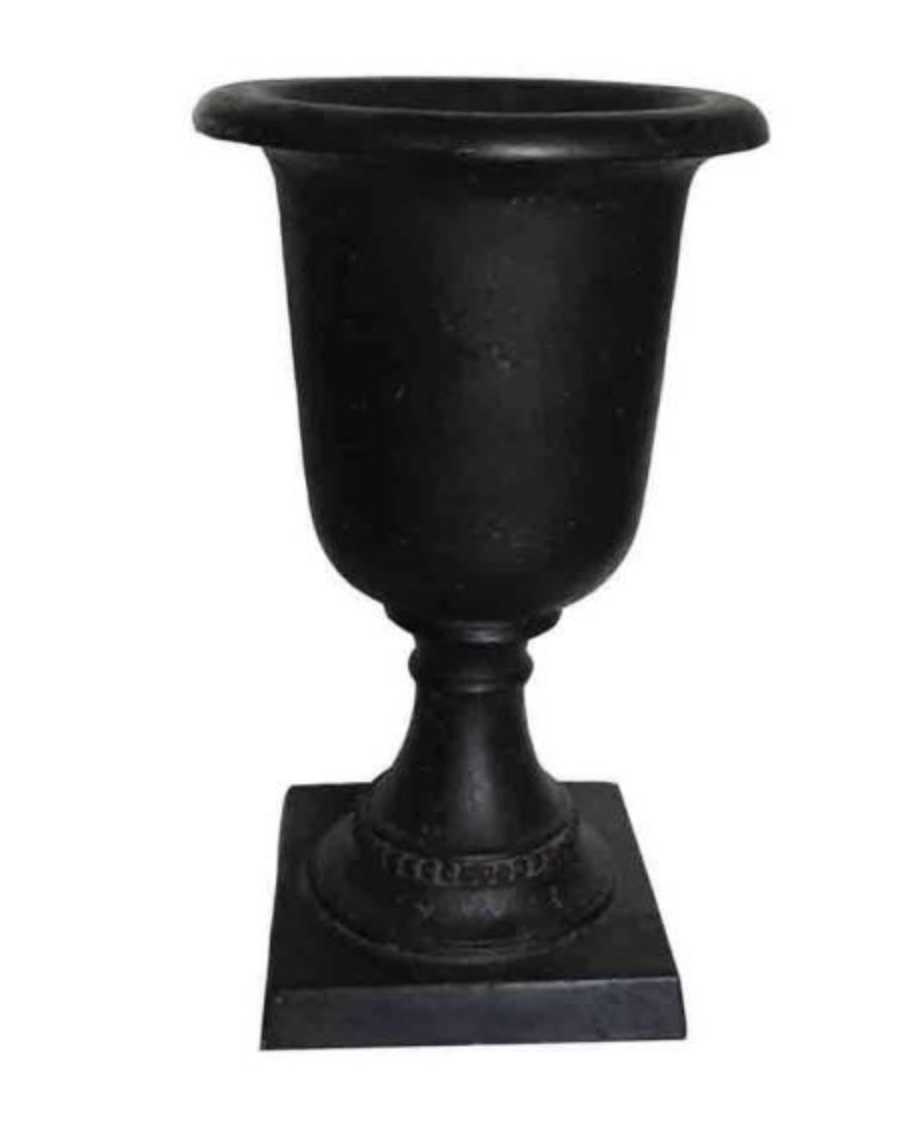
The front entry has a set of Fairfield Square Black Plastic Planter where I planted live Arborvitae. This urn sits outside, and the planter retains water so I rarely have to worry about watering the Arborvitae. The back of the front entry (under the overhang) has these Cast Stone Italian Urn in Aged Charcoal with National Tree Company 15 in. Juniper Bush . Once again, I’m sneaking in some faux greenery, but I don’t thing anyone will now. I “plant” the faux plant using mulch.
The side entry urns are from The Home Depot, and I “planted” a couple National Tree Company 48 in. Artificial Arborvitae Trees. I am not a huge fan of faux plants, but these trees are so realistic! I find that having plants under an overhang is rough and requires a lot of watering which is why I love this maintenance-free option that will last for years.
The tropical topiaries add a pop of color to our front landscaping. The hibiscus will provide blooms all summer long.
The tree by the road is the first thing guests see of our home, so we built a retaining wall using retaining wall bricks and filled it with boxwoods and flowers for a pretty entry to our home.
Here’s a video on the entire project:
I’ve linked up some of my favorite product from The Home Depot:
As I announced last week, I am participating in FrogTape’sPaintover Challenge. I was given a bucket of FrogTape and a $1000 budget to makeover a space. I’m sharing how to paint accent walls and bookshelves with FrogTape.
I am making over our home library which was previously ALL GRAY. I have always wanted a more exciting space, and I was inspired by the Luxe Modern design trend.
I began by painting the gray (and trim) walls an off-white. I used FrogTape to tape off the trim.
After the trim and walls were painted I began scheming about my wall treatment using FrogTape. I was inspired by a wall treatment I saw on a recent trip to Chicago (see more on that in this post), and I drew out a plan on grid paper.
Once I figured out a scale, I transferred the pattern with pencil onto the focal wall.
It was a little bit of a process. I first measured and drew out squares.
Once I had those in place, I created the diamonds.
I was then ready for the FrogTape. I taped a piece down the center (this piece will later be removed since it’s where I will paint).
Next, I added to strips of tape to either side and then removed the center piece.
I did this to all the lines going in the same direction and painted them.
Once dry, I removed the FrogTape.
FrogTape’s PaintBlock technology is amazing! It keeps paint out and keeps line sharp.
Once the first side was done, I repeated the entire process with the lines going the other way.
I did discover a little trick. I was using so much FrogTape, and I wanted to be sure I didn’t miss pressing any of the tape down. I ran a fine-grit sandblock over the tape to seal the tape.
The result was pretty impressive!
As in my inspiration wall treatment, I added medallions to the wall where the lines intersected.
I found these medallions on ebay for next to nothing and painted them gold.
I used my nail gun to adhere them to the wall.
I completed the wall treatment by adding organic dots along the geometric lines to soften the space.
Next up was the giant bookshelf!
I used Frog Tape to tape of the outside of the shelves as well as the ladder rung.
I used a rich matte black on the bookshelves, and it is gorgeous!
FrogTape left a perfect line and protected my marble floors and white ceiling.
FrogTape was also helpful in adding metallic paint to some accent pieces.
Updating door hardware is an easy way to add value to your home. I share a video at the end of the post if you are more of a visual learner, but I will explain (step-by-step) how to install a Schlage Custom Interior Door Knob.
First, remove the old door knob and any associated hardware before you begin. This should be fairly easy and require only a screwdriver. Once the old hardware is removed, you are ready to begin!
1. Install the Latch
Install the latch and backplate making sure the bevel faces the door frame (so the door can easily shut).
2. Add the Faceplate
Add the faceplate and secure with screws. Be sure to use a hand-held screwdriver for the entire install to avoid stripping the screws.
3. Install the Strike onto the Door Frame
Install the strike onto the door frame with screws.
4. Install the Exterior & Interior Chassis.
Identify the exterior (posts and slots) and the interior chassis (pegs). Install the exterior chassis first.
The chassis is spring-loaded so you will need to secure it with two screws.
5. Install the Trim
To install the trim, align the hole in trim with hole in chassis and press down until it clicks. It is so easy.
6. Install the Door Knobs
Push the exterior door knob firmly into place and then tighten set screw using the included allen wrench.
If you have a privacy pin, install it before installing the interior door knob.
And that is it! The first door knob takes a little time, but once you figure out the steps, it really becomes easy. I was installing door knobs in under five minutes after I figured out the first one.
For our doors, I used Schlage’s Custom Bowery Knobs with Century Trim, and they are beautiful! My goal is always timeless and elegant, and this hardware is exactly that.
Schlage offers a huge assortment of quality door hardware for every decor style. You will find everything from modern, contemporary door hardware and backplates to classic, vintage style door knob and lever backplates.
Here is the video I promised on how to install a door knob – it is so much easier than you think!
I absolutely love our new Schlage custom door hardware – it was made for our home!
I’ve also added Schlage hardware to my exterior doors. You can see more on that hardware HERE.
The post How to Install A Custom Interior Door Knob written by me on behalf of Schlage. All opinions are 100% mine.
Go create something!
Are you new to my blog? Go HERE to see my home tour and HERE to shop for items I use in our home.
While CORT Furniture specializes in furniture rental for home, office, and events, I was excited to learn CORT has a furniture outlet where you can find amazing deals on the previously rented pieces. There are great household items at a fraction of the price!
Besides mattresses and furniture, I found all kinds of other household items including lamps, artwork, and linens. CORT also had an entire section filled with quality office furniture.
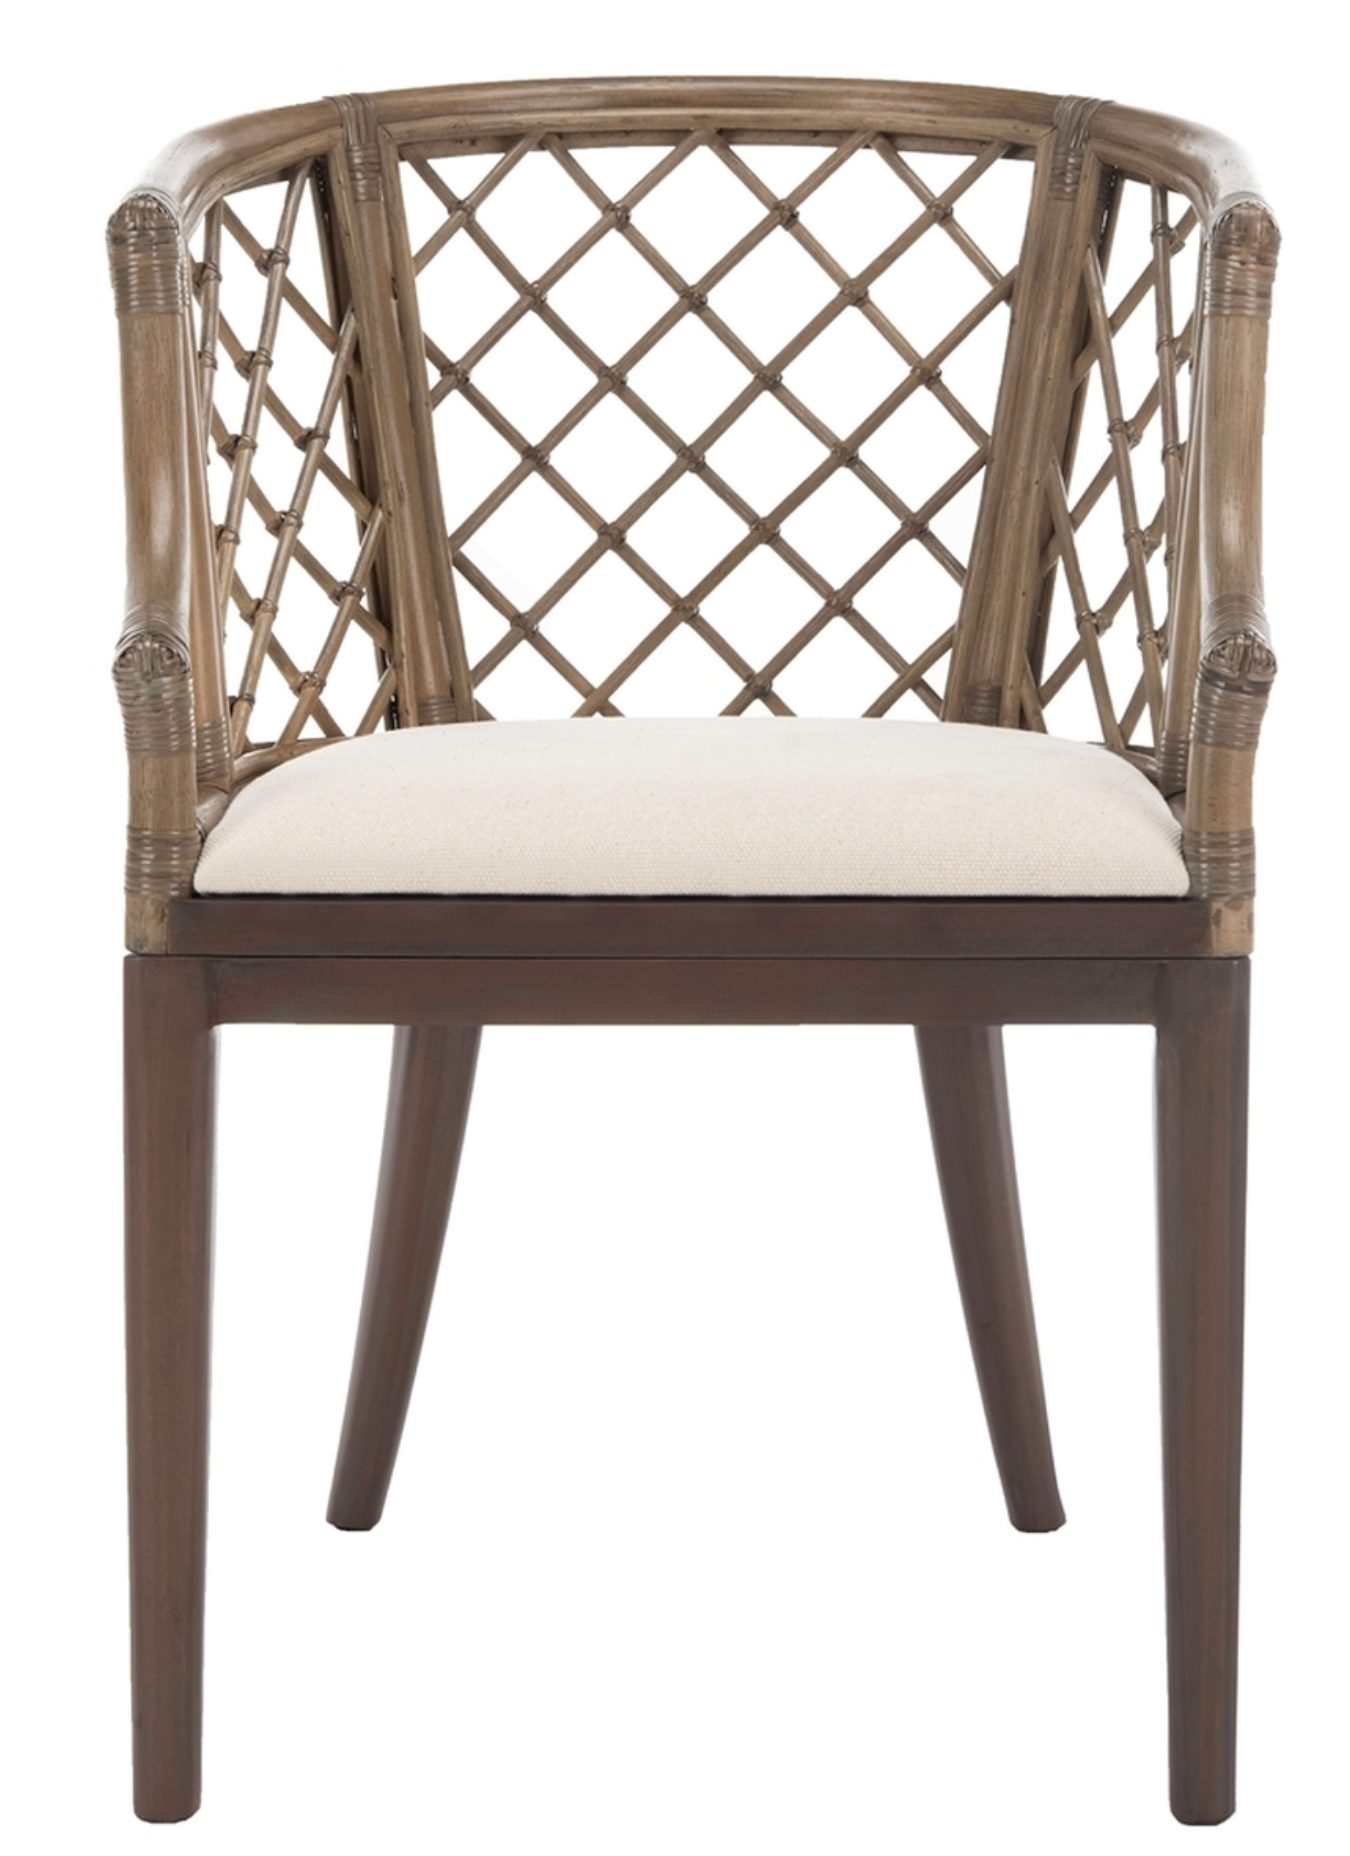
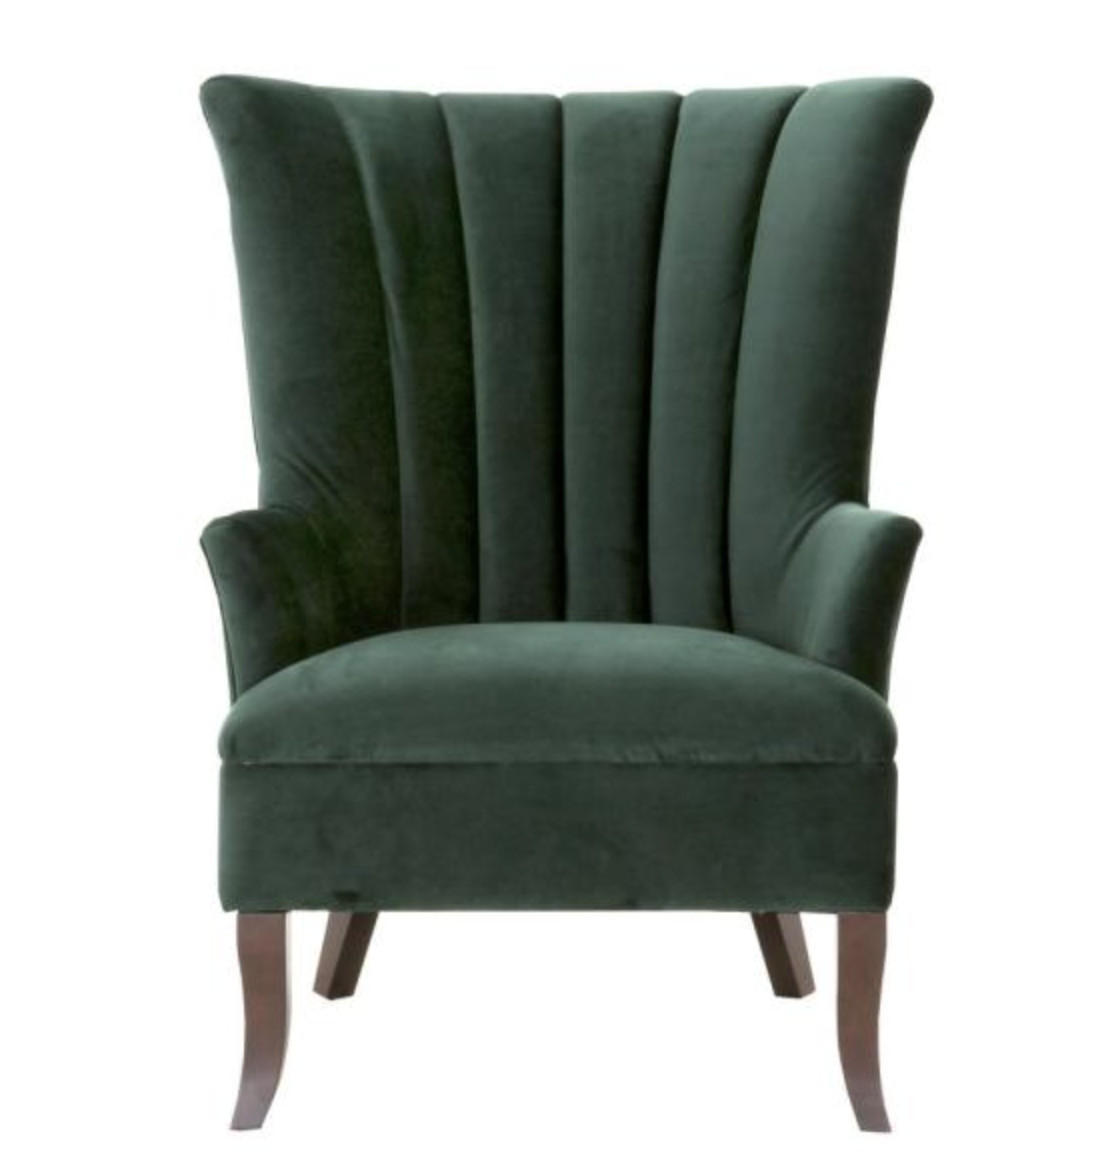
I was especially drawn to the more ornate, elegant pieces like the chair above and this gorgeous blue velvet bench. I was told these pieces were used as rentals for some of their more formal events. They were in fantastic shape and are back by the CORT certified promise.
After wandering the furniture outlet for some time, I ultimately decided I needed this little side table – so it came home with me.
I added a couple coats of navy spray paint (which is so easy), and it is the perfect addition for our home!
I love the character the piece brings to the space, and it is a fun little side table that adds interest.
Whether you need furniture for a transitional period or some permanent pieces from their furniture center (and great prices), check out your local CORT Blog
Want more home and apartment ideas? Visit the CORT blog.
Sometimes it is easier to get the full pictures via video, so here is a short little video of my adventure at my local (Indianapolis) CORT Furniture Outlet.
Go create something!
Are you new to my blog? Go HERE to see my home tour and HERE to shop for items I use in our home.
I am thrilled to announce that I am participating in this year’s FrogTape Paintover Challenge!
If you are not familiar with FrogTape, it is THE BEST painter’s tape on the market. You know I love paint, and I have been using FrogTape for years. It is my go-to painter’s tape for all of my projects.
There are five bloggers participating in this challenge, and we are all completing a one room makeover challenge using FrogTape and interior designer Taniya Nayak’s 2019 Design Trends.
I decided to makeover my home library. I recently replaced the carpet with tile, and I want the rest of the room to feel more stately.
Here is a before of the space:
The bookshelves are also going to get a makeover. I played it safe when I originally painted them this pale gray. I want them to be more of a focal point, so they are going to be repainted.
Each blogger was assigned to one of FrogTape’s five 2019 Design Trends, received a bucket of painting supplies and a $1,000 budget to redesign a room.
I received the design trend Luxe Modern. The matchy-matchy days of keeping one specific metal is long gone, and the hot trend for 2019 is to mix and match metals and mediums.
Luxe Modern
Colors: Bronze, Rose Gold, Matte Gold, Pewter, Iron
Patterns: Metal is incredible rigid and durable yet has the capablity to mold into any shape you desire. Geometric shapes for hardware and wall applications are what we are seeing pop up everywhere these days.
Overall Style: Modern glam and minimalist with a bold statement
When I envision Luxe Modern in my home, I plan to mix the old and new for a fun juxtaposition. I am using lots of golds with touches of silver and copper and luxurious velvet fabrics. I am mixing whites and blacks for a bold statement, and I am adding a metallic wall treatment.
I was inspired by a recent trip to the Blackwell Hotel in Chicago. I love the wall treatment in their restaurant and how the medallions rest where the lines meet.
Next week I will be sharing my progress of the space and in two weeks voting will begin! I would love your vote. If I win, FrogTape will gift one of my favorite charities (Second Harvest Food Bank) $10,000! $10,000 will provide 40,000 meals to people in need, and you can help feed them by voting for my library!
UPDATE: Want to see the final FrogTape Paintover Challenge reveal? GO HERE!
This is a sponsored post written by me on behalf of FrogTape. All opinions are 100% mine.
Go create something!
Are you new to my blog? Go HERE to see my home tour and HERE to shop for items I use in our home.
How to Paint Exterior Doors is a sponsored post written by me on behalf of Modern Masters. All opinions are 100% mine.
It is amazing how quickly painting exterior doors can transform your home. It is an inexpensive and easy way to add curb appeal, and I am going to share (step-by-step) how to paint exterior doors.
Several years ago, I used Modern Masters (never-fades) Front Door Paint on our front door (see more on that transformation HERE). I wanted a classic black for our home, so I painted the door in Modern Masters Elegant.
It has been several years, and the door paint still looks great. Our other exterior doors have been crying out for help (lots of yellowing has occurred over the years), so I decided to paint two more of our exterior doors using the Front Door paint.
The reason I love this paint is because it is water-based (clean up is a breeze), it LASTS, and it doesn’t require a primer (if you are painting over a water-based paint).
Here’s a quick video of how I painted two of our exterior doors:
Before you begin painting, you will want to make sure your door was painted with water-based (latex) paint. You can test this with a rag and rubbing alcohol. If paint doesn’t come off, then you know it was painted with an oil-based paint and will need to use a primer first. If paint does come off, you are good to go!
How to Paint Exterior Doors:
Prep the Door.
Clean off any debris/dirt from the door and use painter’s tape on any glass, hardware and hinges (I kept my door on the hinges for ease). Use a sand block to remove paint drips and/or rust, and put a drop-cloth under the door to avoid splatters or drips.
You also need to make sure it is going to be a rain-free, warmer day. I typically only paint when it is above 60 degrees.
Paint Hard-To-Reach Areas with a Brush.
Begin by painting the sides of the doors, areas around glass and hardware and any inset panels with a brush.
In regards to the door edge, the general rule is when a door is painted different colors on two sides each side gets a different color. The hinged edge gets the outside color when the door swings in. If the door swings out, it is the opposite.
Use a Roller for Painting the Door.
Using a roller will eliminate brush marks. I have found that rollers similar to those that you use to paint walls (only smaller) work best. The foam rollers tend to leave paint lines/marks.
Paint Several Coats and Allow for Dry Time.
Do not skimp on paint. You will want to use 2-3 coats of paint, but be sure to allow for proper dry time between coats.
Once Dry, Remove Painter’s Tape and Touch-Up Where Needed.
Carefully remove the painter’s tape once the doors is painted and dry. You may need to use a smaller brush to touch-up areas.
Now enjoy your beautiful, newly-painted door(s)!
Modern Masters Front Door Paint comes in a large selection of colors and the never-fades technology will keep your door looking as nice as the day it was painted!
Go create something!
Are you new to my blog? Go HERE to see my home tour and HERE to shop for items I use in our home.
The Best Patio Lights is a post written by me on behalf of Jasco Enbrighten Seasons Cafe Lights and Mini Landscape Lights. All opinions are 100% mine.
The weather is warming up here in Indiana, and I am excited for outdoor entertaining and pool-side parties. I discovered the BEST patio lights several years ago (see more on them here), but they are even better now because they can CHANGE COLOR!
Enbrighten’s Cafe Lights and Landscape Lights make everything brighter! I spiced up our back patio, and these lights work for year-round use and can light-up flower beds, gardens, walkways, decks, and eaves.
The lights come with a pairable remote so you can wirelessly control the lights. The options are endless:
Dimming
Countdown times
Preset themes
Effects
Change color (over 120 color combinations or any two-color combos as well as three adjustable white lights – warm, soft and daylight)!
You can transform you lights with a click of a button from the classy white lights to green…
to red…
to purple…
or blue!
The possibilities are endless! Suddenly your house is transformed with color. Color really does change everything!
The Seasons Cafe Lights are available in 24 or 48 feet lengths. They are linkable up to 750 feet and come in either a white or black cord.
Installation is a breeze. I used nails to hang my Seasons Cafe Lights.
Each puck comes with its own stake, and they are easy to install. Insert the stake into the ground and cover the cord with mulch or dirt.
The durability of this product is amazing (and I speak from experience after owning a set of the Enbrighten Cafe Lights for several years). The Edison-style bulbs won’t break if dropped, stepped on, or blown around in the wind.
Enbrighten has commercial grade construction and are UL Listed for permanent indoor and outdoor installation. They are designed to withstand year-round exposure to the elements so you only have to set them up once!
Thanks to Enbrighten, my space will be bright and colorful all year.
We are officially ready for warmer weather and the entertaining season thanks to The Home Depot! We gave our patio a makeover, and I am sharing patio decor ideas on The Home Depot’s Blog and you can check it out HERE!
Here’s a quick little video of how we transformed our boring space into a space we will use both for our family and for entertaining:
As you saw in the video, our bare patio needed some attention. Here is the before:
#DutchBoyPartner This bathroom leaned a little cool, so I warmed it up with Sandstone Tint by @dutchboypaints and it completely changed the look of the space.
No major reno. No new cabinets. Just paint.
Save this if you’ve been wanting to try a DIY project
#DutchBoyPartner This bathroom leaned a little cool, so I warmed it up with Sandstone Tint by @dutchboypaints and it completely changed the look of the space.
No major reno. No new cabinets. Just paint.
Save this if you’ve been wanting to try a DIY project...
56
32
I created this reel two years ago, but since the fields behind our house rotate between corn and beans… it’s a corn summer again. 🌽
The older I get, the more I appreciate these ordinary little rhythms of life. Watching the field change through the seasons has quietly become one of my favorite parts of home.
I created this reel two years ago, but since the fields behind our house rotate between corn and beans… it’s a corn summer again. 🌽
The older I get, the more I appreciate these ordinary little rhythms of life. Watching the field change through the seasons has quietly become one of my favorite parts of home....
52
8
I love this chair and side table from @zgallerie that I decided to try it in my office/library. I’m not sure where I love it more - here or my bedroom! It adds so much elegance and charm to the spaces. Use my code SY5 at checkout for 5% off your entire purchase. Shop My Favorites by commenting LINKS or through the link in my bio #ZGallerie #MyZgallerie #Zgallerie #ModernLuxury #LuxuryInterior
I love this chair and side table from @zgallerie that I decided to try it in my office/library. I’m not sure where I love it more - here or my bedroom! It adds so much elegance and charm to the spaces. Use my code SY5 at checkout for 5% off your entire purchase. Shop My Favorites by commenting LINKS or through the link in my bio #ZGallerie #MyZgallerie #Zgallerie #ModernLuxury #LuxuryInterior...
38
11
We waited 13 years for this - and our house looks happier with her glow-up!
We went from a drafty single door (with a 90s glass inlay I poorly covered up) to double doors that allows in more light and feel right for our home.
My patio is all ready for warmer weather thanks to the new launch with @livabliss + @galeyalix! I’m LOVING the checkerboard outdoor rug. Comment “PATIO” and I’ll send you the links! #Livabliss #LivablissHome #GaleyALixxLivabliss #HomeDecor #Rugs
My patio is all ready for warmer weather thanks to the new launch with @livabliss + @galeyalix! I’m LOVING the checkerboard outdoor rug. Comment “PATIO” and I’ll send you the links! #Livabliss #LivablissHome #GaleyALixxLivabliss #HomeDecor #Rugs...
43
16
I’ve been slowly refreshing our bedroom and recently added this beautiful swivel chair and side table from @zgallerie! They add the perfect elegant modern touch to the space. Use my code SY5 at checkout for 5% off your entire purchase. Shop My Favorites by commenting “LINKS” or through the link in my bio. #gifted #ZGallerie #MyZgallerie #Zgallerie #ModernLuxury
I’ve been slowly refreshing our bedroom and recently added this beautiful swivel chair and side table from @zgallerie! They add the perfect elegant modern touch to the space. Use my code SY5 at checkout for 5% off your entire purchase. Shop My Favorites by commenting “LINKS” or through the link in my bio. #gifted #ZGallerie #MyZgallerie #Zgallerie #ModernLuxury...
23
16
Bathroom Reveal. 💫 Last spring, our upstairs shower leaked into our living room below. We were put on our contractor’s list - and the wait was worth it! We now have a gorgeous bathroom with checkerboard floors - a dream of mine since I first saw my husband’s granny’s farmhouse bathroom with checkerboard floors (years and years ago)! The shower glass is coming soon. Comment LINKS, and I’ll send you the blog post and bathroom product links.
Bathroom Reveal. 💫 Last spring, our upstairs shower leaked into our living room below. We were put on our contractor’s list - and the wait was worth it! We now have a gorgeous bathroom with checkerboard floors - a dream of mine since I first saw my husband’s granny’s farmhouse bathroom with checkerboard floors (years and years ago)! The shower glass is coming soon. Comment LINKS, and I’ll send you the blog post and bathroom product links....
120
26
What started as a leak turned into my dream bathroom ✨ I partnered with @wayfair and found everything - from checkerboard tile to the vanities, mirrors, and faucets. Comment “LINK” and I’ll send you all my favorite finds! *Shower glass coming soon! #ad #wayfaircreator #homereno
What started as a leak turned into my dream bathroom ✨ I partnered with @wayfair and found everything - from checkerboard tile to the vanities, mirrors, and faucets. Comment “LINK” and I’ll send you all my favorite finds! *Shower glass coming soon! #ad #wayfaircreator #homereno...
74
34
@wayfair is helping us turn a disaster into something beautiful ✨A leak from our upstairs shower led to a full remodel, and I can’t wait to show you the AFTER! Bathroom remodel reveal coming soon. Comment “LINKS” and I’ll send all my Wayfair favorites! #ad #wayfaircreator #wayfair #homereno
@wayfair is helping us turn a disaster into something beautiful ✨A leak from our upstairs shower led to a full remodel, and I can’t wait to show you the AFTER! Bathroom remodel reveal coming soon. Comment “LINKS” and I’ll send all my Wayfair favorites! #ad #wayfaircreator #wayfair #homereno...
50
15
I used to paint everything. I literally taught chalk paint classes and wrote an ebook about it.
So I don’t blame whoever painted these, but every room needs a little natural wood.
I used to paint everything. I literally taught chalk paint classes and wrote an ebook about it.
So I don’t blame whoever painted these, but every room needs a little natural wood....
159
26
*TWO THINGS that make wallpaper removal easy* Wallpaper has come a long way and there’s no need to be scared of it anymore! Before I hang wallpaper, I size the walls and often use pre-pasted SureStrip wallpaper that is activated with water! Comment WALLPAPER for easy to remove wallpaper links!
*TWO THINGS that make wallpaper removal easy* Wallpaper has come a long way and there’s no need to be scared of it anymore! Before I hang wallpaper, I size the walls and often use pre-pasted SureStrip wallpaper that is activated with water! Comment WALLPAPER for easy to remove wallpaper links!...
#DutchBoyPartner This bathroom leaned a little cool, so I warmed it up with Sandstone Tint by @dutchboypaints and it completely changed the look of the space.
No major reno. No new cabinets. Just paint.
Save this if you’ve been wanting to try a DIY project
#DutchBoyPartner This bathroom leaned a little cool, so I warmed it up with Sandstone Tint by @dutchboypaints and it completely changed the look of the space.
No major reno. No new cabinets. Just paint.
Save this if you’ve been wanting to try a DIY project...
56
32
I created this reel two years ago, but since the fields behind our house rotate between corn and beans… it’s a corn summer again. 🌽
The older I get, the more I appreciate these ordinary little rhythms of life. Watching the field change through the seasons has quietly become one of my favorite parts of home.
I created this reel two years ago, but since the fields behind our house rotate between corn and beans… it’s a corn summer again. 🌽
The older I get, the more I appreciate these ordinary little rhythms of life. Watching the field change through the seasons has quietly become one of my favorite parts of home....
52
8
I love this chair and side table from @zgallerie that I decided to try it in my office/library. I’m not sure where I love it more - here or my bedroom! It adds so much elegance and charm to the spaces. Use my code SY5 at checkout for 5% off your entire purchase. Shop My Favorites by commenting LINKS or through the link in my bio #ZGallerie #MyZgallerie #Zgallerie #ModernLuxury #LuxuryInterior
I love this chair and side table from @zgallerie that I decided to try it in my office/library. I’m not sure where I love it more - here or my bedroom! It adds so much elegance and charm to the spaces. Use my code SY5 at checkout for 5% off your entire purchase. Shop My Favorites by commenting LINKS or through the link in my bio #ZGallerie #MyZgallerie #Zgallerie #ModernLuxury #LuxuryInterior...
38
11
We waited 13 years for this - and our house looks happier with her glow-up!
We went from a drafty single door (with a 90s glass inlay I poorly covered up) to double doors that allows in more light and feel right for our home.
My patio is all ready for warmer weather thanks to the new launch with @livabliss + @galeyalix! I’m LOVING the checkerboard outdoor rug. Comment “PATIO” and I’ll send you the links! #Livabliss #LivablissHome #GaleyALixxLivabliss #HomeDecor #Rugs
My patio is all ready for warmer weather thanks to the new launch with @livabliss + @galeyalix! I’m LOVING the checkerboard outdoor rug. Comment “PATIO” and I’ll send you the links! #Livabliss #LivablissHome #GaleyALixxLivabliss #HomeDecor #Rugs...
43
16
I’ve been slowly refreshing our bedroom and recently added this beautiful swivel chair and side table from @zgallerie! They add the perfect elegant modern touch to the space. Use my code SY5 at checkout for 5% off your entire purchase. Shop My Favorites by commenting “LINKS” or through the link in my bio. #gifted #ZGallerie #MyZgallerie #Zgallerie #ModernLuxury
I’ve been slowly refreshing our bedroom and recently added this beautiful swivel chair and side table from @zgallerie! They add the perfect elegant modern touch to the space. Use my code SY5 at checkout for 5% off your entire purchase. Shop My Favorites by commenting “LINKS” or through the link in my bio. #gifted #ZGallerie #MyZgallerie #Zgallerie #ModernLuxury...
23
16
Bathroom Reveal. 💫 Last spring, our upstairs shower leaked into our living room below. We were put on our contractor’s list - and the wait was worth it! We now have a gorgeous bathroom with checkerboard floors - a dream of mine since I first saw my husband’s granny’s farmhouse bathroom with checkerboard floors (years and years ago)! The shower glass is coming soon. Comment LINKS, and I’ll send you the blog post and bathroom product links.
Bathroom Reveal. 💫 Last spring, our upstairs shower leaked into our living room below. We were put on our contractor’s list - and the wait was worth it! We now have a gorgeous bathroom with checkerboard floors - a dream of mine since I first saw my husband’s granny’s farmhouse bathroom with checkerboard floors (years and years ago)! The shower glass is coming soon. Comment LINKS, and I’ll send you the blog post and bathroom product links....
120
26
What started as a leak turned into my dream bathroom ✨ I partnered with @wayfair and found everything - from checkerboard tile to the vanities, mirrors, and faucets. Comment “LINK” and I’ll send you all my favorite finds! *Shower glass coming soon! #ad #wayfaircreator #homereno
What started as a leak turned into my dream bathroom ✨ I partnered with @wayfair and found everything - from checkerboard tile to the vanities, mirrors, and faucets. Comment “LINK” and I’ll send you all my favorite finds! *Shower glass coming soon! #ad #wayfaircreator #homereno...
74
34
@wayfair is helping us turn a disaster into something beautiful ✨A leak from our upstairs shower led to a full remodel, and I can’t wait to show you the AFTER! Bathroom remodel reveal coming soon. Comment “LINKS” and I’ll send all my Wayfair favorites! #ad #wayfaircreator #wayfair #homereno
@wayfair is helping us turn a disaster into something beautiful ✨A leak from our upstairs shower led to a full remodel, and I can’t wait to show you the AFTER! Bathroom remodel reveal coming soon. Comment “LINKS” and I’ll send all my Wayfair favorites! #ad #wayfaircreator #wayfair #homereno...
50
15
I used to paint everything. I literally taught chalk paint classes and wrote an ebook about it.
So I don’t blame whoever painted these, but every room needs a little natural wood.
I used to paint everything. I literally taught chalk paint classes and wrote an ebook about it.
So I don’t blame whoever painted these, but every room needs a little natural wood....
159
26
*TWO THINGS that make wallpaper removal easy* Wallpaper has come a long way and there’s no need to be scared of it anymore! Before I hang wallpaper, I size the walls and often use pre-pasted SureStrip wallpaper that is activated with water! Comment WALLPAPER for easy to remove wallpaper links!
*TWO THINGS that make wallpaper removal easy* Wallpaper has come a long way and there’s no need to be scared of it anymore! Before I hang wallpaper, I size the walls and often use pre-pasted SureStrip wallpaper that is activated with water! Comment WALLPAPER for easy to remove wallpaper links!...


