I am so excited to share our Navy Home Office Reveal!
I recently remodeled what was our kids’ playroom into a home office.
Now that our kids are getting older, a designated play area wasn’t really necessary, and my husband and I really needed a space to work.
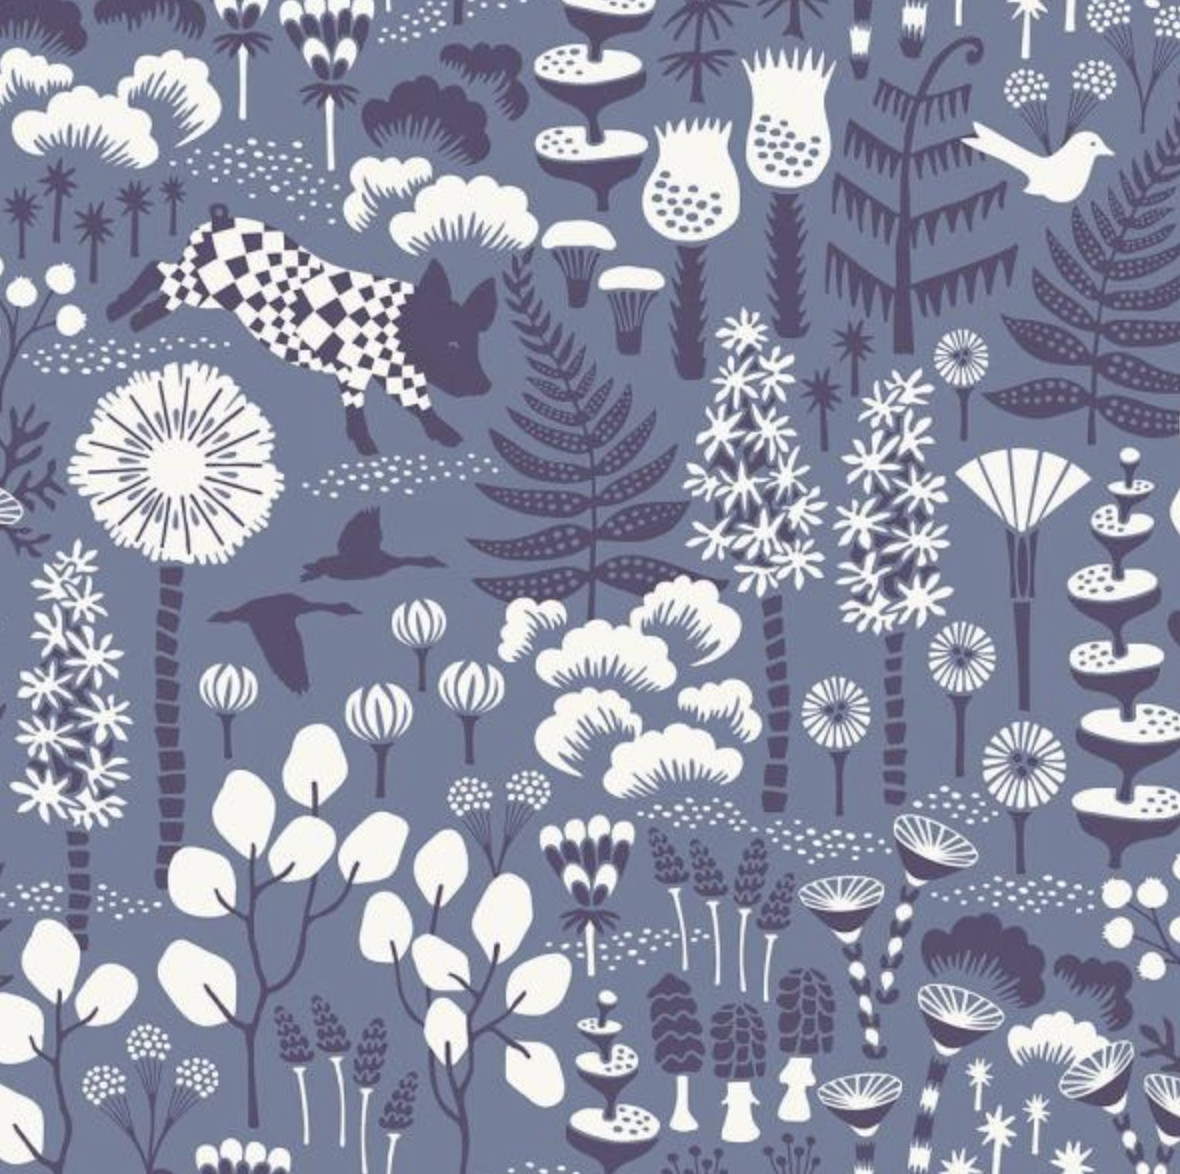
I was excited to partner with The Home Depot on decorating this room, and every beautiful item was found online. I was able to find the perfect balance of some fun decor pieces that fit my more creative spirit while bringing in the more traditional look my husband prefers. I managed to persuade my husband that work doesn’t need to be boring and hung this gorgeous Hoppet Blue Folk Wallpaper.
It instantly brought fun into the space.
We will be building a credenza on the wall behind the desk for my computer and storage, but we wanted a writing desk in the space and this Aldridge Antique Grey Desk is even more beautiful in person.
It is simple but sophisticated – exactly what we wanted!
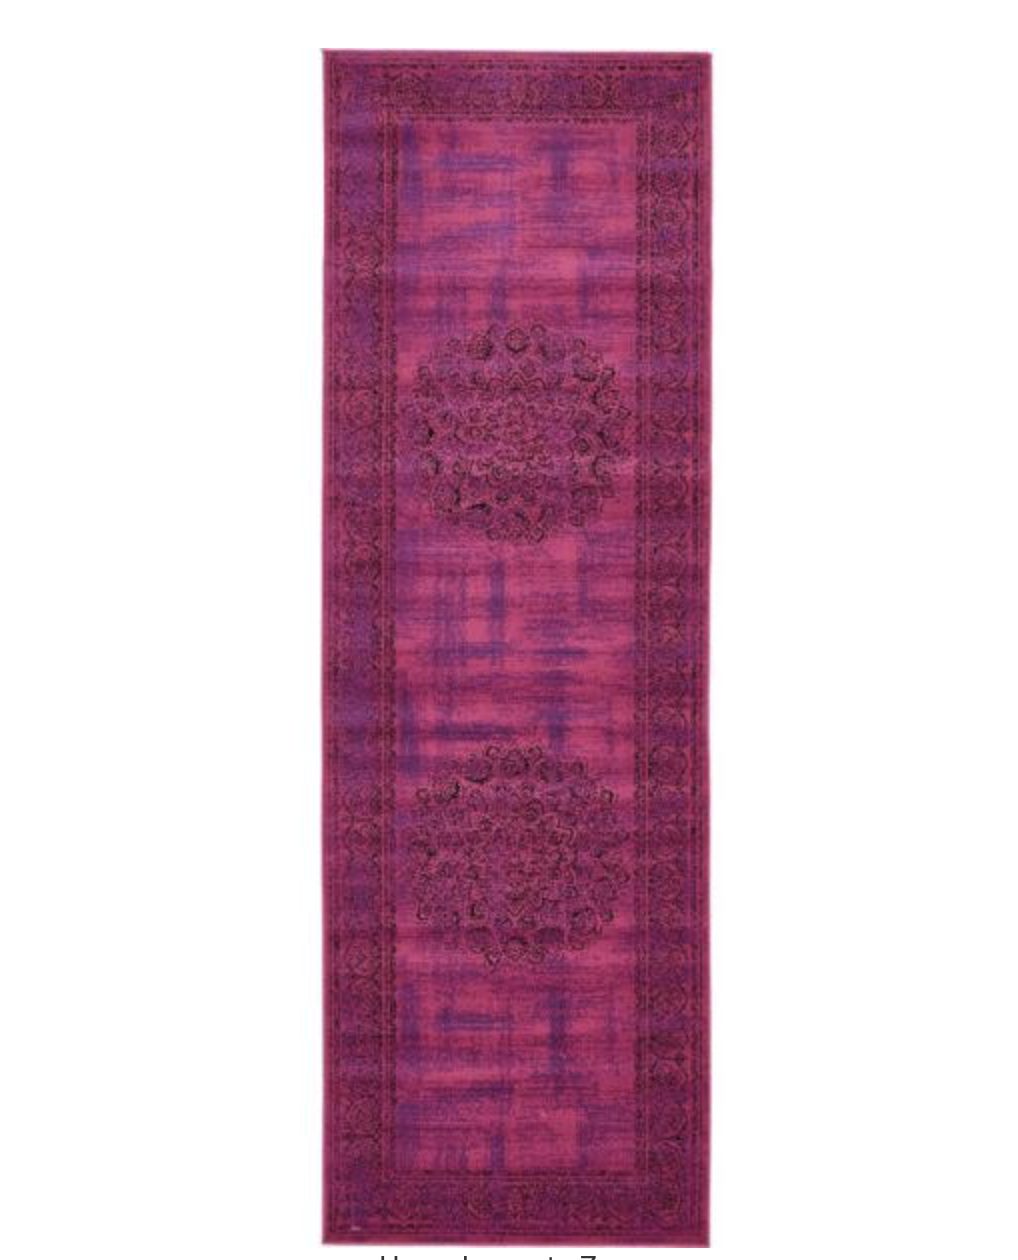
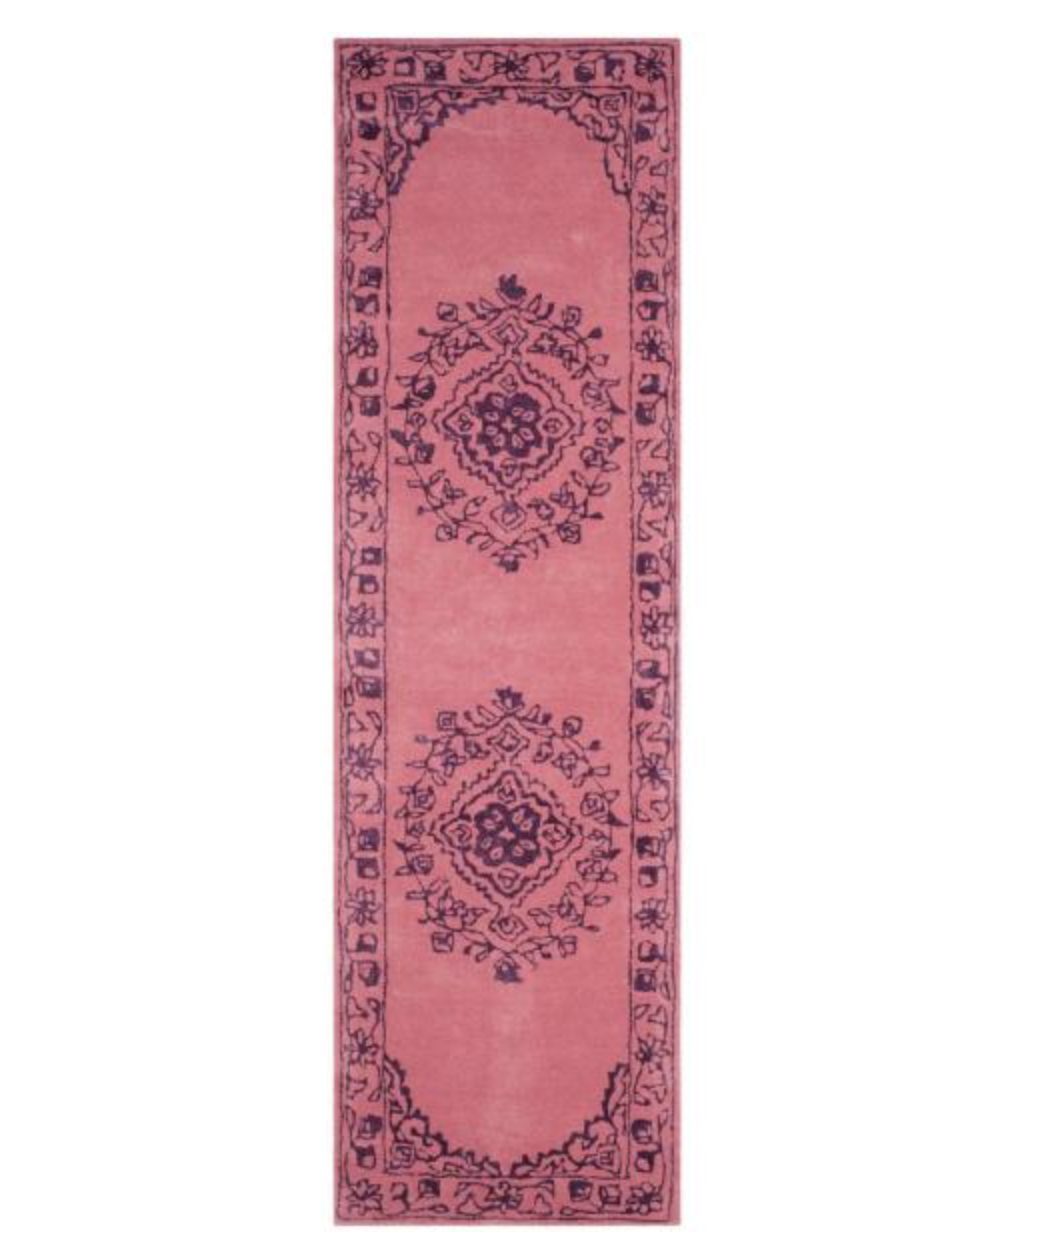
The Vintage Ellie Navy Rug softens up the flooring. It ties in the loveseat and works well with the wallpaper.
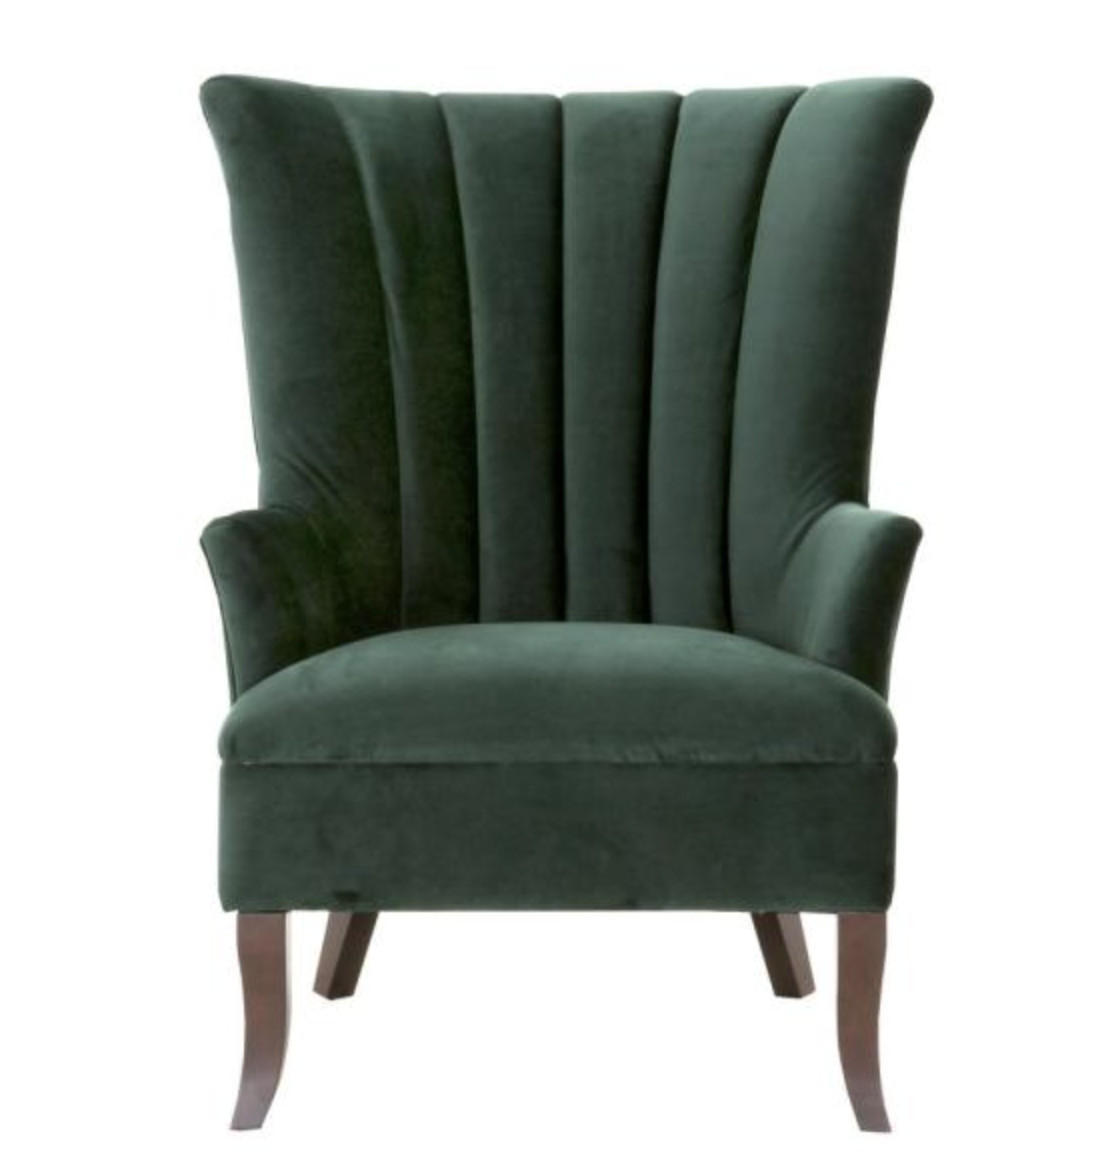
I am loving all things velvet, and this gorgeous Carlotta Emerald Velvet Club Chair is stately and so comfortable and the pop of green is perfect for the office.
Although I love them all, my favorite piece in the space is this Jack Navy Blue Tuxedo Loveseat. It is the perfect little sofa for an office, and the navy, tufted details and velvet make for the perfect piece of furniture.
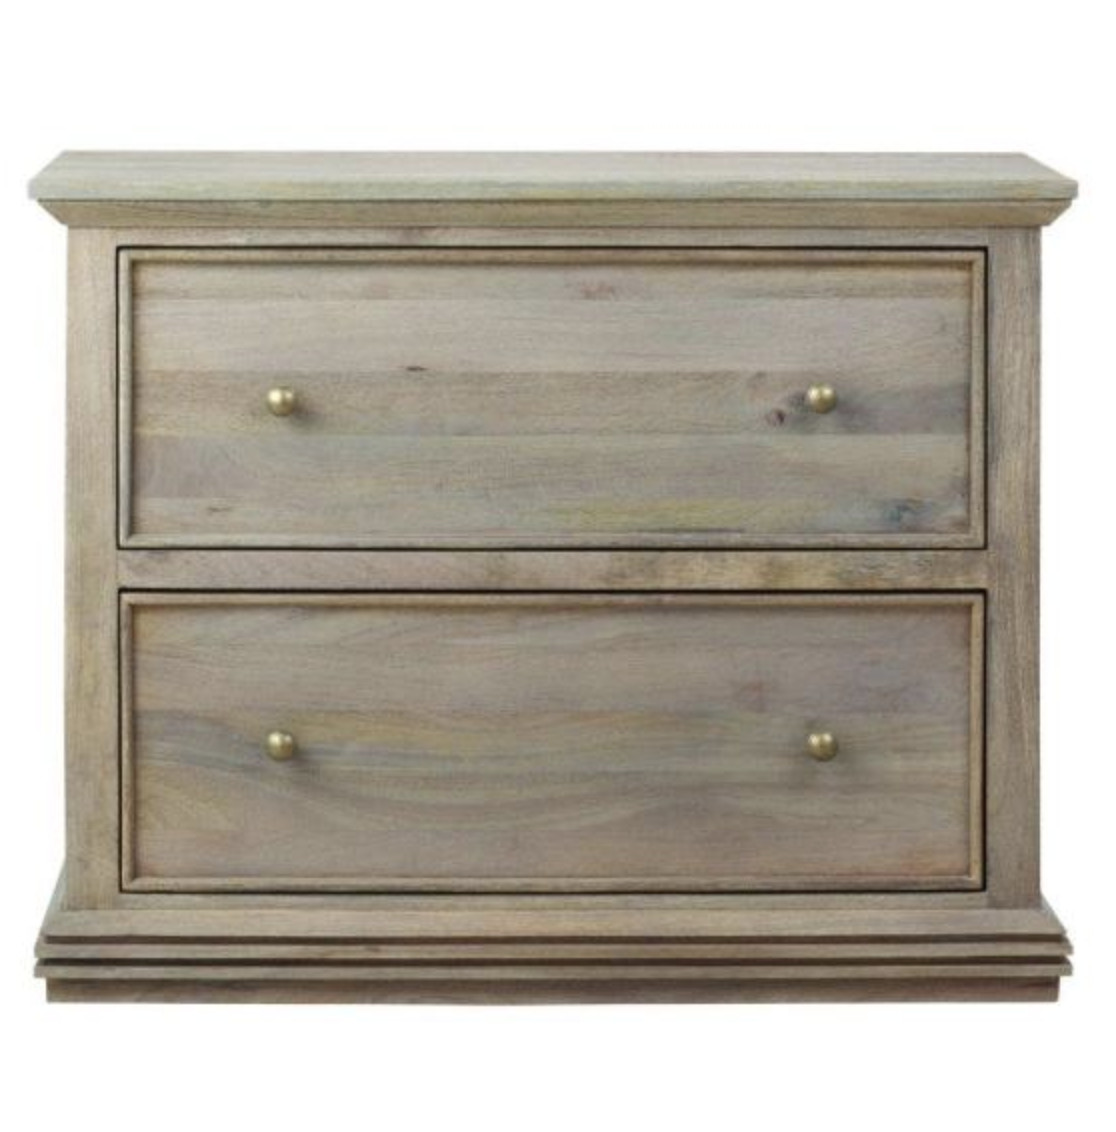
My husband always requests filing cabinets, but they are usually ugly. I was so excited when I discovered this Aldridge Antique Grey File Cabinet – beauty and form can exist!
Our new home office came together thanks to gorgeous furniture pieces from The Home Depot! I ordered everything online, and it came right to my doorstep. Now that is the way to shop!
Now it’s time to get to work…
Go create something!
Are you new to my blog? Go HERE to see my home tour and HERE to shop for items I use in our home.
This is a sponsored post written by me on behalf of The Home Depot. All opinions are 100% mine.This post contains some affiliate links for your convenience. Click here to read my full disclosure policy.
I partnered with Joss & Main to share how to find the perfect bedding.
How to Find the Perfect Bedding:
Before you even think about creating a pretty bed from the outside, it is important to build the bed up with quality pieces from the inside:
Sheets: Find a set that offers both comfort and longevity. To do this, consider both thread count and material. Thread count is often used as the barometer of a sheet’s smoothness and durability and is the number of threads woven into a square inch of fabric. In regards to fabric, there are lots of options, but the most common is cotton. The best is 100 percent Egyptian cotton followed by 100 percent pima cotton.
Duvet or Comforter: A duvet requires both a duvet (insert) and a duvet cover. The duvet can be filled with either down, wool, feathers, or a synthetic alternative. Duvets cannot be used without a duvet cover. A comforter, on the other hand, can be used without any cover. Comforters typically are thick and fluffy (making them especially great in colder weather), are covered in a durable fabric, and filled with down or synthetic fibers. I selected a duvet for our bed, so I share more details on that duvet below.
Sheets
We have a really deep mattress, and up until now have had sheets that constantly pop off. Not only is it uncomfortable, but I would spend every morning remaking our bed – until now. I discovered the most perfect sheets from Joss & Main. They feel like luxury hotel sheets, are pima cotton, 800 thread count, they have the deep pockets our mattress requires, AND they’re affordable!
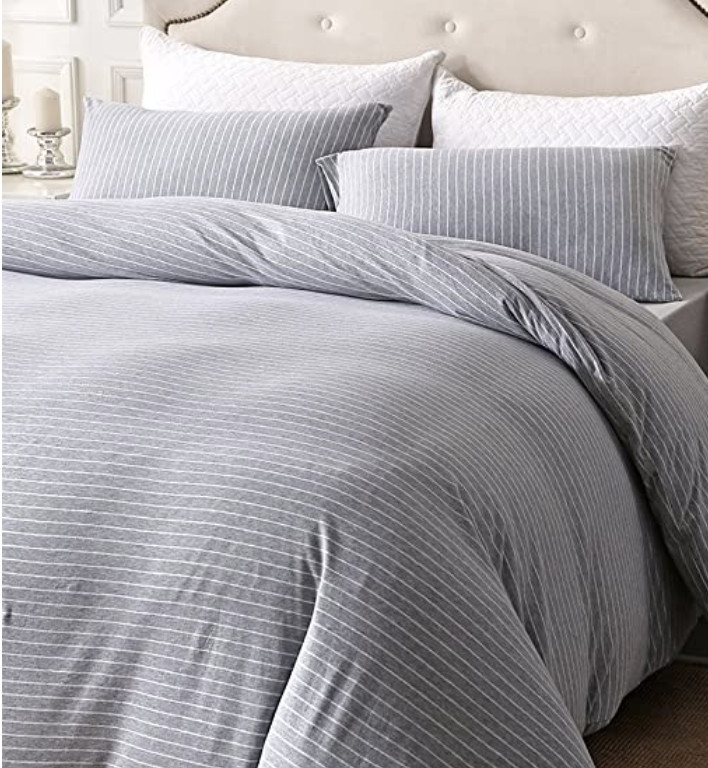
Duvet
My previous duvet cover yellowed, so I replaced it with this super soft and sophisticated Duvet Set. It has the same embroidered stitching some of the higher end stores offer but at a fraction of the price.
Duvet Insert
It is important to stay warm at night while not getting hot. This midweight down alternative comforter is perfect and cozy. Once you have the foundation bedding pieces (sheets, duvet cover, and comforter), it’s time to have fun. I prefer to stay neutral with my foundational pieces and add color with the bedding accessories:
Throw blanket
Throw pillows
Throw Blanket
I selected this casual cotton throw in navyto tie in the navy in my velvet pillows and my navy nightstands. You can casually drape the throw over the bed, or neatly fold it at the end of the bed. It is a fun way to add texture and bedding to your space.
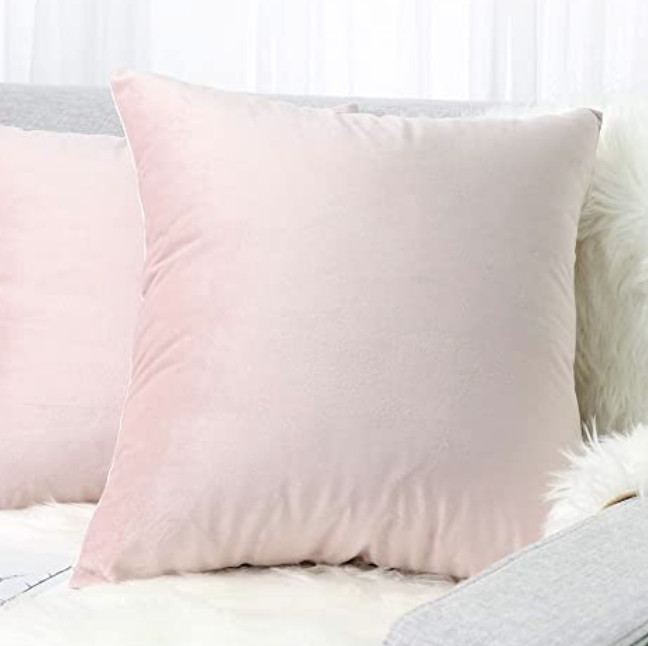
Throw Pillows
I love throw pillows and they can instantly change up a space without breaking the bank. Throw pillows can be changed out as the seasons change, and they also add color add texture to bedding like these boucle embroidered pillows.\
If you grow tired of your accent colors, changing out the pillows and throws are the best way to updated the space!
I tested out my new pillows in my living room as well, and they look just as pretty on my sofa as they do on the bed.
Don’t forgot to check out Joss & Main for their incredible home decor pieces and express yourself in this new year!
Go create something!
Are you new to my blog? Go HERE to see my home tour and HERE to shop for items I use in our home.
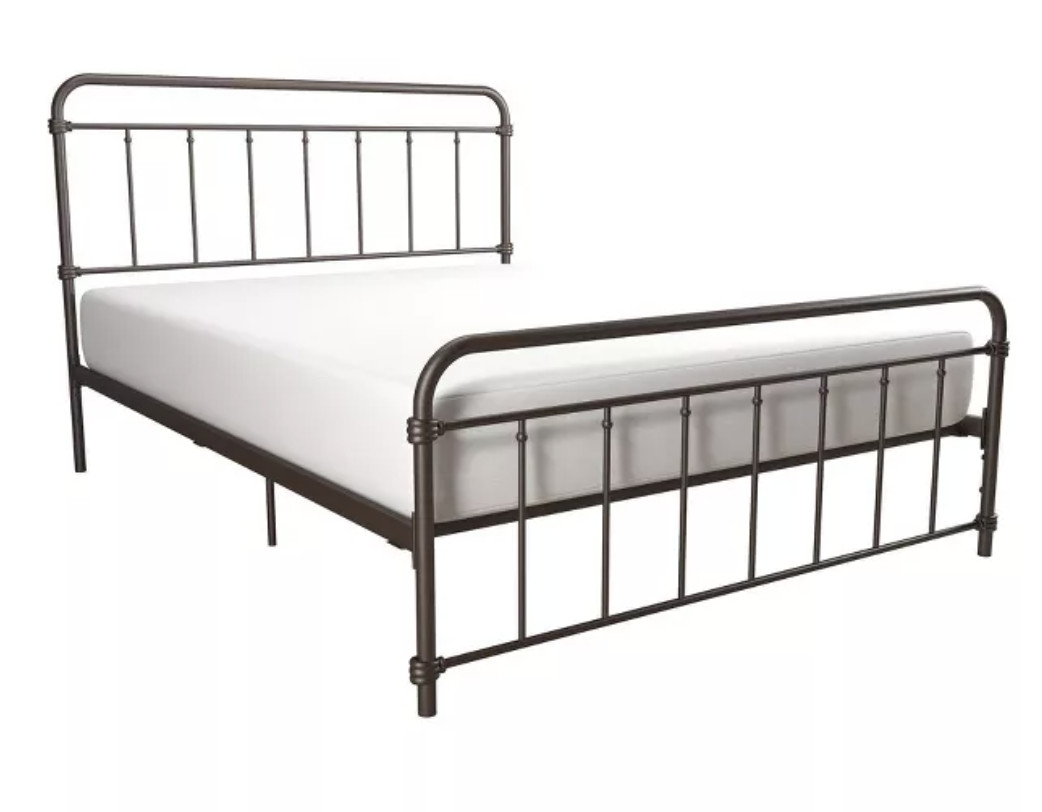
Since the first of the year, I have been hard at work making over what was our kids’ toy room. Now that they are getting older, we decided they don’t need a designated toy room. I work from home (and would love to work somewhere outside my bedroom), and my husband likes to get caught up on work in the evenings. So, we are transforming what was the kids’ space into our home office! Here is what the room looked like before:
I added cement board in preparation for the new tile. We also painted all the trim, removed the popcorn on the slanted ceiling and painted all the walls.
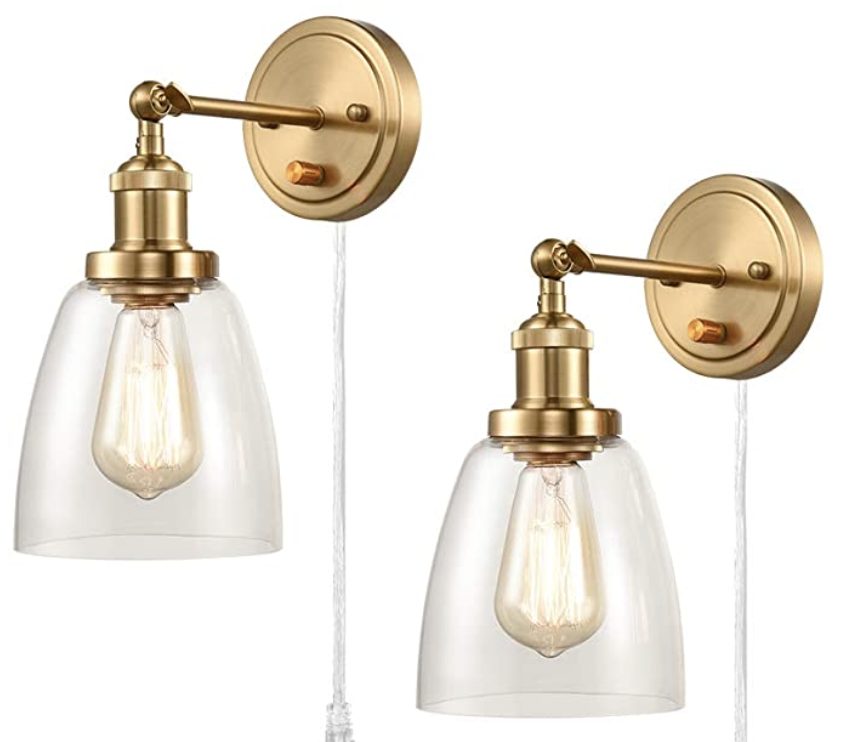
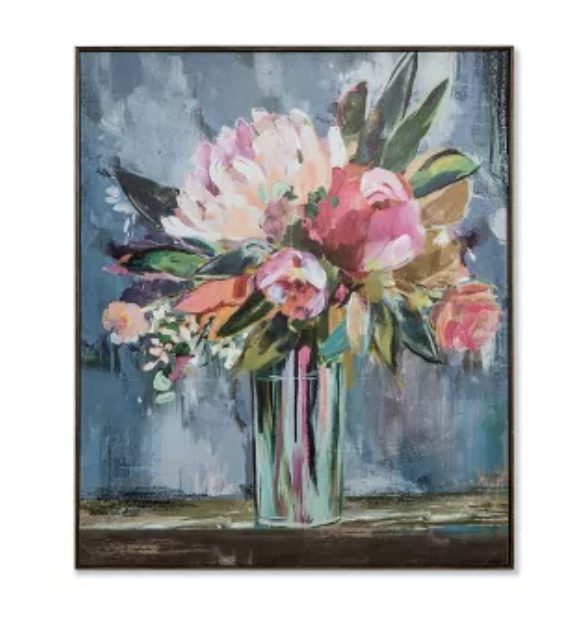
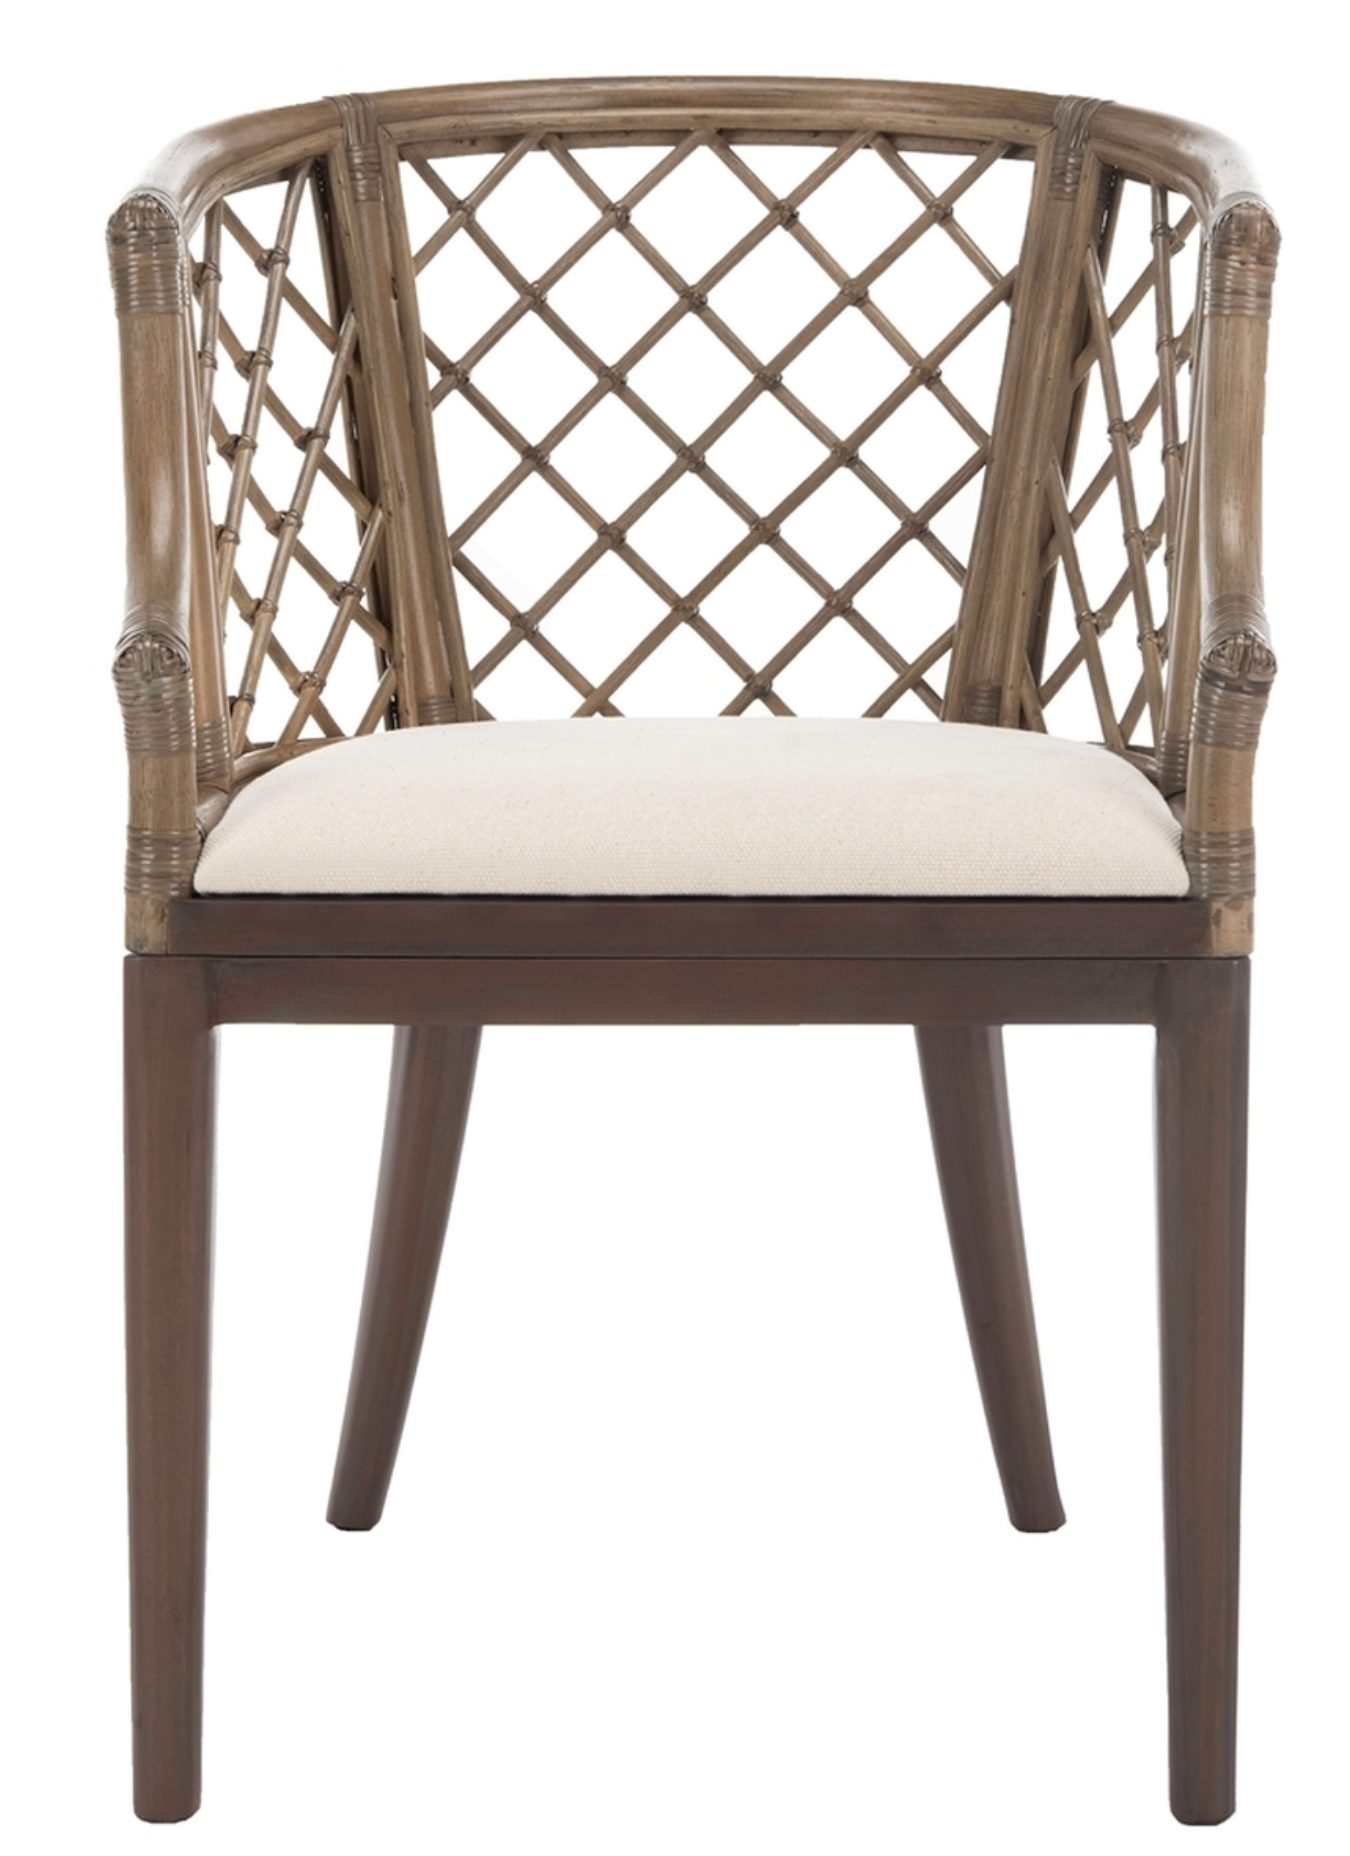
This dark green chair is so comfortable and looks elegant (and makes me feel a little important). I will be sharing the full reveal very soon! Click on the images below for the product links.
A special thanks to The Home Depot for partnering with me on this office remodel!
Go create something!
Are you new to my blog? Go HERE to see my home tour and HERE to shop for items I use in our home.
I am celebrating 5 years of blogging this month (technically 6, but I don’t count the first year since my mom was my only reader). The most common question I receive regarding my career is “can you make money blogging?” I thought it would be fun to share a little of my blogging journey and how I monetize the blog.
I will share more about how I fell into blogging but first, let’s talk money (because let’s be honest – that’s why you’re here). The majority of my income comes from ads and sponsored posts.
Make Money Blogging
Ads
When I first began blogging, I used Google AdSense. I had to decide where to put the ads (something I was clueless about). Once I reached a certain amount of page views, I was able to apply for an ad network. I joined The Blogger Network and was amazed at how much more money I could make. I no longer had to worry about ad placement – my network did everything for me. As I continued to grow, I joined another network: AdThrive (who I am still with today).
Sponsored Posts
Another way I make income is through sponsored posts. In the beginning, I had to work for product only (and wasn’t very picky on what product I promoted). However, as I grew, I found that I could be more particular about the product and brand I promote. Also, I want to protect my brand and my readers, so I am selective about who I partner with. Now, I not only work for product, but I often am paid as well to share my reviews on the blog. As my social media has grown, I have also received sponsorships for social posts – mainly Instagram.
When I do sponsored blog posts, I try to integrate valuable information in the post beyond just the product review. For example, here’s a paid post I did for a toilet company. Most likely no one is going to want a blog post on a toilet review (unless they happen to be in the market for that particular toilet), so I share a tutorial on how to remove a toilet. Hopefully someone looking to learn how to remove a toilet will happen upon my post for the tutorial and then also learn more about the toilet I’m promoting.
I also add equity to my home through the DIY projects I work on. I partnered with several brands to remodel our kitchen, and I was part of a renovation challenge and remodeled our bathroom. Both of these projects were for product only, but with some sweat equity and product, I was able to create updated spaces that add value to our home. I am asked where I find sponsored posts, and it’s amazing how many marketing companies specialize in influencer marketing. I am a member of several networks where the campaigns are listed, and you can apply (and pitch your idea). As I’ve grown, I’ve had more opportunities and marketers (and or companies) reach out to me directly.
Other Forms of Income
Besides ads and sponsored posts, I also make money through affiliate links (Amazon, Reward Style and Shop Your Likes). However, I am the worst salesperson out there, so I definitely don’t push these affiliate links for their full potential.
I wrote an eBook and made a little income off it, but it wasn’t enough for me to want to write another. However, I know several bloggers who have had a lot of success writing eBooks and/or courses. Unfortunately running a blog isn’t all cash flow in. There are a lot more expenses than you wouldn’t expect. I pay website domain fees, monthly website host fees, services to help speed up my site, website developers, an email service provider, a monthly fee for creative software, conference and travel fees, and equipment (computer, phone and camera equipment). However, I can work in the comfort of my own home, and I enjoy the flexibility of working around my family’s schedule – which is why blogging worked for me in the first place…
My Blogging Journey
Growing up, I was always creating, and I believe I was created to create. I loved making handmade gifts and was probably the only elementary-aged girl with a victorian themed room (complete with doilies)! In college, I majored in Marketing and General Studies in Art & Design. After school I worked at a greeting card company and put my husband through school. Once our first child was born, we decided it was best if I stayed home with him. I began little home decor projects while I was a stay-at-home mom of little kids. During naps and bedtime, I would paint walls and furniture. I was created to create, and I found that these little projects brought me sanity. At the time I also had a Etsy shop where I created custom invitations that I appropriately named, “Sincerely, Sara D.” However, I was encouraged by friends to share my home decor projects and eventually found I loved the home decor side more than stationery side. So, Sincerely, Sara D. the blog was born. The first year I shared several projects – most involving paint. Unfortunately I’ve since then deleted lots of those early posts, but I did save some like the chalk paint tutorial. I cringe now at my photography, but it’s a perfect example of my journey (and how far I’ve come)!
If you have any questions on blogging, don’t hesitate to reach out to me. Comment or send me an email!
And that is How to Make Money Blogging
Go create something!
Are you new to my blog? Go HERE to see my home tour and HERE to shop for items I use in our home.
I assume we are all similar in that when the new year comes around, we all make resolutions to stay on track. I crave order and organization, so I always spend the first few days of the new year putting my home back together after all the holiday madness and entertaining. Since I work from home, I often begin by home office organization. I partnered with Snapfish, and I am sharing unique, personalized ways to organize yourself (and office).
Although I use an electronic calendar, I love having a calendar on my desk that I can view quickly. I am in love with this Woodblock Desk Calendar. There are so many design options to fit every decor style and personality. It gives me a month view at a glance, and this calendar would also make a wonderful gift!
Are there any other list makers out there? I love the feeling of accomplishment and checking things off my list.
Thanks to my customized softcover journal I am going to stay organized and on task this year. I added my logo to this gorgeously designed planner and am ready to tackle the new year!
I sit at my computer desk for way too many hours, so I love this custom mousepad. It is easy to make, and you can instantly warm up your workplace with a personalized mousepad. Although I chose to keep my mousepad simple with just one photo, Snapfish offers so many customization options in their product builder:
Photos: Upload photos from your device, Facebook, Instagram, Google Photos or your Snapfish album.
Layout: Choose a single photo or multi-photo layout.
Design Variations: Snapfish offers pre-designed themed templates that make it easy to create.
Backgrounds: There is a pattern option for almost any occasion.
Text: Add a name, initials, or personalized phrases that help caption the moment.
Size: There are several different product sizes.
Embellishments: This is where the fun really begins! Snapfish offers hundreds of cute embellishments, sassy sayings and themed collections you can add to your product…
You will instantly feel like a designer, and it so fun (and easy) to play around with all the options.
I have a design background, and I have used lots of various programs over the years. This program offered by Snapfish is SO easy and well done! I am looking forward to writing thank you’s with my new customized folded notecards. I was so impressed with the quality and price that I am planning to order some note cards just for my business.
I feel ready to tackle 2019 thanks to my custom office product! Creating it was so easy, and I love that I have personalized supplies that look fantastic and function well!
Whether you are looking to get organized and wanting a unique gift for friends or family, I highly recommend creating Snapfish photo product. Happy New Year!
Go create something!
Are you new to my blog? Go HERE to see my home tour and HERE to shop for items I use in our home.
I have always loved sharing easy photo wall gallery ideas. It seems natural to incorporate photos into my decor since the people in those photos are so important to me. More recently, I have begun adding photos to my spaces on a larger scale: I added old family photo to our upstairs hallway and a photo to our hallway landing.
However, my favorite photo wall gallery is in our family room (on the other side of our kitchen wall). I originally created the wall using IKEA frames (see more here), but I was having issues with the frames warping over time. When Frame It Easy asked to partner, I was excited to update my sagging frames. If you aren’t familiar with Frame It Easy, they offer online custom picture frames that are easy, affordable and fast. I have to also mention that they offer photo printing, and I am SO impressed with the quality. The photos are gorgeous.
When you go to Frame It Easy‘s website, you select the art size, the frame style, the mat size, the cover and the backing. The frames came in one large box, and all I had to do was remove a protective cover from the acrylic front. The frames came ready to hang – it was so easy!
I went with thin gold frames to accent the gold in our kitchen, and the wall is perfect.
I was able to select a custom frame size that would work perfect for my space.
I always struggle with framing photos because I find a random piece of hair stuck in between the glass and photo, but not this time! The photos came perfectly framed without any dust, debris or random hair!
I also added a small photo gallery wall to my home office (which is also our master bedroom).
I selected a square frame for the center and two matching horizontal frames for either side.
Go create something!
Are you new to my blog? Go HERE to see my home tour and HERE to shop for items I use in our home.
This past year was filled with room transformations in our home, and I thought it would be fun to recap them with you all. There were four rooms in our home that received fairly major makeovers: my mudroom, my boys’ bedroom, my master bedroom and my daughter’s bathroom. It has been a fun year filled with lots of DIYing and decorating! Our mudroom received a makeover early in the year. I was over the shiplap (go here to see how I installed the shiplap and go here to see how I removed the shiplap). I still have shiplap in our kitchen, but I wanted more color in this space so I decided to replace it with wallpaper.
My oldest son turned 13 this year (I am still trying to navigate this mom-of-a-teenager thing), and I decided it was time to update the bedroom he shares with his younger brother. Here is the before (to see more on the barn door headboards, go here):
I painted the walls and added some wall lamps and gorgeous new furniture. To see more on this makeover, go here. The last makeover of the year (and by far my favorite), was my daughter’s bathroom. Here is the before:
And the after:
This bathroom makeover was done in under six weeks, and the entire space was a DIY. You can see more on this bathroom makeover here. I am looking forward to 2019 and sharing new DIY adventures with you all. Happy New Year!
Go create something!
Are you new to my blog? Go HERE to see my home tour and HERE to shop for items I use in our home.
We take it for granted how easy it is to get clean water. My biggest worry for water is making sure I change out my fridge water filter (which now I don’t even worry about since it shows up on my doorstep every 6 months thanks to FiltersFast.com Home Filter Club). However, there is a global water crisis, and FiltersFast.com partnered with two other organizations (Trekdesk.com and Winetowater.org) and created a charity partnership: The W3 Project.
How to Help this Holiday Season
The W3 Project’s mission is to end the global water crisis. The statistics are heartbreaking:
1 in 10 people lack access to clean water.
1 in 3 people lack access to improved sanitation.
A child dies EVERY 90 seconds from a water related illness.
The partners of the W3 Project share a passion for bringing cleaning water to people in need and fighting this epidemic. They have worked in 25 countries and have provided clean water to over 600,000 people. Wine To Water supports over 30 field staff on 4 continents and they work to empower the local community to help them meet their ongoing needs. With every project, they work on bringing the proper type of water system to the communities. Here’s where you can help. For every $1 donated, you can help provide an entire year of life saving clean water for a person in need. Want to get involved? Donate directly to Wine to Water HERE or donate at checkout when you purchase a filter at Filtersfast.com.
Go create something!
Are you new to my blog? Go HERE to see my home tour and HERE to shop for items I use in our home.
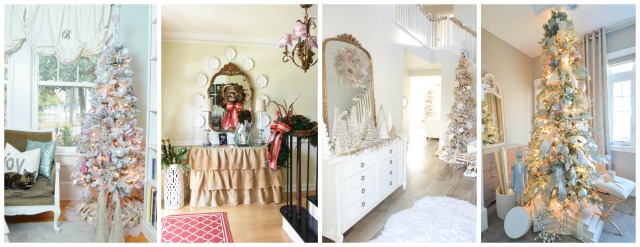
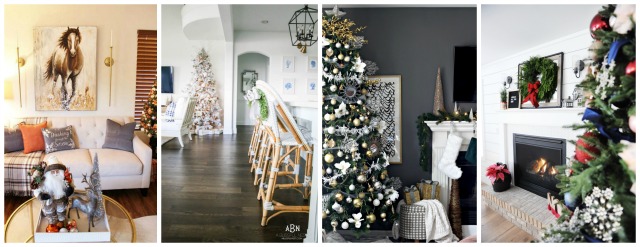
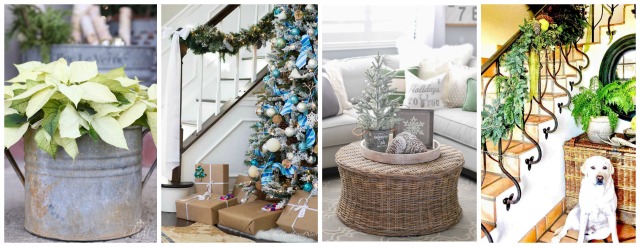
I love decorating for Christmas, and I also love keeping things manageable. Today I’m sharing some easy holiday decor ideas.
As much as I adore the look of live trees and greenery, I also don’t love the maintenance (I never remember to mist them) and one of my sons deals with allergies. So, we have artificial trees and greenery (minus the gorgeous live wreath hanging above my fireplace).
I try to find trees and greenery that looks realistic, and I save money in the long run. My holiday decor mainly consists of Christmas trees, greenery and wreaths.
I don’t love a lot of clutter, so I keep things as simple as possible.
I’m always on the hunt for faux mini Christmas trees, and I love to set them everywhere. If anyone has a good source for them, please let me know!
I still have our golden neutral Christmas tree in our family room, and I love the hanging the santa photo ornaments every year.
I still have one more tree that I was hoping to show you today. It’s going in our library, but it still hasn’t arrived. I’ll be showing you that tree in the next week or two.
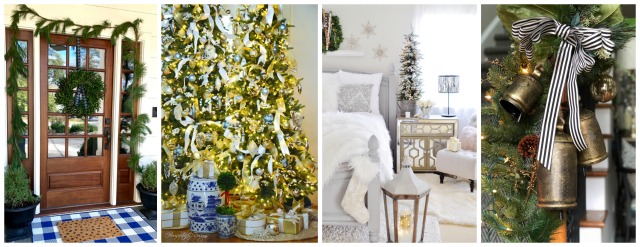
I love how just the simple greenery touches make the space instantly festive.
I used a lot of candles during the holiday season, and I love the sparkle they provide.
I haven’t had a star on top of our tree for years, but my 7-year-old begged for one, and I do love the charm it brings.
In our dining room, I added more greenery (and candles). The room is instantly ready for the holiday thanks to three wreaths and matching table greenery.
Want more design inspiration for the holidays? My friends are all sharing how they deck the halls.
A few years ago, I created a fall pumpkin patch sign, and since then I have had several requests for a Christmas version. I finally got around to creating one, and here is the free editable Christmas tree farm sign!
If you are not familiar with the pumpkin patch sign, I have a free editable printable that you can customize with your own City and State.
You can print out both my pumpkin patch and tree farm signs and frame them. Or, if you’re ambitious (and want to create something really cool), you can follow this tutorial to see how to transfer an image to wood.
I share the tutorial HERE. It is time consuming, but it makes a pretty amazing sign you can enjoy for years.
However, most of you are probably here for the free Christmas tree farm sign.
I am sharing two PDF files. The first has editable city and state fields and the second is exactly like the one in my photos.
**All Sincerely Sara D. printables are for personal, non-commercial use only. Useit, gift it, but don’t alter it, sell it or otherwise distribute the print or the file.
Go create something!
Are you new to my blog? Go HERE to see my home tour and HERE to shop for items I use in our home.
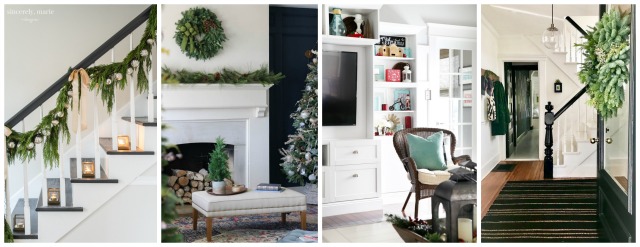
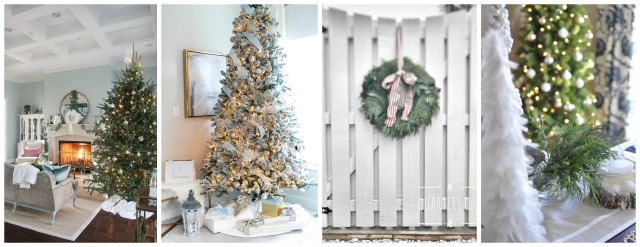
Now that Thanksgiving is over, it’s time to deck the halls! Today I’m sharing some simple Christmas decor ideas. If you’re here from Sincerely, Marie Designs, welcome!
Most of my holiday decor is in forms of greenery – trees, garland and wreaths.
I’m giving away a gorgeous wreath like mine on Instagram right now. I
t’s the Blended Bay live wreath from Lynch Creek Farm, and my house smells amazing thanks to it!
I even added a little greenery to our kitchen. I don’t love a lot of clutter, so I tend to keep the Christmas decor fairly simple.
I also mix up the greenery – some is live but a lot is fake.
I also added a Christmas tree to our kitchen, and I love having this view where you can see both trees (see more on my colorful kitchen tree here).
The tree in our family room is decorating with neutral metallics.
I kept the mantel simple with the live wreath and some natural-looking faux garland.
I love having all the greenery indoors right now – especially because the outdoors here in Indiana is pretty bland this time of year.
I’ve joined several other bloggers on this Christmas home tour sponsored by Lynch Creek Farm, and you can see how they used their live greenery to decorate for the holidays! Go see Just a Girl and her Blog for more inspiration and stop by these other beautiful holiday tours:
This is a sponsored post written by me on behalf of Kohler Co.. All opinions are 100% mine.
Today I am sharing a tutorial on how to remove a toilet, and that video tutorial can be found at the end of this post.
But first, I want to share what we replaced our nasty old toilet with: the Corbelle ContinuousClean toilet from Kohler.
Before I talk about why this toilet is so great in its functionality, I want to mention how pretty it is (and you know aesthetics are important to me in any space). I love its classic lines and even the flush lever has great design – it is timeless and won’t look dated.
Installation was a little different that what we have been used to in the past with non-skirted toilets. However, the toilet comes with detailed instructions and the ReadyLock™system eliminated the need to drill holes.
This toilet offers Kohler’s cleanest flush yet in that it automatically fights germs with every flush, keeping the bowl cleaner, longer. With three kids that know how all to well how to make a mess, I am always in for help keeping things clean!
The Corbelle toilet makes the cleaning process even easier because it comes with a factory-installed system and all you need to do is pick your favorite toilet bowl tablet.
The toilet has three settings, so you decide how much cleaning power goes into each flush.
ContinuousClean automatically fights germs. It is housed in the toilet tank and dispenses a consistent dosage of cleaner during each flush. The cleaner is safely tucked away from kids and pets so there is no need to worry. It also has an indicator light that lets you know when the cleaning solution has been dispensed with the flush, when the cleaning solution is getting low, when the cleaning solution is gone, when the batteries need replaced, and when the batteries are dead.
The new system works with any toilet bowl puck-like tablets, allowing you to choose (bleach or not) and is optimized to extend the life of the cleansing tablet for more than a year. The toilet stays clean AND does all the work – it is a win, win!
ContinuousClean offers a complete, always-on clean – keeping the bowl cleaner, longer. It fights germs, grime and stains – it is something that keeps the toilet actually cleaner (and visually) cleaner.
CleanCoat technology prevents bacteria, mildew and mineral deposits from sticking – which is especially great for people like me with well water. No more rings around the toilet!
The product also features Revolution 360; the swirl flushing technology sends 360 degrees of water through the bowl for complete coverage that leaves nothing behind. The water is powerfully propelled from Kohler’s patented AquaPiston flush canister through a single powerful jet that ensures optimal bowl coverage for a clean bowl. It keeps the toilet 5x cleaner and stays cleaner longer. Are you ready to replace your dirty old toilet with Kohler’s Corbelle ContinuousClean toilet that stays clean and does all the work for you?!
Watch this video on how to remove your old toilet:
Go create something!
Are you new to my blog? Go HERE to see my home tour and HERE to shop for items I use in our home.
#DutchBoyPartner This bathroom leaned a little cool, so I warmed it up with Sandstone Tint by @dutchboypaints and it completely changed the look of the space.
No major reno. No new cabinets. Just paint.
Save this if you’ve been wanting to try a DIY project
#DutchBoyPartner This bathroom leaned a little cool, so I warmed it up with Sandstone Tint by @dutchboypaints and it completely changed the look of the space.
No major reno. No new cabinets. Just paint.
Save this if you’ve been wanting to try a DIY project...
56
32
I created this reel two years ago, but since the fields behind our house rotate between corn and beans… it’s a corn summer again. 🌽
The older I get, the more I appreciate these ordinary little rhythms of life. Watching the field change through the seasons has quietly become one of my favorite parts of home.
I created this reel two years ago, but since the fields behind our house rotate between corn and beans… it’s a corn summer again. 🌽
The older I get, the more I appreciate these ordinary little rhythms of life. Watching the field change through the seasons has quietly become one of my favorite parts of home....
52
8
I love this chair and side table from @zgallerie that I decided to try it in my office/library. I’m not sure where I love it more - here or my bedroom! It adds so much elegance and charm to the spaces. Use my code SY5 at checkout for 5% off your entire purchase. Shop My Favorites by commenting LINKS or through the link in my bio #ZGallerie #MyZgallerie #Zgallerie #ModernLuxury #LuxuryInterior
I love this chair and side table from @zgallerie that I decided to try it in my office/library. I’m not sure where I love it more - here or my bedroom! It adds so much elegance and charm to the spaces. Use my code SY5 at checkout for 5% off your entire purchase. Shop My Favorites by commenting LINKS or through the link in my bio #ZGallerie #MyZgallerie #Zgallerie #ModernLuxury #LuxuryInterior...
38
11
We waited 13 years for this - and our house looks happier with her glow-up!
We went from a drafty single door (with a 90s glass inlay I poorly covered up) to double doors that allows in more light and feel right for our home.
My patio is all ready for warmer weather thanks to the new launch with @livabliss + @galeyalix! I’m LOVING the checkerboard outdoor rug. Comment “PATIO” and I’ll send you the links! #Livabliss #LivablissHome #GaleyALixxLivabliss #HomeDecor #Rugs
My patio is all ready for warmer weather thanks to the new launch with @livabliss + @galeyalix! I’m LOVING the checkerboard outdoor rug. Comment “PATIO” and I’ll send you the links! #Livabliss #LivablissHome #GaleyALixxLivabliss #HomeDecor #Rugs...
43
16
I’ve been slowly refreshing our bedroom and recently added this beautiful swivel chair and side table from @zgallerie! They add the perfect elegant modern touch to the space. Use my code SY5 at checkout for 5% off your entire purchase. Shop My Favorites by commenting “LINKS” or through the link in my bio. #gifted #ZGallerie #MyZgallerie #Zgallerie #ModernLuxury
I’ve been slowly refreshing our bedroom and recently added this beautiful swivel chair and side table from @zgallerie! They add the perfect elegant modern touch to the space. Use my code SY5 at checkout for 5% off your entire purchase. Shop My Favorites by commenting “LINKS” or through the link in my bio. #gifted #ZGallerie #MyZgallerie #Zgallerie #ModernLuxury...
23
16
Bathroom Reveal. 💫 Last spring, our upstairs shower leaked into our living room below. We were put on our contractor’s list - and the wait was worth it! We now have a gorgeous bathroom with checkerboard floors - a dream of mine since I first saw my husband’s granny’s farmhouse bathroom with checkerboard floors (years and years ago)! The shower glass is coming soon. Comment LINKS, and I’ll send you the blog post and bathroom product links.
Bathroom Reveal. 💫 Last spring, our upstairs shower leaked into our living room below. We were put on our contractor’s list - and the wait was worth it! We now have a gorgeous bathroom with checkerboard floors - a dream of mine since I first saw my husband’s granny’s farmhouse bathroom with checkerboard floors (years and years ago)! The shower glass is coming soon. Comment LINKS, and I’ll send you the blog post and bathroom product links....
120
26
What started as a leak turned into my dream bathroom ✨ I partnered with @wayfair and found everything - from checkerboard tile to the vanities, mirrors, and faucets. Comment “LINK” and I’ll send you all my favorite finds! *Shower glass coming soon! #ad #wayfaircreator #homereno
What started as a leak turned into my dream bathroom ✨ I partnered with @wayfair and found everything - from checkerboard tile to the vanities, mirrors, and faucets. Comment “LINK” and I’ll send you all my favorite finds! *Shower glass coming soon! #ad #wayfaircreator #homereno...
74
34
@wayfair is helping us turn a disaster into something beautiful ✨A leak from our upstairs shower led to a full remodel, and I can’t wait to show you the AFTER! Bathroom remodel reveal coming soon. Comment “LINKS” and I’ll send all my Wayfair favorites! #ad #wayfaircreator #wayfair #homereno
@wayfair is helping us turn a disaster into something beautiful ✨A leak from our upstairs shower led to a full remodel, and I can’t wait to show you the AFTER! Bathroom remodel reveal coming soon. Comment “LINKS” and I’ll send all my Wayfair favorites! #ad #wayfaircreator #wayfair #homereno...
50
15
I used to paint everything. I literally taught chalk paint classes and wrote an ebook about it.
So I don’t blame whoever painted these, but every room needs a little natural wood.
I used to paint everything. I literally taught chalk paint classes and wrote an ebook about it.
So I don’t blame whoever painted these, but every room needs a little natural wood....
159
26
*TWO THINGS that make wallpaper removal easy* Wallpaper has come a long way and there’s no need to be scared of it anymore! Before I hang wallpaper, I size the walls and often use pre-pasted SureStrip wallpaper that is activated with water! Comment WALLPAPER for easy to remove wallpaper links!
*TWO THINGS that make wallpaper removal easy* Wallpaper has come a long way and there’s no need to be scared of it anymore! Before I hang wallpaper, I size the walls and often use pre-pasted SureStrip wallpaper that is activated with water! Comment WALLPAPER for easy to remove wallpaper links!...
#DutchBoyPartner This bathroom leaned a little cool, so I warmed it up with Sandstone Tint by @dutchboypaints and it completely changed the look of the space.
No major reno. No new cabinets. Just paint.
Save this if you’ve been wanting to try a DIY project
#DutchBoyPartner This bathroom leaned a little cool, so I warmed it up with Sandstone Tint by @dutchboypaints and it completely changed the look of the space.
No major reno. No new cabinets. Just paint.
Save this if you’ve been wanting to try a DIY project...
56
32
I created this reel two years ago, but since the fields behind our house rotate between corn and beans… it’s a corn summer again. 🌽
The older I get, the more I appreciate these ordinary little rhythms of life. Watching the field change through the seasons has quietly become one of my favorite parts of home.
I created this reel two years ago, but since the fields behind our house rotate between corn and beans… it’s a corn summer again. 🌽
The older I get, the more I appreciate these ordinary little rhythms of life. Watching the field change through the seasons has quietly become one of my favorite parts of home....
52
8
I love this chair and side table from @zgallerie that I decided to try it in my office/library. I’m not sure where I love it more - here or my bedroom! It adds so much elegance and charm to the spaces. Use my code SY5 at checkout for 5% off your entire purchase. Shop My Favorites by commenting LINKS or through the link in my bio #ZGallerie #MyZgallerie #Zgallerie #ModernLuxury #LuxuryInterior
I love this chair and side table from @zgallerie that I decided to try it in my office/library. I’m not sure where I love it more - here or my bedroom! It adds so much elegance and charm to the spaces. Use my code SY5 at checkout for 5% off your entire purchase. Shop My Favorites by commenting LINKS or through the link in my bio #ZGallerie #MyZgallerie #Zgallerie #ModernLuxury #LuxuryInterior...
38
11
We waited 13 years for this - and our house looks happier with her glow-up!
We went from a drafty single door (with a 90s glass inlay I poorly covered up) to double doors that allows in more light and feel right for our home.
My patio is all ready for warmer weather thanks to the new launch with @livabliss + @galeyalix! I’m LOVING the checkerboard outdoor rug. Comment “PATIO” and I’ll send you the links! #Livabliss #LivablissHome #GaleyALixxLivabliss #HomeDecor #Rugs
My patio is all ready for warmer weather thanks to the new launch with @livabliss + @galeyalix! I’m LOVING the checkerboard outdoor rug. Comment “PATIO” and I’ll send you the links! #Livabliss #LivablissHome #GaleyALixxLivabliss #HomeDecor #Rugs...
43
16
I’ve been slowly refreshing our bedroom and recently added this beautiful swivel chair and side table from @zgallerie! They add the perfect elegant modern touch to the space. Use my code SY5 at checkout for 5% off your entire purchase. Shop My Favorites by commenting “LINKS” or through the link in my bio. #gifted #ZGallerie #MyZgallerie #Zgallerie #ModernLuxury
I’ve been slowly refreshing our bedroom and recently added this beautiful swivel chair and side table from @zgallerie! They add the perfect elegant modern touch to the space. Use my code SY5 at checkout for 5% off your entire purchase. Shop My Favorites by commenting “LINKS” or through the link in my bio. #gifted #ZGallerie #MyZgallerie #Zgallerie #ModernLuxury...
23
16
Bathroom Reveal. 💫 Last spring, our upstairs shower leaked into our living room below. We were put on our contractor’s list - and the wait was worth it! We now have a gorgeous bathroom with checkerboard floors - a dream of mine since I first saw my husband’s granny’s farmhouse bathroom with checkerboard floors (years and years ago)! The shower glass is coming soon. Comment LINKS, and I’ll send you the blog post and bathroom product links.
Bathroom Reveal. 💫 Last spring, our upstairs shower leaked into our living room below. We were put on our contractor’s list - and the wait was worth it! We now have a gorgeous bathroom with checkerboard floors - a dream of mine since I first saw my husband’s granny’s farmhouse bathroom with checkerboard floors (years and years ago)! The shower glass is coming soon. Comment LINKS, and I’ll send you the blog post and bathroom product links....
120
26
What started as a leak turned into my dream bathroom ✨ I partnered with @wayfair and found everything - from checkerboard tile to the vanities, mirrors, and faucets. Comment “LINK” and I’ll send you all my favorite finds! *Shower glass coming soon! #ad #wayfaircreator #homereno
What started as a leak turned into my dream bathroom ✨ I partnered with @wayfair and found everything - from checkerboard tile to the vanities, mirrors, and faucets. Comment “LINK” and I’ll send you all my favorite finds! *Shower glass coming soon! #ad #wayfaircreator #homereno...
74
34
@wayfair is helping us turn a disaster into something beautiful ✨A leak from our upstairs shower led to a full remodel, and I can’t wait to show you the AFTER! Bathroom remodel reveal coming soon. Comment “LINKS” and I’ll send all my Wayfair favorites! #ad #wayfaircreator #wayfair #homereno
@wayfair is helping us turn a disaster into something beautiful ✨A leak from our upstairs shower led to a full remodel, and I can’t wait to show you the AFTER! Bathroom remodel reveal coming soon. Comment “LINKS” and I’ll send all my Wayfair favorites! #ad #wayfaircreator #wayfair #homereno...
50
15
I used to paint everything. I literally taught chalk paint classes and wrote an ebook about it.
So I don’t blame whoever painted these, but every room needs a little natural wood.
I used to paint everything. I literally taught chalk paint classes and wrote an ebook about it.
So I don’t blame whoever painted these, but every room needs a little natural wood....
159
26
*TWO THINGS that make wallpaper removal easy* Wallpaper has come a long way and there’s no need to be scared of it anymore! Before I hang wallpaper, I size the walls and often use pre-pasted SureStrip wallpaper that is activated with water! Comment WALLPAPER for easy to remove wallpaper links!
*TWO THINGS that make wallpaper removal easy* Wallpaper has come a long way and there’s no need to be scared of it anymore! Before I hang wallpaper, I size the walls and often use pre-pasted SureStrip wallpaper that is activated with water! Comment WALLPAPER for easy to remove wallpaper links!...


 I partnered with


