Today I am partnering with Balsam Hill on their Let’s Give Thanks campaign and sharing Holiday Tablescape decor ideas to help you plan for Thanksgiving.

For as long as I can remember, my mom has always set a beautiful table for special events – including Thanksgiving. Now that I am older and aware of the time and effort she put (and continues to put) into creating a pretty and memorable experience, I want to do the same for my family! I am so grateful that she believed we were worth the effort, and I want to continue the tradition of a beautifully set table with my children. Today I’m sharing our holiday tablescape and tips for creating a beautiful table.

There are oversized hanging chalkboard nameplates on the back of the chairs – one for each member of the family.

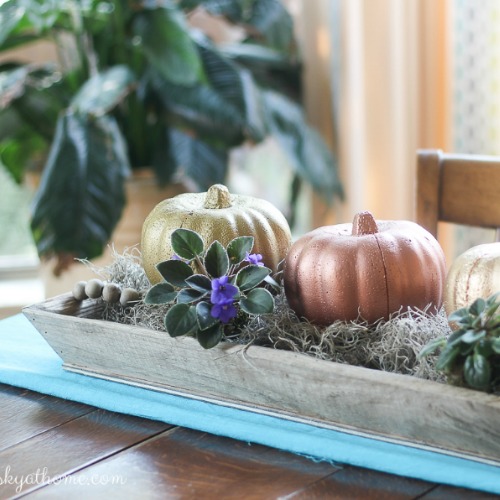
Three festive 26″ Orchard Harvest wreaths were added to the walls in our dining room.

The wreaths firs are filled with rich berries, gilt leaves, and copper fruits. They are so festive and beautifully and effortlessly transfer from Thanksgiving into Christmas.

The rich colors in the wreath continue to the table.

The Charlestown Decorated Foliage Garland is on the table, and it coordinates beautifully with the Orchard Harvest wreaths.

Its lifelike pine needles adorned with leaves, fruits, pinecones, rustic bronze bells, and pale gold shimmer are stunning – especially by candlelight.

Several sets of Balsam Hill’s Miracle Flame Taper Candles add drama to the table.

These candles give the natural beauty of candlelight with the touch of a button.

The candles are set to run for 10 hours everyday and add elegance to the space (with no effort on my part).

When setting a table, layers helps add elegance and makes the tablescape more special. In this thanksgiving tablescape, gold chargers are the first layer under the dinner plate and finished with pretty bowls with a the pear as the finishing touch. The napkins are knotted with a small piece of fir tucked in the fold.

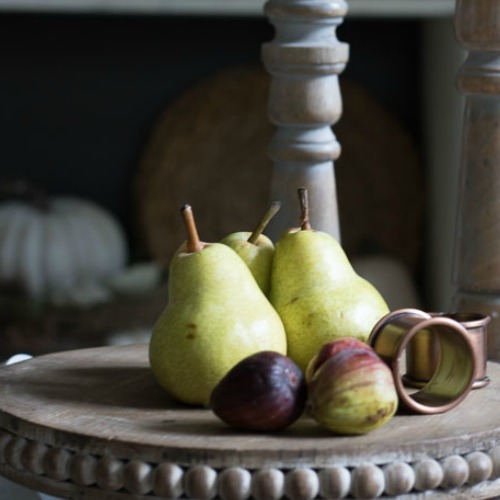
I added some smaller pears to the buffet behind the dining room table.

Although I was not gifted with the ability to craft delicious meals, I do love to create a pretty dining experience through the decor.

By creating a pretty dining experience, I’m expressing my gratitude to my family.

And maybe distracting them from the not-so-amazing meal?

My hope is that my guests will be excited to dine in the festive space…
I love adding fresh fruit to the tablescape.

Fresh fruit is such an inexpensive way to liven up the tablescape – while gifting your guests with a sweet treat.


Also, please visit the other bloggers’ sites to see their Thanksgiving tablescapes (and enter their own personal giveaways):

- Courtney of French Country Cottage
- Bonnie of Thirsty for Tea
- Kelly of Live Laugh Rowe
- Lory of DesignThusiasm
- Mary Beth of Cupcakes and Crinoline
Happy Thanksgiving! I am so thankful for you and your support! Go create something!

Are you new to my blog? Go HERE to see my home tour and HERE to shop for items I use in our home.
Find me on Facebook | Instagram | Twitter | Pinterest *This post is a sponsored post by Balsam Hill. I take pride in reviewing only products that fit my brand and will be beneficial to my readers. And while this post is sponsored, all the opinions are my own.
 I partnered with The Home Depot on the appliances (microwave, stove, fridge and dishwasher), and they all arrived early one day last week.
Delivery was quick and easy.
I partnered with The Home Depot on the appliances (microwave, stove, fridge and dishwasher), and they all arrived early one day last week.
Delivery was quick and easy.
 Although I am excited for all the appliances, the refrigerator is by far my favorite! I will be sharing more details on the fridge soon, and it is pretty amazing.
 We worked on several kitchen projects last week – one of which was the pot filler. We began working on placement for it, and Steve drilled the hole through our tile. He used a special tile bit (and kept it wet), and we did not crack the tile. Success!
 A lot of electrical work was done this week in preparation for the appliances. We are so grateful for a friend who helped us out.
 We had to get the farmhouse sink in before the countertops can be measured and ordered. We had no idea how much work is involved in installing a farmhouse sink, and I will be sharing a post about that soon. However, we now have a farmhouse kitchen sink ready to go!
Steve carefully cut out the front of the cabinets for the sink…
We had to get the farmhouse sink in before the countertops can be measured and ordered. We had no idea how much work is involved in installing a farmhouse sink, and I will be sharing a post about that soon. However, we now have a farmhouse kitchen sink ready to go!
Steve carefully cut out the front of the cabinets for the sink…
 …while I spent the next several hours sanding so it would fit perfectly. There was no room for error on this one, and we somehow managed not to mess it up.
 A special thanks to


 I wanted to document our final cabinet build, but Steve was more focused on organizing the screws than documenting this sweet moment…
 We also began refinishing our wood floors this week. If you’re local, we are using Full Circle out of Indianapolis.
 I am so excited to say goodbye to our orange hardwood floors…
 Besides being orange, they were pretty cupped, so it took several days of sanding.
 Every room in our home (not having floors refinished) is filled with stuff. Lots and lots of stuff.
 Yesterday we began hanging the cabinets from Custom Service Hardware. Since we are going all the way to the ceiling with the cabinets, Steve checked how level our ceiling line is.
 We found the lowest point in our ceiling line and drew a line for the top row of cabinets. We began at the corner and went out.
 My dad came and helped us with the cabinet hanging.
 It’s coming together and looking like a kitchen once again!
 Go create something!


 This entire remodel is happening thanks to The Home Depot. A few months ago I participated in a project competition called Orange Tank at Haven Conference and was thrilled to win (
 The main problem with our kitchen is the terrible layout. It’s horrible for hosting, and someone is always bumping into each other.
 Here’s one last shot of the kitchen before the kitchen demo…
 But quickly, let’s look at the evolution of this kitchen in the past four years. Before the cabinets were gray and cream, they were green and cream.
 I repainted them because I hated the wax sealer (you can
  The kitchen has come a LONG way, but paint can only do so much. The appliances are old and the space was not working.
I prepped for demo Friday and am in shock at how much stuff I had stuffed into those cabinets.
The kitchen has come a LONG way, but paint can only do so much. The appliances are old and the space was not working.
I prepped for demo Friday and am in shock at how much stuff I had stuffed into those cabinets.
 Those boxes are now living with us in our bedroom.
The night before the demo, Steve and I were up late trying to have everything ready for the demo. We removed some cabinet doors, the dishwasher, garbage disposal, sink, and faucet.
Those boxes are now living with us in our bedroom.
The night before the demo, Steve and I were up late trying to have everything ready for the demo. We removed some cabinet doors, the dishwasher, garbage disposal, sink, and faucet.
 This amazing group of men came to our rescue Saturday morning to help us demolish the kitchen.
 It was amazing how fast they were able to remove everything.
We attempted to save the granite but unfortunately broke most of it during removal.
It was amazing how fast they were able to remove everything.
We attempted to save the granite but unfortunately broke most of it during removal.


 We found a horrible surprise under the corner lazy Susan cabinet – a mouse nest. I almost died. Seriously. This is what nightmares are made of…
 I’m sorry. It will probably be hard to get that image out of your head…
We had a friend who’s knowledgeable with home remodeling help us out with the electrical work and other prep for the drywall – which begins tomorrow!
I also played around with pendant lighting placement – what do you think?!
I’m sorry. It will probably be hard to get that image out of your head…
We had a friend who’s knowledgeable with home remodeling help us out with the electrical work and other prep for the drywall – which begins tomorrow!
I also played around with pendant lighting placement – what do you think?!
 A special thanks to


 I don’t know where I’ve been, but I just discovered that you can put chalk-type paint in a paint sprayer!
I have been a fan of chalk-type paint for years and have used Amy Howard’s version (
I don’t know where I’ve been, but I just discovered that you can put chalk-type paint in a paint sprayer!
I have been a fan of chalk-type paint for years and have used Amy Howard’s version ( I was used the Amy Howard paint sprayer on this project, but unfortuntely they no longer sell a sprayer. However, I have two other favorites I have used, and you can see those
  This post contains some affiliate links for your convenience.
  All the doors and drawers were painted in my garage.
 Early in the design stage, I wanted colorful cabinets and ordered Amy Howard’s
  I decided to mix some colors to create a soft similar color.
I played around with a little paint to get the perfect color. Once I felt confident in my ratios, I used an empty gallon can and mixed a batch large enough for both sets of cabinets in my laundry room.
I used:
I decided to mix some colors to create a soft similar color.
I played around with a little paint to get the perfect color. Once I felt confident in my ratios, I used an empty gallon can and mixed a batch large enough for both sets of cabinets in my laundry room.
I used:
 I used a brush and foam rollers to paint the cabinet frames and sealed the paint with a
  And after an afternoon of painting, my cabinets were a gorgeous new custom color!
 I used
  This room was definitely a labor of love, and I really am so excited to share the full reveal
  I have a few finishing touches left (like caulking around the tile and finding accessories for the space), but the hard work has been done.
 UPDATE: It has been several years since I painted these cabinets, and they still look great! Spraying helped provide a smooth finish, and I ALWAYS recommend a water-based sealer rather than a wax for cabinets. You can


